
Chrome winter nails are the easiest way to make your hands look like they belong in a snowstorm. A mirror finish catches the light the way frozen lakes do, and when you add a hint of blue, pearl, or silver, the whole manicure reads as ice without a single snowflake painted on it. This guide collects 20 chrome winter nail designs, each with a nail shape, a skill level, an honest wear time, and one mistake I have made so you do not have to. Some take twenty minutes with one chrome powder, and others are best left to a nail tech with a steady hand and a good lamp.
Quick Answer: For a first chrome winter set, start with the Classic Mirror Chrome on Almond (#1) or the Glazed Donut Chrome (#8). For the iciest look, ask for the Icy Silver Chrome (#2) or the Frozen Blue Chrome (#3). For a salon-level statement, book the Aurora Chrome (#6) or the Holographic Winter Chrome (#15). Salon sets run $55-95, and DIY chrome supplies cost about $20-40.
Why Chrome Winter Nails Are Worth Your Time
Chrome nails suit winter better than any other season, because the cold light of December makes a mirror finish look natural instead of flashy. In summer, chrome can read as loud. In winter, against wool coats, grey skies, and fairy lights, it reads as frost.
There are practical wins too. Chrome powder hides small application mistakes better than flat polish, because the mirror surface distracts the eye from a slightly uneven edge. It also wears hard: a sealed chrome gel set lasts 2-3 weeks without chipping at the tips, as long as the top coat is a no-wipe formula and the free edge is capped.
Here is the lesser-known part: chrome is one of the few finishes that looks good on every nail length. Short square nails get a clean, icy flash, while long almond and coffin nails get a full mirror that looks expensive. You do not need length to pull this trend off, which makes it one of the most democratic winter looks around.
This guide suits anyone looking for winter nail ideas, an icy manicure for a holiday party, or a salon reference photo for a reflective finish. It also covers press-on and DIY chrome options if you would rather skip the salon entirely.
At a Glance
- All 20 designs use a chrome, pearl, or holographic finish, so every look in this list is reflective.
- Wear times run 2-3 weeks for a sealed gel chrome set, with a fill recommended after 2 weeks.
- Salon prices run $55-95 for a full chrome set, while DIY chrome powder and supplies cost about $20-40.
- Finishes include mirror, pearl, aurora, holographic, cat-eye, and matte chrome, so you can match your outfit and mood.
- Every design lists a nail shape, a skill level, a wear time, and an occasion, so you can pick in minutes.
| # | Design | Nail Shape | Skill Level | Wear Time | Occasion |
|---|---|---|---|---|---|
| 1 | Classic Mirror Chrome on Almond | Almond | Intermediate | 2-3 weeks | Holiday party |
| 2 | Icy Silver Chrome | Long almond | Salon | 2-3 weeks | New Year |
| 3 | Frozen Blue Chrome | Oval | Intermediate | 2-3 weeks | Winter weekend |
| 4 | Pearl Chrome | Short oval | Beginner | 2-3 weeks | Everyday |
| 5 | Chrome French Tips | Almond | Intermediate | 2-3 weeks | Office party |
| 6 | Aurora Chrome | Coffin | Salon | 2-3 weeks | Evening |
| 7 | Rose Gold Chrome | Short square | Intermediate | 2-3 weeks | Date night |
| 8 | Glazed Donut Chrome | Short round | Beginner | 2-3 weeks | Everyday |
| 9 | Chrome Snowflake Accent | Almond | Advanced | 2-3 weeks | Christmas Day |
| 10 | Gunmetal Chrome | Long square | Salon | 2-3 weeks | Formal party |
| 11 | Chrome Ombre Fade | Long coffin | Intermediate | 2-3 weeks | Holiday party |
| 12 | Frosted Chrome with Glitter | Coffin | Intermediate | 2-3 weeks | New Year |
| 13 | Chrome on Short Square Nails | Short square | Beginner | 2-3 weeks | Office |
| 14 | Champagne Chrome | Oval | Intermediate | 2-3 weeks | Dinner |
| 15 | Holographic Winter Chrome | Almond | Salon | 2-3 weeks | Party |
| 16 | Chrome Cat-Eye | Almond | Salon | 2-3 weeks | Evening |
| 17 | Chrome with Rhinestone Cuticles | Long almond | Advanced | 2-3 weeks | Holiday party |
| 18 | Lavender Chrome | Squoval | Intermediate | 2-3 weeks | Weekend |
| 19 | Black Chrome | Long coffin | Salon | 2-3 weeks | Formal night |
| 20 | Winter Wonderland Chrome Mix | Long almond | Advanced | 2-3 weeks | Christmas Eve |
1. Classic Mirror Chrome on Almond

Classic mirror chrome on almond nails is the purest version of this trend, and it is the best place to start if you have never tried chrome before. The almond shape gives the mirror surface room to reflect, and the result looks like polished ice on every finger.
Your tech will apply a black gel base, cure it, then add a no-wipe top coat and rub silver chrome powder over it with a sponge applicator until the surface turns into a mirror. A second no-wipe top coat seals it. Almond nails with a 4-5 mm free edge show the reflection best. I once skipped the black base and used a clear one instead, and the chrome looked thin and grey instead of mirror bright, so do not skip the dark base.
Pro Tip: Cap the free edge with top coat twice. Chrome lifts first at the tip, and a double-sealed edge keeps the mirror intact for the full three weeks.
See chrome nail ideas or how chrome powder works.
This one costs about $55-75 in a salon and takes about an hour.
2. Icy Silver Chrome

Icy silver chrome is the coldest look in this list, and it is the one that most literally looks like ice. The silver is brighter and cooler than standard chrome, with a blue-white cast that reads as frozen water in daylight.
This is a salon finish, because the icy tone depends on a very specific silver powder and a perfectly smooth base. Any ridge in the gel shows through the mirror, so your tech will buff the base until it is glass smooth before the powder goes on. Long almond nails of 6-8 mm give the reflection the most drama. I tried a cheap silver powder at home once and it came out dull grey, so the powder quality matters more here than in any other design.
Pro Tip: Ask for a blue-white silver powder rather than a warm silver. Warm silver reads as steel, while blue-white silver reads as ice.
See winter nail ideas or silver manicure inspiration.
Salon price runs about $65-90, and the set takes 60-75 minutes.
3. Frozen Blue Chrome

Frozen blue chrome takes the mirror finish and tints it the colour of a glacier, which makes it the most obviously winter design in this list. The blue shifts between pale ice and deep sapphire as your hand moves, so the nails never look the same twice.
Apply a deep navy or black gel base, cure it, then rub blue chrome powder over a no-wipe top coat. The darker the base, the deeper the blue reads, so a black base gives the most dramatic frozen effect. Oval nails of medium length suit the colour well, because the rounded shape softens the bold blue. A mistake I made early on was using a light blue base, which made the chrome look washed out and chalky.
Pro Tip: Pair frozen blue chrome with silver rings, not gold. Gold fights the cool tone, while silver makes the blue look even icier.
See blue nail ideas or how to wear bold winter colours.
It costs about $60-85 in a salon.
4. Pearl Chrome

Pearl chrome is the softest chrome in this list, and it is the one to choose if a full mirror feels too bold. The finish has the glow of a pearl rather than the flash of a mirror, so it looks polished at the office and pretty at a party.
This is the most beginner-friendly chrome design, because pearl powder is forgiving. Rub it over a white or pale pink base instead of black, and the result is a milky shimmer rather than a hard mirror. Short oval nails of 3-4 mm are ideal, since the soft finish suits a shorter length. I recommend a white base, because a nude base can make pearl chrome look yellow in warm light.
Pro Tip: Use a white base under pearl chrome powder. A nude base warms the pearl and dulls the icy glow.
Browse pearl nail ideas or soft winter manicure inspiration.
Budget about $50-70 in a salon, or $20-25 for DIY powder and supplies.
5. Chrome French Tips

Chrome French tips give you the mirror trend in a shape that works anywhere, including the office. The nude base keeps it subtle, and the chrome tip adds the ice.
Paint a sheer nude or milky pink gel base, then draw a thin chrome smile line at the tip using chrome powder over a no-wipe top coat, or use a chrome gel polish with a fine brush. Almond nails with a 4-5 mm free edge give the cleanest line. Wipe the brush with alcohol between strokes so the chrome does not smear onto the nude base. I once applied the chrome before the base fully cured, and the silver bled into the pink, so cure each layer fully.
Pro Tip: Keep the chrome tip thin, about 2 mm. A thick tip looks heavy and loses the delicate French effect.
See French tip nail ideas or how to draw clean tips.
It costs about $55-75 in a salon.
6. Aurora Chrome

Aurora chrome shifts colour as your hand moves, like the northern lights over snow, and it is the most magical finish in this list. Pink, blue, and green ripple across the nail depending on the light, so the manicure looks different in every photo.
This is a salon finish, because aurora powder needs a very dark base and a flawless top coat to shift properly. Apply a black gel base, cure, add no-wipe top coat, and rub the aurora powder on in a thin, even layer. Coffin nails of medium length show the colour shift best, since the flat surface catches the light evenly. I tried aurora powder over a white base once and the shift disappeared entirely, so the black base is not optional here.
Pro Tip: Ask your tech to rub the powder on in one direction only. Rubbing back and forth creates streaks that break the smooth colour shift.
See aurora nail ideas or holographic manicure inspiration.
Salon price runs about $70-95.
7. Rose Gold Chrome

Rose gold chrome warms up the ice trend, and it is the best chrome for anyone who finds silver too cold against their skin. The pink-gold mirror flatters warm undertones and looks beautiful with gold jewellery.
Apply a black or deep brown gel base, cure, then rub rose gold chrome powder over a no-wipe top coat and seal. Short square nails of 3-4 mm suit this finish well, because the warm mirror looks neat and modern on a shorter length. I skipped the dark base once and the rose gold looked pale pink and flat, so the dark base matters just as much here as it does for silver.
Pro Tip: Use a deep brown base instead of black if you want a softer rose gold. Black gives a sharper mirror, while brown gives a warmer, softer glow.
Browse rose gold nail ideas or warm metallic manicure inspiration.
It costs about $55-80 in a salon.
8. Glazed Donut Chrome

Glazed donut chrome is the milky, pearly finish that made chrome famous, and it is still the easiest chrome to wear every day. The look is soft and sheer, like a thin layer of frost over a nude nail, and it suits every outfit in your winter wardrobe.
Paint a sheer white or milky nude base, cure, then rub a fine pearl chrome powder over a no-wipe top coat and seal with a glossy top coat. Short round nails of 2-3 mm are ideal, because the soft finish looks clean and simple on a short length. This is the most forgiving chrome of all: the sheer base hides uneven powder, and the milky tone hides small chips. A mistake I made was using too much powder, which turned the glaze opaque and lost the sheer effect, so use a light hand.
Pro Tip: Rub the powder on very lightly and buff it in with a silicone tool, not a sponge. Too much powder kills the sheer glazed effect.
See glazed donut nail ideas or milky manicure inspiration.
Budget about $50-70 in a salon, or $20 for DIY powder.
9. Chrome Snowflake Accent

A chrome snowflake on one accent nail is the most festive design in this list, and it is the one that most clearly says Christmas without covering all ten nails in art. The icy blue base keeps it wintery, and the chrome snowflake catches the light like real frost.
Paint an icy blue or pale silver-blue gel base on all nails, then add a chrome snowflake on the ring finger using a snowflake stamp, a sticker, or a fine brush with chrome gel paint. Almond nails give the snowflake room to branch. Keep the snowflake about 5 mm wide so it reads clearly. I drew mine before the base fully cured once, and the chrome bled into the blue, so cure each layer fully before adding the detail.
This is advanced work, so allow 60-90 minutes. Gel lasts 2-3 weeks.
Pro Tip: Use a snowflake stamp rather than freehand if you are doing this at home. A stamp gives clean, even arms every time, while freehand snowflakes often come out lopsided.
See snowflake nail ideas or winter accent nail inspiration.
Salon price runs about $60-85.
10. Gunmetal Chrome
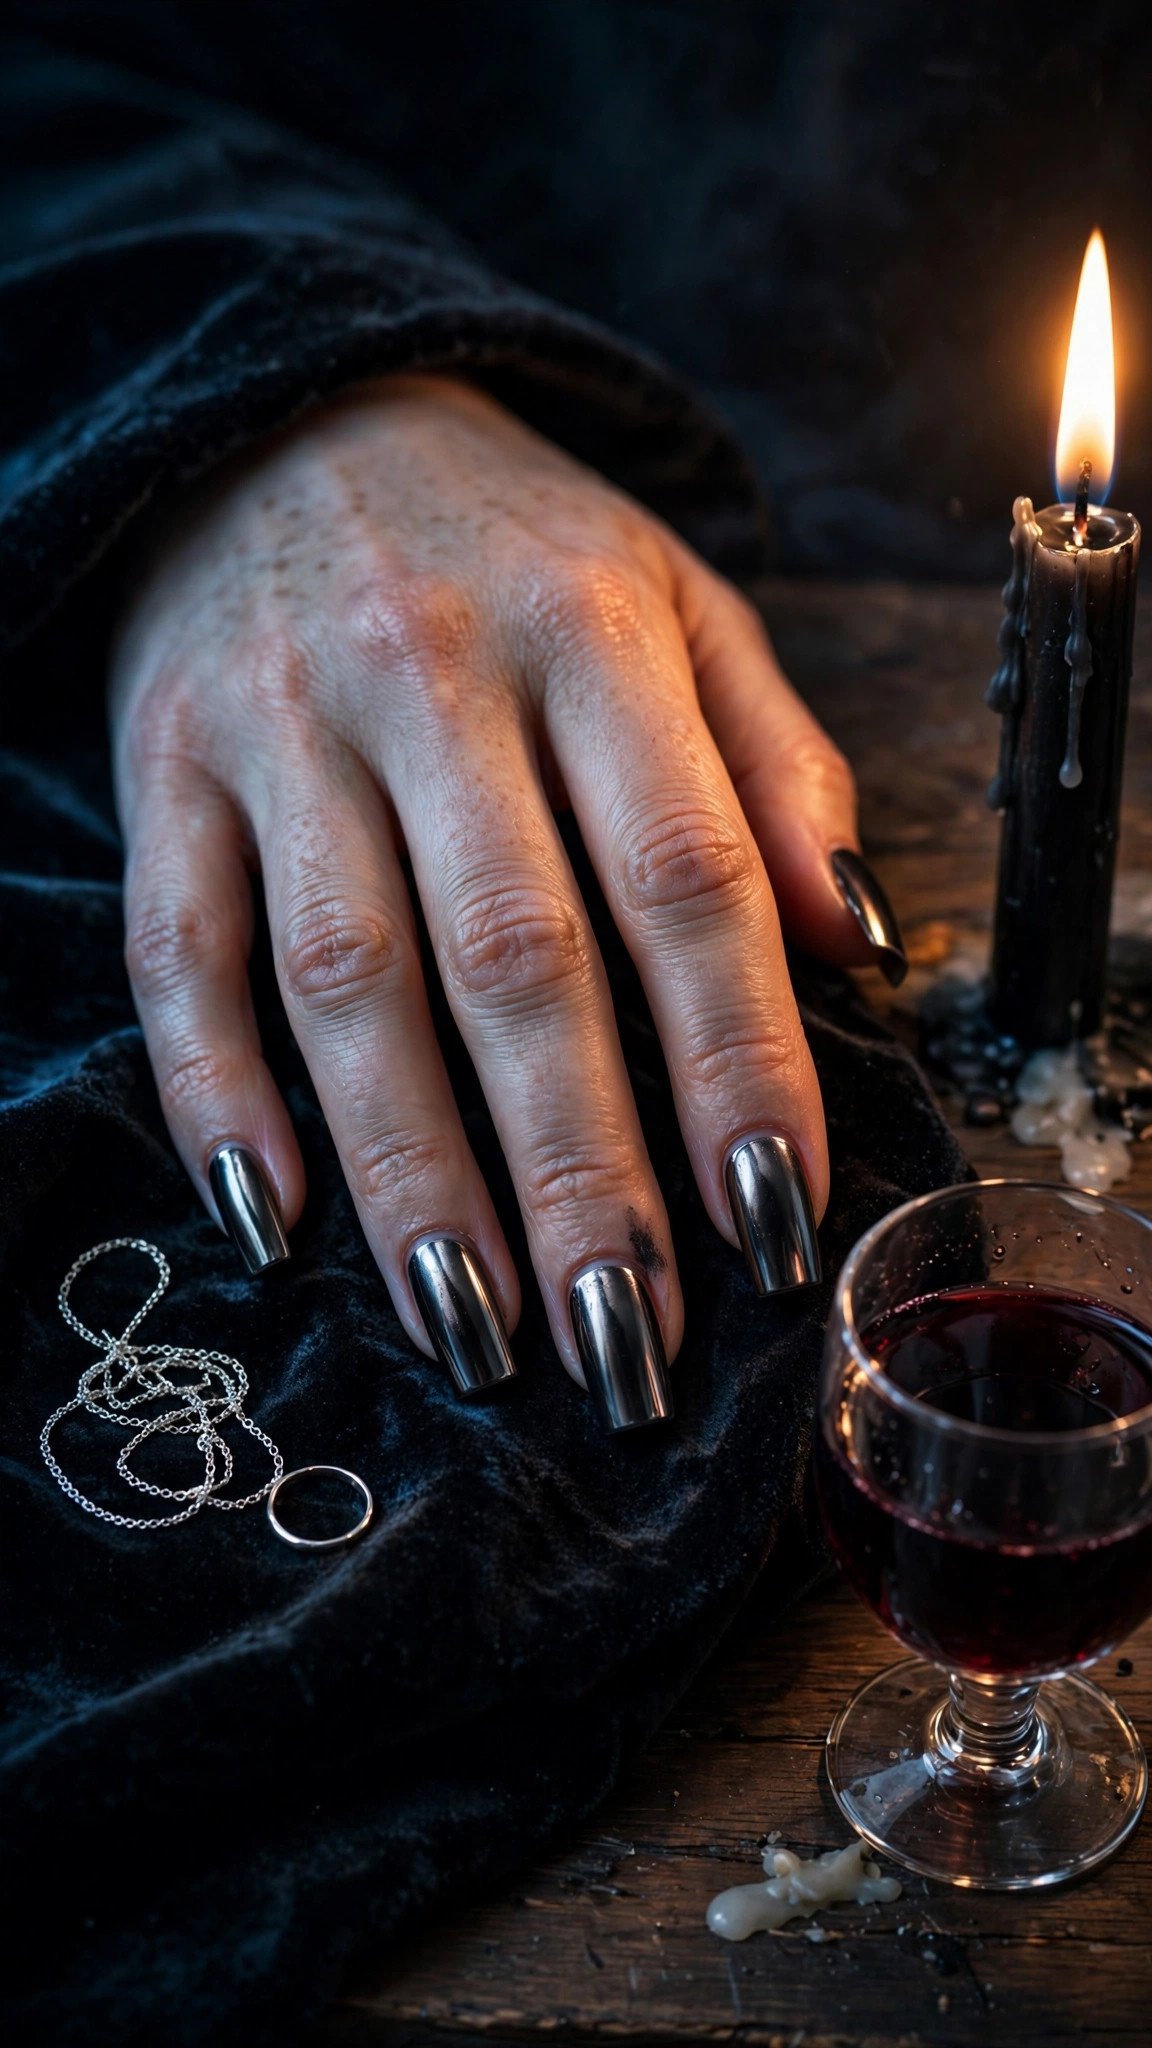
Gunmetal chrome is the darkest chrome in this list, and it is the one to choose for a formal winter night. The deep grey mirror looks like polished steel, and it pairs beautifully with black dresses and silver jewellery.
This is a salon finish, because the dark mirror shows every flaw in the base. Your tech will apply a black gel base, buff it smooth, then rub gunmetal chrome powder over a no-wipe top coat and seal it twice. Long square nails of 6-8 mm give the dark mirror the most drama. I once tried gunmetal powder over a base that was not fully smooth, and every ridge showed through like a scratch, so the prep matters more here than anywhere else.
Pro Tip: Seal gunmetal chrome with two layers of no-wipe top coat. One layer can leave the dark mirror looking cloudy, while two keep it sharp.
See dark nail ideas or formal winter manicure inspiration.
Salon price runs about $65-90.
11. Chrome Ombre Fade

A chrome ombre fades the mirror into a soft colour at the cuticle, which makes it one of the most elegant designs in this list. The fade softens the mirror so it looks icy rather than metallic, and it grows out more gracefully than a full chrome set.
Apply a pale blue or nude gel base, then rub chrome powder only over the tip half of the nail, fading it toward the middle with a soft sponge. Seal with a no-wipe top coat. Long coffin nails of 6-8 mm give the fade enough space to blend smoothly. A mistake I made was rubbing the powder too far down the nail, which turned the ombre into a full chrome set, so keep the powder to the top half.
Pro Tip: Fade the powder with a clean, dry sponge after the first rub. The second pass blends the edge so the ombre looks smooth instead of striped.
See ombre nail ideas or chrome fade tutorials.
It costs about $65-90 in a salon.
12. Frosted Chrome with Glitter

Frosted chrome with glitter is the most festive design in this list after the snowflake accent, and it is the one that photographs best under party lights. The chrome gives the ice, and the glitter gives the sparkle of fresh snow in sunlight.
Paint a silver chrome base on coffin nails, then dab silver glitter polish from the tip upward with a sponge, fading toward the middle. Seal with two coats of glossy top coat to smooth the glitter texture. Medium coffin nails of 6-8 mm give enough space for the gradient. Glitter is harder to remove, so soak cotton pads in acetone and wrap each nail for ten minutes rather than peeling it off.
Pro Tip: Use fine glitter, not chunky glitter, over chrome. Chunky glitter dulls the mirror underneath, while fine glitter lets the chrome shine through.
Browse glitter nail ideas or frosted winter manicure inspiration.
It costs about $60-85 in a salon.
13. Chrome on Short Square Nails

Chrome on short square nails proves that you do not need length to wear this trend, and it is the most practical design in this list. Short nails suit the office, the gym, and typing all day, and the mirror finish still gives you the full icy effect.
Apply a black gel base on short square nails of 2-3 mm free edge, cure, then rub silver chrome powder over a no-wipe top coat and seal. The short, flat shape makes the mirror look neat and modern rather than dramatic. This is the most beginner-friendly mirror chrome, because the small surface is easy to rub evenly and the straight edges are easy to cap. A mistake I made was using too much powder on short nails, which piled up at the cuticle, so use a light hand and tap off the excess.
Pro Tip: File the corners of short square nails slightly rounded. Sharp square corners chip first, and a tiny rounding keeps the chrome intact for the full three weeks.
See short nail design ideas or office-friendly winter nails.
Budget about $50-70 in a salon, or $20 for DIY powder.
14. Champagne Chrome

Champagne chrome is the warmest icy finish in this list, and it is the one to choose for a holiday dinner or a New Year toast. The gold-silver mirror looks like the bubbles in a glass of champagne, and it flatters every skin tone.
Apply a black or deep brown gel base, cure, then rub champagne chrome powder over a no-wipe top coat and seal. Oval nails of medium length suit the warm mirror well, because the rounded shape softens the metallic flash. I recommend a brown base rather than black if you want a softer champagne, since black can make the gold read as brass. Cure each layer fully, because champagne powder over a tacky base turns cloudy.
Pro Tip: Pair champagne chrome with a nude or cream outfit rather than black. The warm mirror pops against light colours and disappears against dark ones.
Browse champagne nail ideas or gold manicure inspiration.
It costs about $55-80 in a salon.
15. Holographic Winter Chrome

Holographic chrome scatters tiny rainbows across the mirror, like sunlight on fresh snow, and it is the most eye-catching finish in this list. In direct light the nails flash pink, blue, green, and gold, while in soft light they read as a bright silver mirror.
This is a salon finish, because holographic powder needs a perfectly smooth black base and a flawless top coat to scatter light evenly. Apply the black base, cure, add no-wipe top coat, and rub the holographic powder on in a thin, even layer. Almond nails of medium length show the rainbow best. I tried holographic powder over a white base once and the rainbow vanished, so the black base is essential here.
Pro Tip: Keep holographic chrome away from matte top coat. Matte kills the rainbow scatter, while a glossy no-wipe top coat keeps it bright.
See holographic nail ideas or rainbow manicure inspiration.
Salon price runs about $70-95.
16. Chrome Cat-Eye

Chrome cat-eye combines a magnetic shimmer line with a mirror finish, so the nails look like polished ice with a line of light moving through them. The effect shifts as your hand moves, which makes it one of the most dynamic designs in this list.
Apply a magnetic gel polish in silver or icy blue, hold a magnet about 2 mm over the nail for 10 seconds, then cure for 60 seconds. For the chrome version, add a light dusting of silver chrome powder over the cured cat-eye before the final top coat. Almond nails show the line off best. I tried this once without a steady hand and got crooked lines, so rest your hand on a table while you hold the magnet.
Pro Tip: Keep the magnet parallel to the nail and still for the full ten seconds. Tilting it by even a few degrees leaves a slanted shimmer line.
See cat-eye nail ideas or how magnetic polish works.
Salon price runs about $65-90.
17. Chrome with Rhinestone Cuticles
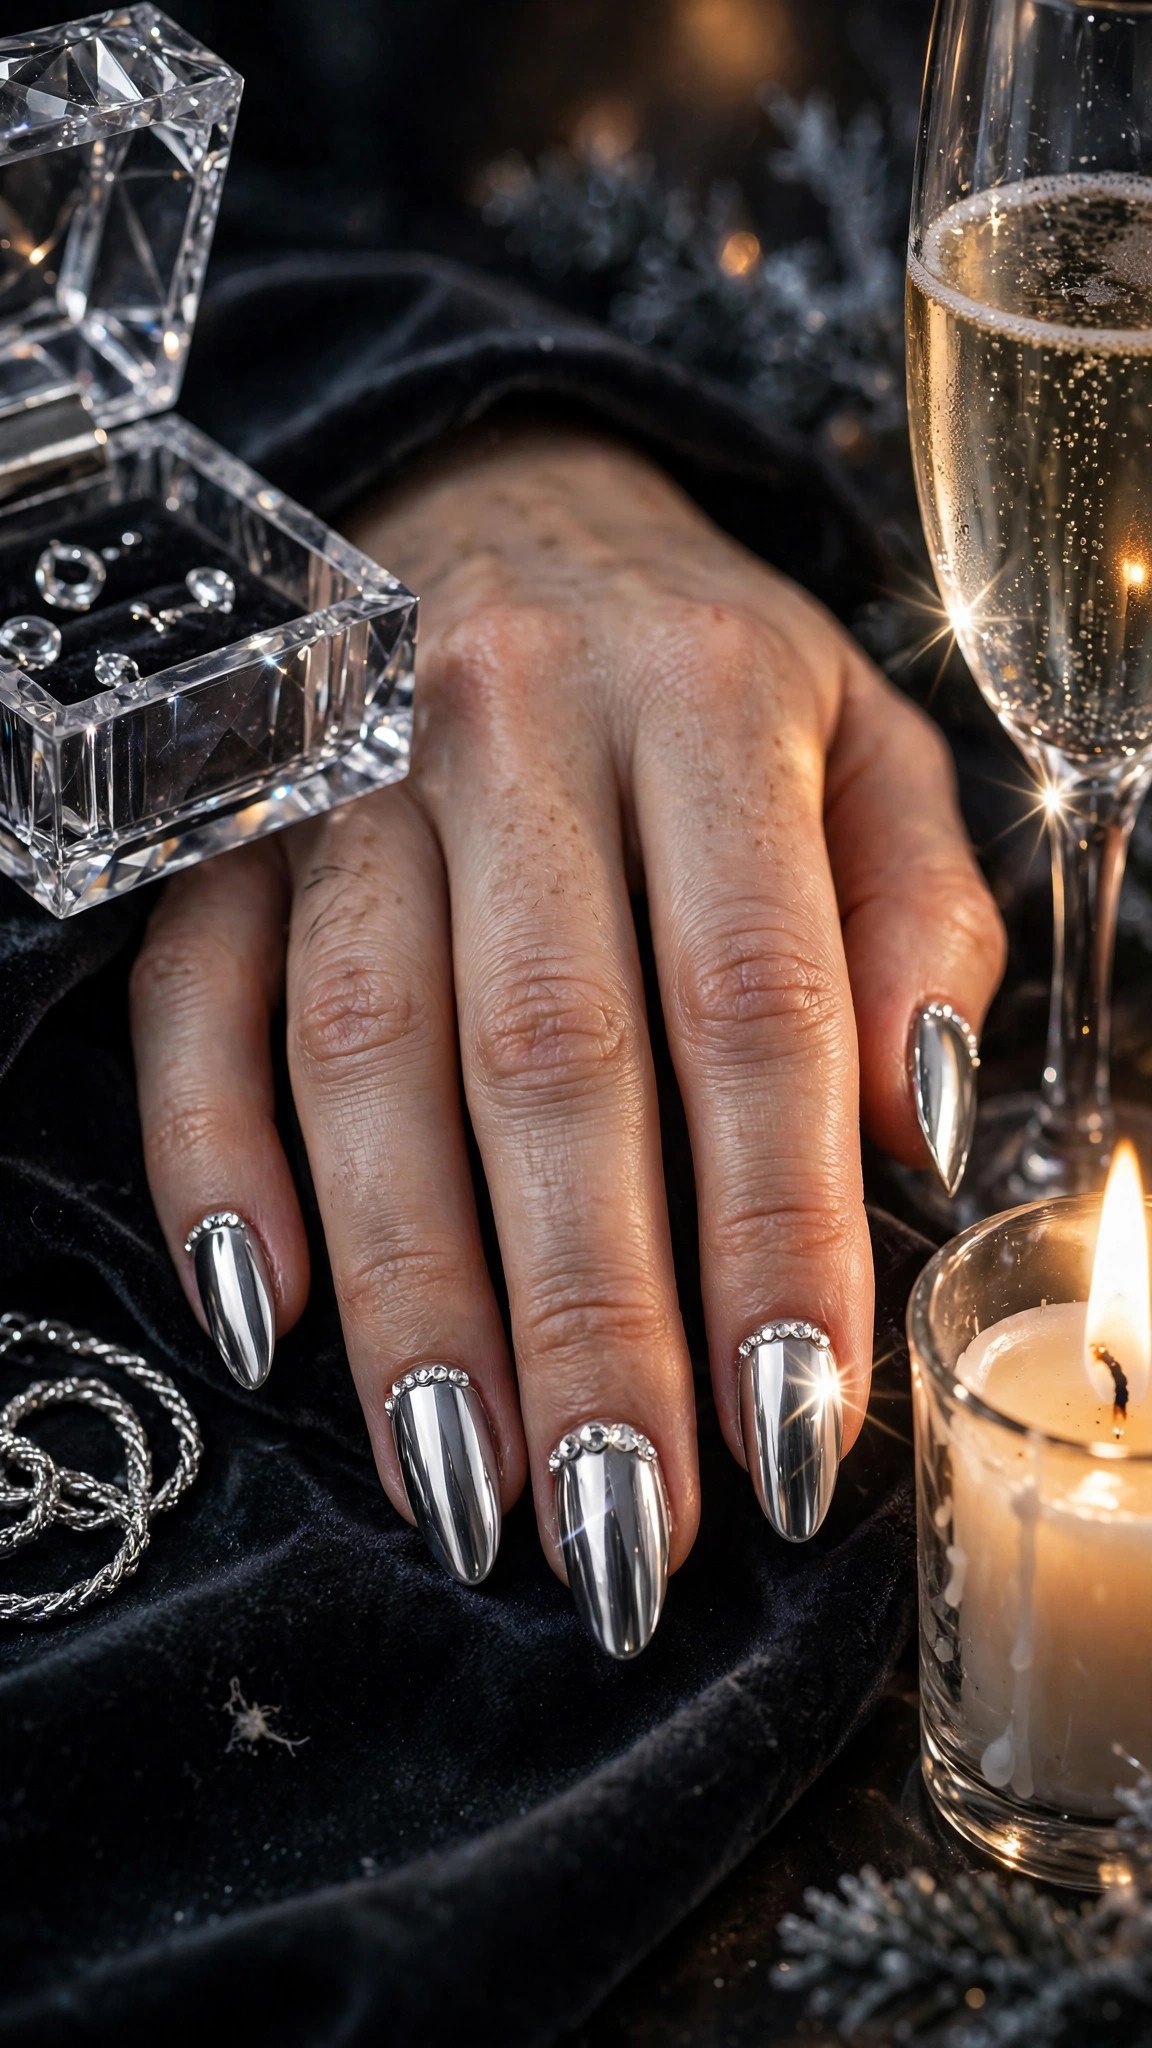
Chrome with rhinestone cuticles is the most glamorous design in this list, and it is the one to choose for a holiday party where you want your nails to read as jewellery. The mirror gives the ice, and the rhinestones give the sparkle of frost on a window.
Apply a full mirror chrome set on long almond nails, then set tiny clear rhinestones along the cuticle line using nail glue or a thick top coat. Use 1-2 mm stones and keep the row to five or six per nail. Cure in thin layers, since thick glue spreads and dulls the chrome. This is advanced work, so allow 90 minutes and expect a salon price at the higher end. I once used stones that were too large, and they caught on everything, so keep them small and flat.
Gel lasts 2-3 weeks, though rhinestones can lift at the edges, so avoid using your nails as tools.
Pro Tip: Seal the rhinestones with a thin layer of top coat around their edges, not over the top. Top coat over the stone dulls its sparkle, while top coat around it locks it in place.
See rhinestone nail ideas or glamorous winter manicure inspiration.
Salon price runs about $75-95.
18. Lavender Chrome
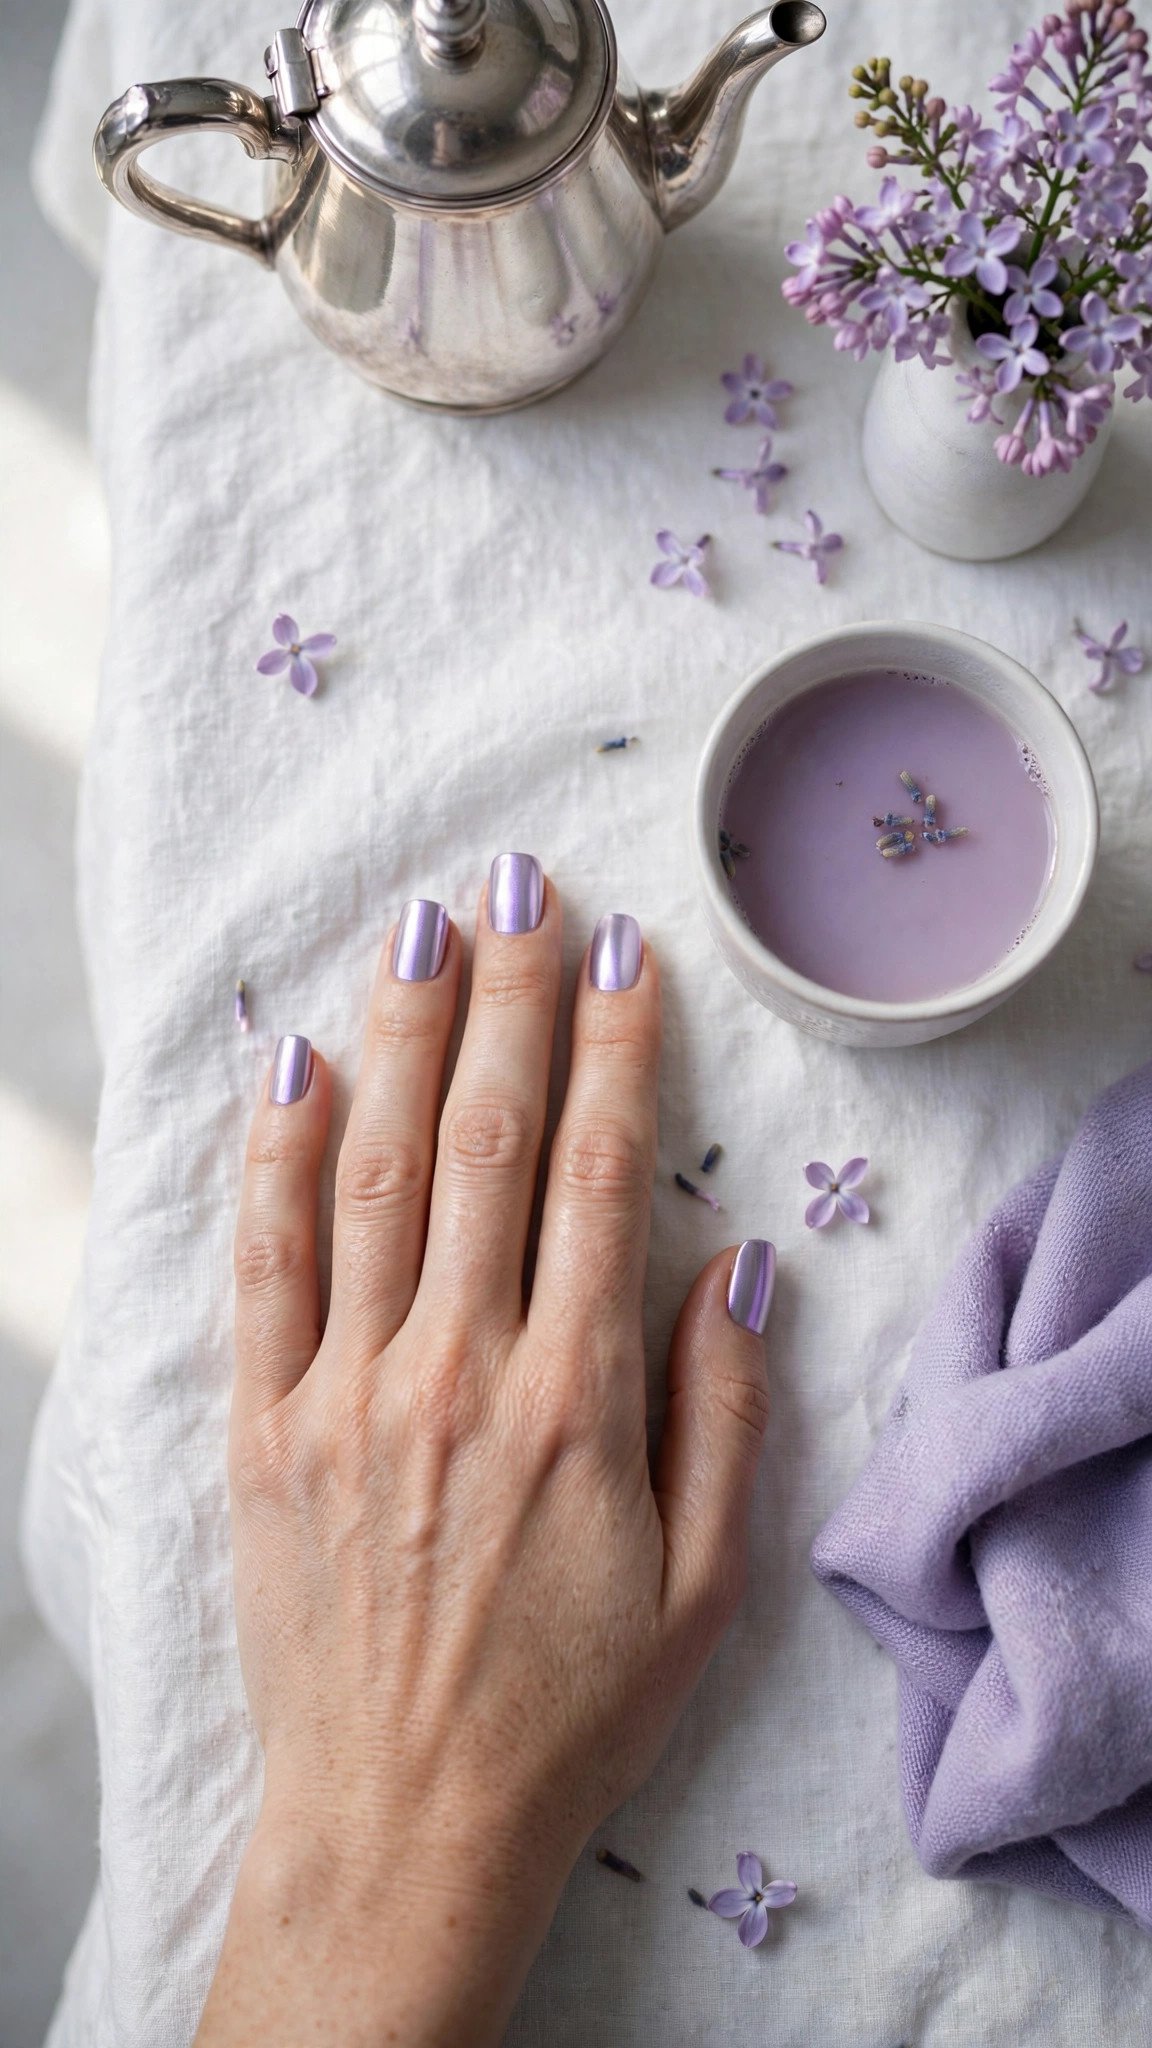
Lavender chrome is the softest coloured chrome in this list, and it is the one to choose if blue chrome feels too bold but you still want colour. The pale purple mirror reads as frosted lilac, and it flatters cool skin tones beautifully.
Apply a black or deep purple gel base, cure, then rub lavender chrome powder over a no-wipe top coat and seal. Squoval nails of medium length suit the soft colour well, because the rounded corners keep the look gentle. A mistake I made was using a light purple base, which made the chrome look chalky, so the dark base matters here too.
Pro Tip: Pair lavender chrome with silver jewellery, not gold. Silver keeps the cool purple tone, while gold warms it up and dulls the frost effect.
See lavender nail ideas or pastel winter manicure inspiration.
It costs about $55-80 in a salon.
19. Black Chrome
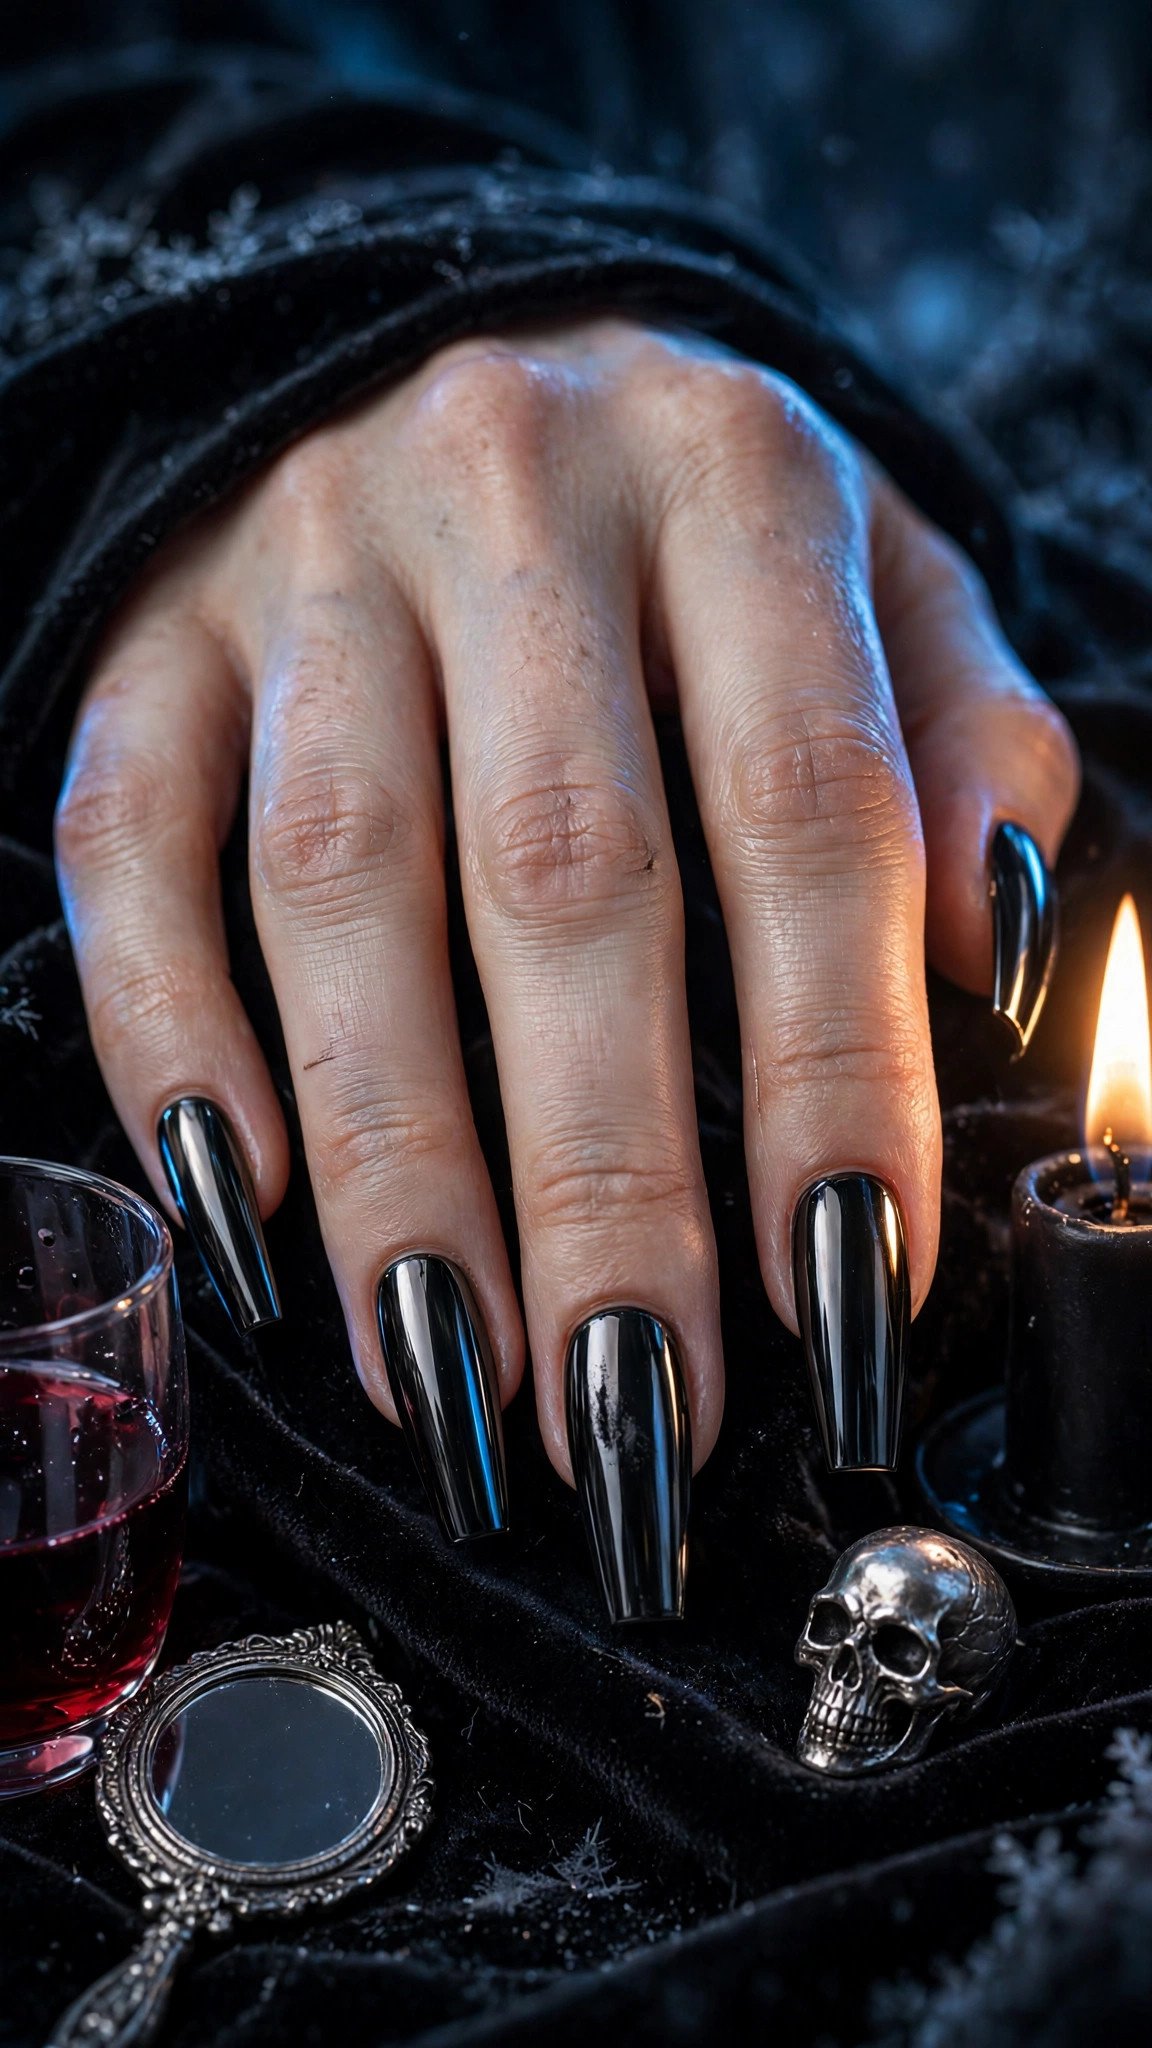
Black chrome is the boldest design in this list, and it is the one to choose for a formal winter night when you want your nails to look like polished obsidian. The dark mirror is dramatic without being loud, and it pairs with everything from a black dress to a silver gown.
This is a salon finish, because black chrome shows every flaw in the base even more than gunmetal does. Your tech will apply a black gel base, buff it until it is glass smooth, then rub black chrome powder over a no-wipe top coat and seal it twice. Long coffin nails of 6-8 mm give the dark mirror the most drama. I once skipped the second top coat, and the black mirror looked cloudy within a week, so the double seal matters.
Pro Tip: Ask for a black chrome powder, not a silver chrome over a black base. Silver over black gives gunmetal, while true black chrome powder gives a deeper, darker mirror.
See black nail ideas or formal winter manicure inspiration.
Salon price runs about $65-90.
20. Winter Wonderland Chrome Mix

A winter wonderland chrome mix combines three finishes on one hand, and it is the best way to wear every chrome you love at once. Silver chrome on two nails, pearl chrome on two more, icy blue on the rest, and a tiny snowflake on the accent nail give you a full winter scene without a single design fighting the others.
This is advanced work, so bring a reference photo and allow 90 minutes. Your tech will do each finish separately, curing between them, and finish with a snowflake stamp or a fine brush on the ring finger. Long almond nails of 6-8 mm give each finish room to show.
What to try: Beginner: silver chrome on all nails with one pearl accent. Intermediate: silver and pearl chrome alternating across the hand. Advanced: the full mix with icy blue and a snowflake accent.
Gel lasts 2-3 weeks, and this is a salon design, usually $75-95.
See winter wonderland nail ideas or mixed finish manicure inspiration.
Getting Started With Chrome Winter Nails
The easiest first step is to pick one finish, not one design. Mirror, pearl, and aurora behave differently, and starting with a pearl or glazed donut chrome teaches you how the powder applies before you try a full mirror set. A soft finish is forgiving, while a hard mirror shows every ridge.
The most common beginner mistake is skipping the dark base. Chrome powder needs a smooth, dark, no-wipe surface to turn into a mirror, and a light or tacky base gives a dull, cloudy finish. Push back the cuticles, buff the nail surface lightly, and wipe with alcohol before the base coat. The second mistake is using too much powder, which piles up at the cuticle and looks grainy; a light rub with a sponge applicator beats a heavy one.
What to buy first: a black gel polish, a no-wipe top coat, one silver chrome powder, and a sponge applicator. That is about $20-40 in total and covers designs 1, 4, 8, and 13. If you want a gel set, you will also need an LED lamp, which costs $20-40. If you would rather book a salon, bring a photo and ask for a nail tech who does chrome work, since not every tech stocks the powders.
For timeline, a DIY chrome set takes about 45-60 minutes and lasts 2-3 weeks. A salon set takes 60-90 minutes and lasts 2-3 weeks, though it should not stay on longer than three weeks. If you notice ridges, discoloration, or pain around the nail, skip the polish and ask a nail professional or a doctor before continuing.
Frequently Asked Questions
What are the best chrome winter nails for beginners? The best chrome winter nails for beginners are pearl chrome, glazed donut chrome, and chrome on short square nails. Each needs only one powder and basic tools. Most take under an hour and cost $20-40 in DIY supplies.
What colours go with chrome winter nails besides silver? Icy blue, pearl white, lavender, rose gold, champagne, and gunmetal all pair well with chrome in winter. Cream and pale blue give a soft frosted look, while black and gunmetal suit formal nights. Choose a cool undertone to match the icy theme.
How long do chrome winter nails last? A sealed gel chrome set lasts about 2-3 weeks, and press-ons last 1-2 weeks. Chrome tends to chip first at the tips, so cap the free edge with top coat twice. Gel polish should not stay on longer than three weeks, so book a removal or refill.
Can I do chrome winter nails on short nails? Yes, and many look better short: try the Glazed Donut Chrome, Pearl Chrome, or Chrome on Short Square Nails. Keep the finish light and even, and avoid dense patterns. Short nails of 2-4 mm free edge hold chrome cleanly.
How much do chrome winter nails cost at a salon? A simple chrome gel set costs about $55-75, and a full set with aurora, holographic, or rhinestone details costs $75-95. Chrome and cat-eye finishes add about $5-15 to a standard gel set. Prices vary by city and technician, so confirm before booking.
A Few Final Thoughts
The best chrome winter nails look like ice, and they do not need to be complicated. Across these 20 ideas, the pattern is simple: a dark base, a light rub of powder, and a glossy no-wipe seal make the biggest difference. Whether you choose a ten-minute pearl glaze or a full holographic mirror, your nails will look intentional all winter. A small change, like one chrome accent nail or a new finish, can transform your whole hand. Pick one of the 20, gather your tools this week, and enjoy the season.