
You do not need a nail art kit, a salon appointment, or a single new bottle to get Christmas nails this year. The best holiday manicures in this list are made from things already sitting in your kitchen drawer, your bathroom cabinet, and your makeup bag: kitchen foil, toothpicks, cotton swabs, Scotch tape, bobby pins, a kitchen sponge, an old eyeshadow, and the half-forgotten polishes at the back of your shelf. That is the whole point of this guide. Every one of these 25 Christmas nail designs uses items you already have, costs nothing or next to nothing, and takes between ten minutes and an hour.
This is the guide for the DIYer who wants zero-cost shortcuts, not a shopping list. Each design names the household item it uses, tells you exactly how to use it, and gives you the honest wear time and the cost, which in most cases is zero.
Quick Answer: For the fastest zero-cost set, start with the Toothpick Snowflakes (#2) or the Cotton Swab Polka-Dot Ornaments (#3). For the most impressive look with no new supplies, try the Kitchen Foil Christmas Tree (#1) or the Plastic Wrap Marbled Wrapping Paper (#7). For a party-ready finish, ask for the Foil Transfer Gold Star Topper (#17) or the Broken Necklace Rhinestone Star (#13). Salon sets run $45-85, and every DIY version in this list costs $0-10 because the tools come from your own home.
Why Christmas Nails Using Stuff You Already Own Are Worth Your Time
Christmas nails usually come with a hidden cost: new polishes, dotting tools, striping brushes, stickers, and charms that you use once and forget. The designs in this list skip all of that, because the tools already exist in your house under different names. A toothpick is a dotting tool. A bobby pin is a finer dotting tool. Scotch tape is a stencil. A kitchen sponge is a gradient tool. Once you see the drawer that way, you never need to buy a nail art kit again.
There are practical wins too. Zero-cost nails mean zero guilt if a design does not work out, and that makes you braver. You will try the foil tree, the tape stripes, and the cotton ball snow, because the only thing at stake is ten minutes and a bottle you already own.
Here is the lesser-known part: household tools are often more forgiving than professional ones. A cotton swab makes a softer, rounder dot than a metal dotting tool, which is exactly what you want for ornaments and snow. Plastic wrap creates a marbled effect that no brush can copy.
This guide suits anyone looking for easy Christmas nail art, DIY holiday nails, or a last-minute party manicure with no trip to the store.
At a Glance
- All 25 designs use items you already own, from kitchen foil and toothpicks to old eyeshadow and bobby pins.
- Wear times are listed for each design, from 4-6 days for regular polish to 2-3 weeks for gel.
- Short nails, long nails, and every common shape appear, from short round to long almond.
- Salon prices run $45-85, while every DIY version costs $0-10 because the tools come from your home.
| # | Design | Nail Shape | Skill Level | Wear Time | Occasion |
|---|---|---|---|---|---|
| 1 | Kitchen Foil Christmas Tree | Almond | Beginner | 5-7 days | Christmas Day |
| 2 | Toothpick Snowflakes | Short round | Beginner | 5-7 days | Everyday |
| 3 | Cotton Swab Polka-Dot Ornaments | Oval | Beginner | 5-7 days | Party |
| 4 | Scotch Tape Candy Cane Stripes | Square | Beginner | 5-7 days | Holiday party |
| 5 | Bobby Pin Holly Berries | Short oval | Beginner | 5-7 days | Christmas Day |
| 6 | Old Gold Eyeshadow Glitter Topper | Almond | Beginner | 5-7 days | Evening |
| 7 | Plastic Wrap Marbled Wrapping Paper | Coffin | Intermediate | 5-7 days | Party |
| 8 | Rubber Band Gift-Wrap Stripes | Short square | Beginner | 5-7 days | Brunch |
| 9 | Kitchen Sponge Snowy Ombre | Oval | Beginner | 5-7 days | Weekend |
| 10 | Tape Stencil Negative-Space Stars | Almond | Intermediate | 5-7 days | Evening |
| 11 | Lipstick Red Berry Stain | Short round | Beginner | 4-6 days | Date night |
| 12 | Clear Tape French Tips | Almond | Beginner | 5-7 days | Office |
| 13 | Broken Necklace Rhinestone Star | Short almond | Intermediate | 1-2 weeks | Holiday party |
| 14 | Q-Tip Dotted Christmas Lights Garland | Coffin | Beginner | 5-7 days | Christmas Day |
| 15 | Bobby Pin Christmas Wreath | Almond | Intermediate | 5-7 days | Christmas Day |
| 16 | Toothpick Candy Cane Swirls | Oval | Intermediate | 5-7 days | Party |
| 17 | Foil Transfer Gold Star Topper | Short square | Intermediate | 2-3 weeks | New Year |
| 18 | Sewing Thread Present Bow | Squoval | Intermediate | 5-7 days | Christmas morning |
| 19 | Cotton Ball Snow Texture | Short square | Beginner | 5-7 days | Cozy day |
| 20 | Hair Pin Dotted Snowman Faces | Almond | Beginner | 5-7 days | Family gathering |
| 21 | Old Makeup Brush Snowfall Spray | Long almond | Intermediate | 5-7 days | Evening |
| 22 | Tape Geometric Gift Boxes | Square | Intermediate | 5-7 days | Brunch |
| 23 | Sponge Snow-Capped French Tips | Almond | Beginner | 5-7 days | Everyday |
| 24 | Safety Pin Dotted Ornament Baubles | Oval | Beginner | 5-7 days | Office party |
| 25 | Junk-Drawer Ornament Marble | Coffin | Intermediate | 5-7 days | New Year |
1. Kitchen Foil Christmas Tree
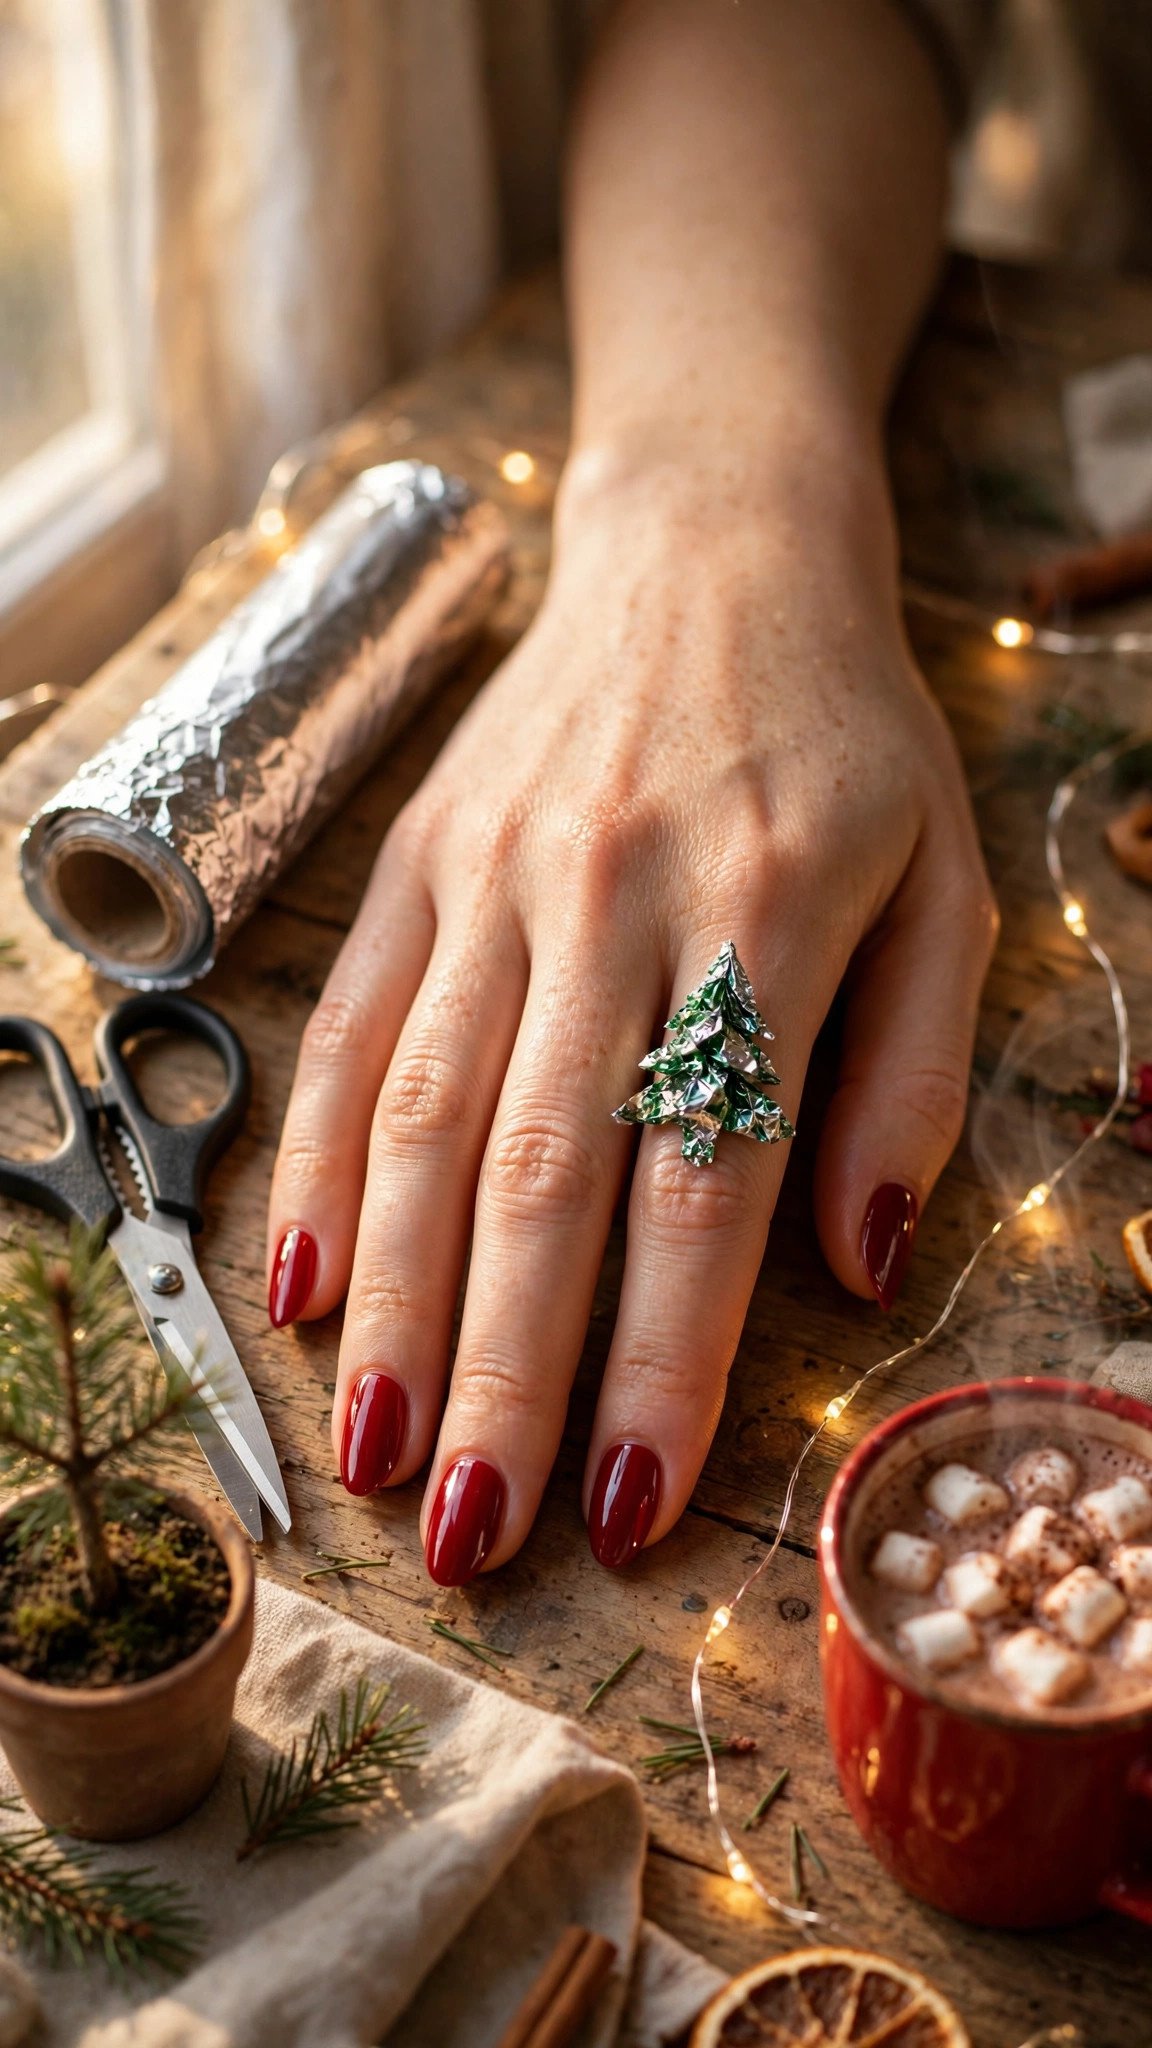
A Christmas tree cut from the kitchen foil you already own is the single best zero-cost nail design in this list, because foil is shiny, stiff enough to cut, and sticks beautifully under top coat.
Tear off a small square of foil and fold it in half. Cut a simple triangle tree shape with kitchen scissors, about 6 mm tall, then unfold it and trim a tiny trunk from the same foil. Paint your nails deep red or forest green, let the base dry for five minutes, then press the foil tree onto the ring finger while the top coat is still wet. Seal it with two coats of clear top coat so the edges cannot lift.
Pro Tip: Dull the foil first by crumpling it lightly and flattening it again. The tiny creases catch the light like tinsel and hide any uneven cut edge.
See foil nail ideas or how to cut nail foil shapes.
This one costs nothing and takes about 25 minutes.
2. Toothpick Snowflakes
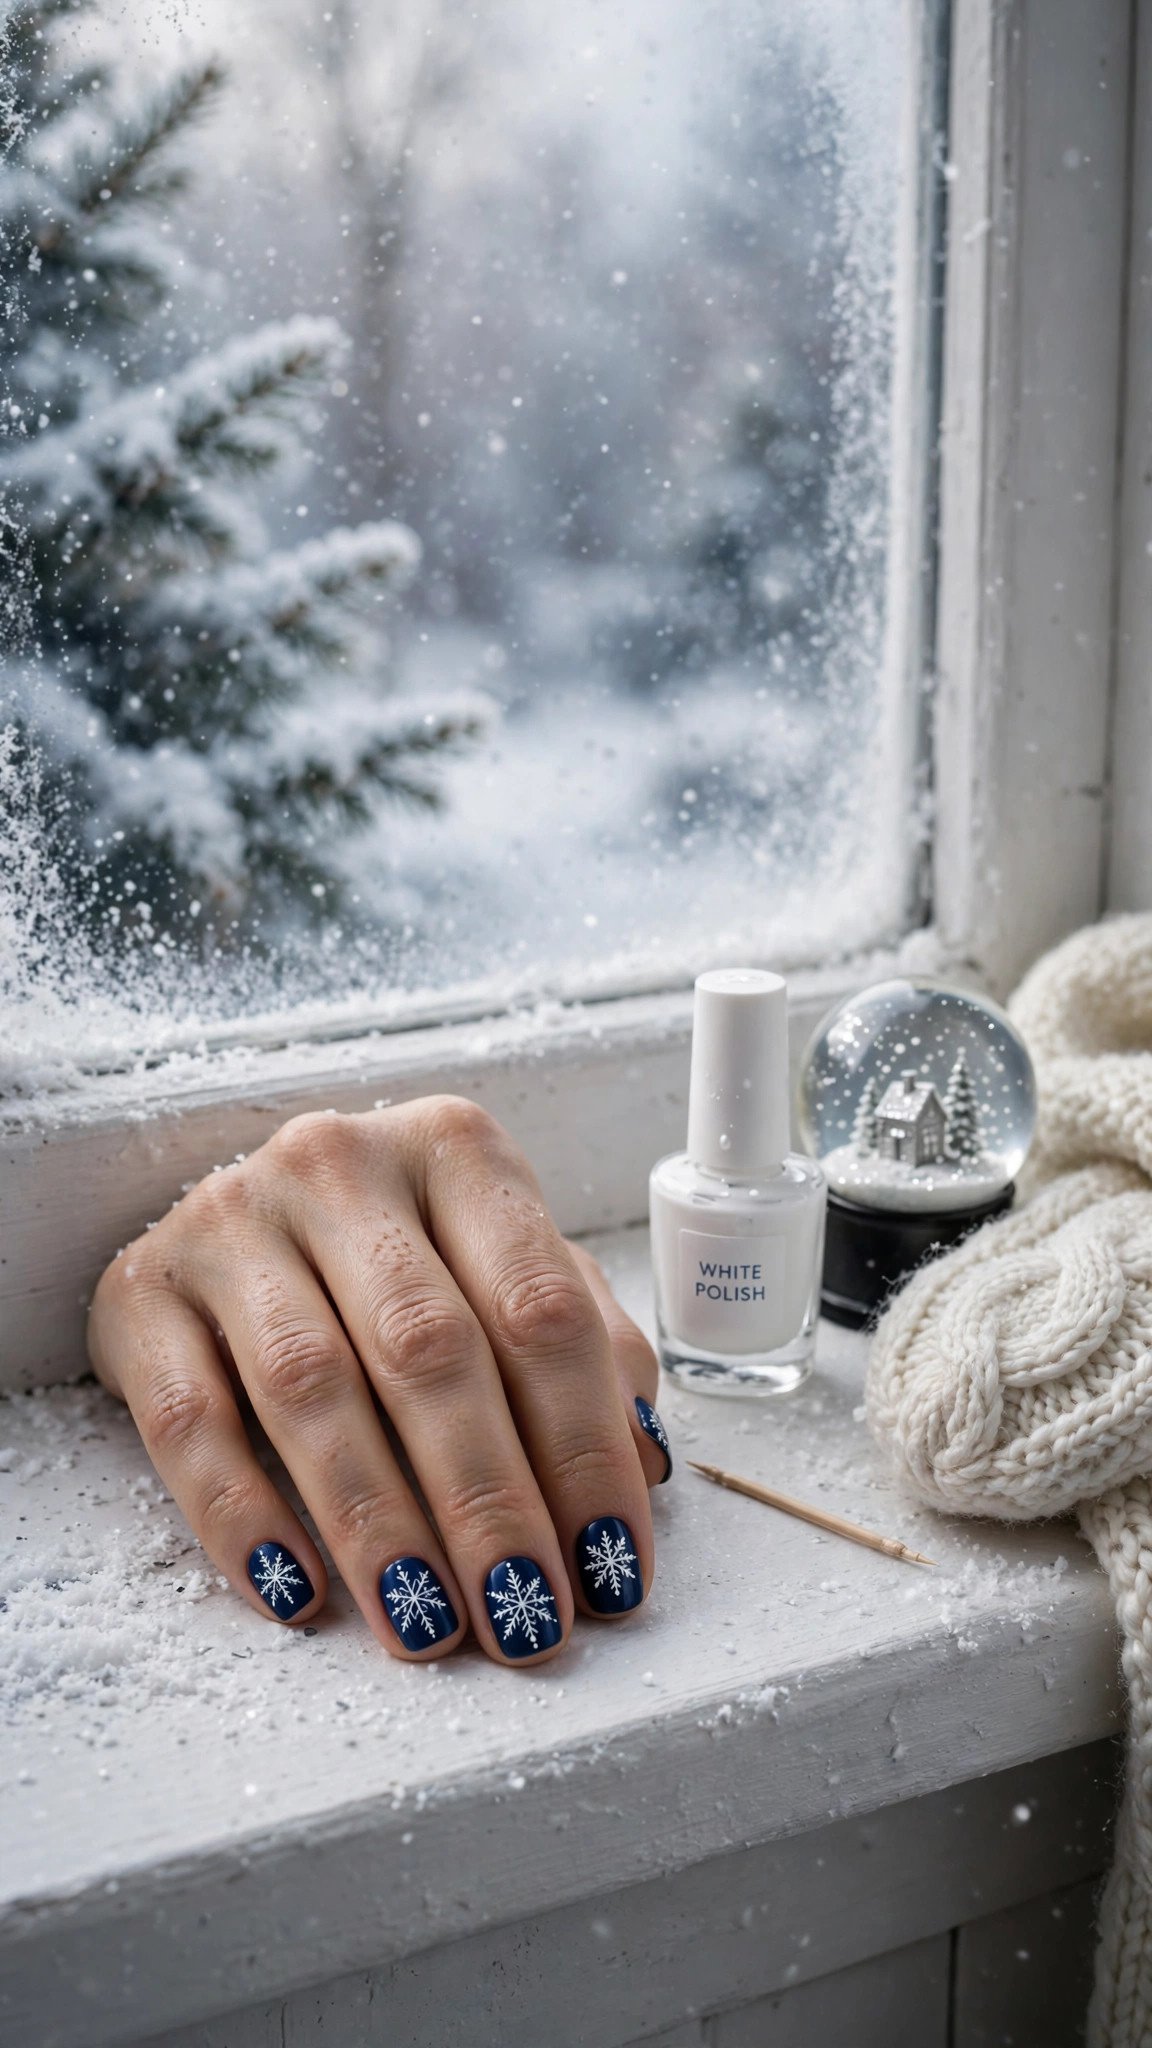
A toothpick is the finest dotting tool you already own, and snowflakes are the design it was made for.
Paint a deep navy or dark green base and let it dry fully. Dip the sharp end of a wooden toothpick into white polish and draw a small cross, then an X over it, so you have six arms. Add two tiny dots at the end of each arm. Keep each flake about 5 mm wide on short round nails. The trick is a light hand: the toothpick should barely touch the nail, and you should reload the polish for every arm so the lines stay even.
Pro Tip: If a flake goes wrong, wait for it to dry and scrape it off gently with the flat end of another toothpick. The base underneath stays untouched.
See snowflake nail ideas or toothpick nail art tips.
This one costs nothing and takes about 20 minutes.
3. Cotton Swab Polka-Dot Ornaments

A cotton swab makes the roundest, softest dot of any household tool, which is exactly what a Christmas bauble needs.
Paint a deep green or navy base. Dip the cotton tip of a swab into red polish and press it straight down on the nail, then lift straight up without twisting. That gives you a perfect round bauble, about 4 mm across. Add a second dot in gold on the next nail, and finish each bauble with a tiny silver dot at the top using the other end of a toothpick for the ornament cap. Space the dots unevenly, like ornaments hanging at different heights, and keep two or three per nail at most.
Pro Tip: Roll the swab on a paper towel after dipping to remove excess polish. A swab that is too wet leaves a ring instead of a solid dot.
See polka dot nail ideas or ornament nail art.
This one costs nothing and takes about 20 minutes.
4. Scotch Tape Candy Cane Stripes

Scotch tape is the stencil you already own, and candy cane stripes are the design that proves it.
Paint your nails white and let them dry completely, at least fifteen minutes, because tape will lift a tacky base. Cut thin strips of tape and lay them diagonally across each nail, leaving even gaps between them. Paint red polish over the whole nail, then peel the tape off while the red is still slightly wet, pulling slowly at a low angle. Square nails with a flat top show the stripes best. One mistake I made early on was peeling the tape after the polish dried, which cracked the stripes.
Pro Tip: Press the tape edges down firmly with the flat end of a toothpick before painting. Any gap lets red bleed under the tape and ruins the line.
Browse candy cane nail ideas or tape stencil nail guide.
This one costs nothing and takes about 30 minutes.
5. Bobby Pin Holly Berries

The round ball at the end of a bobby pin makes a smaller, neater dot than a cotton swab, which is perfect for holly berries.
Paint a deep green, cream, or sheer nude base. Dip the ball end of a clean bobby pin into red polish and dot three berries in a tight triangle near the cuticle or the tip. Use the tip of a toothpick to draw two small pointed leaves in green beside them.
Pro Tip: Wipe the bobby pin ball on a tissue between dots. Dried polish on the ball makes the next dot bigger and blobbier than the last.
See holly nail ideas or bobby pin nail art tips.
This one costs nothing and takes about 20 minutes.
6. Old Gold Eyeshadow Glitter Topper

That gold eyeshadow you stopped wearing is loose glitter pigment, and it is one of the best nail toppers you already own.
Paint a deep burgundy, forest green, or black base and let it dry. Brush a thin layer of clear top coat over the tip half of each nail, then press gold eyeshadow onto it with a fingertip or a dry makeup sponge. Tap off the excess and seal with two coats of top coat. Almond nails show the glitter fade best, because the tip has the most surface to catch the light. I skipped the sealing top coat once and the gold rubbed off on my sweater within a day.
Pro Tip: Use a shimmery eyeshadow, not a matte one. Matte shadow looks dusty on nails, while shimmer shadow reads as gold leaf.
Browse glitter nail ideas or eyeshadow nail art tips.
This one costs nothing and takes about 25 minutes.
7. Plastic Wrap Marbled Wrapping Paper

Crumpled plastic wrap, the kind from your kitchen, creates a marble effect that looks like expensive wrapping paper.
Paint a white or cream base and let it dry. Dab a little red polish and a little gold polish onto the nail, then press a small ball of crumpled plastic wrap onto it and lift it straight off. The wrap picks up and redistributes the polish into soft marble veins. Repeat with a fresh piece of wrap for each nail, because a used piece gets soggy and smears.
Pro Tip: Work one nail at a time and do not let the polish dry before pressing the wrap. Dry polish will not move, and the marble will look like a flat smudge.
See marble nail ideas or plastic wrap nail art guide.
This one costs nothing and takes about 30 minutes.
8. Rubber Band Gift-Wrap Stripes
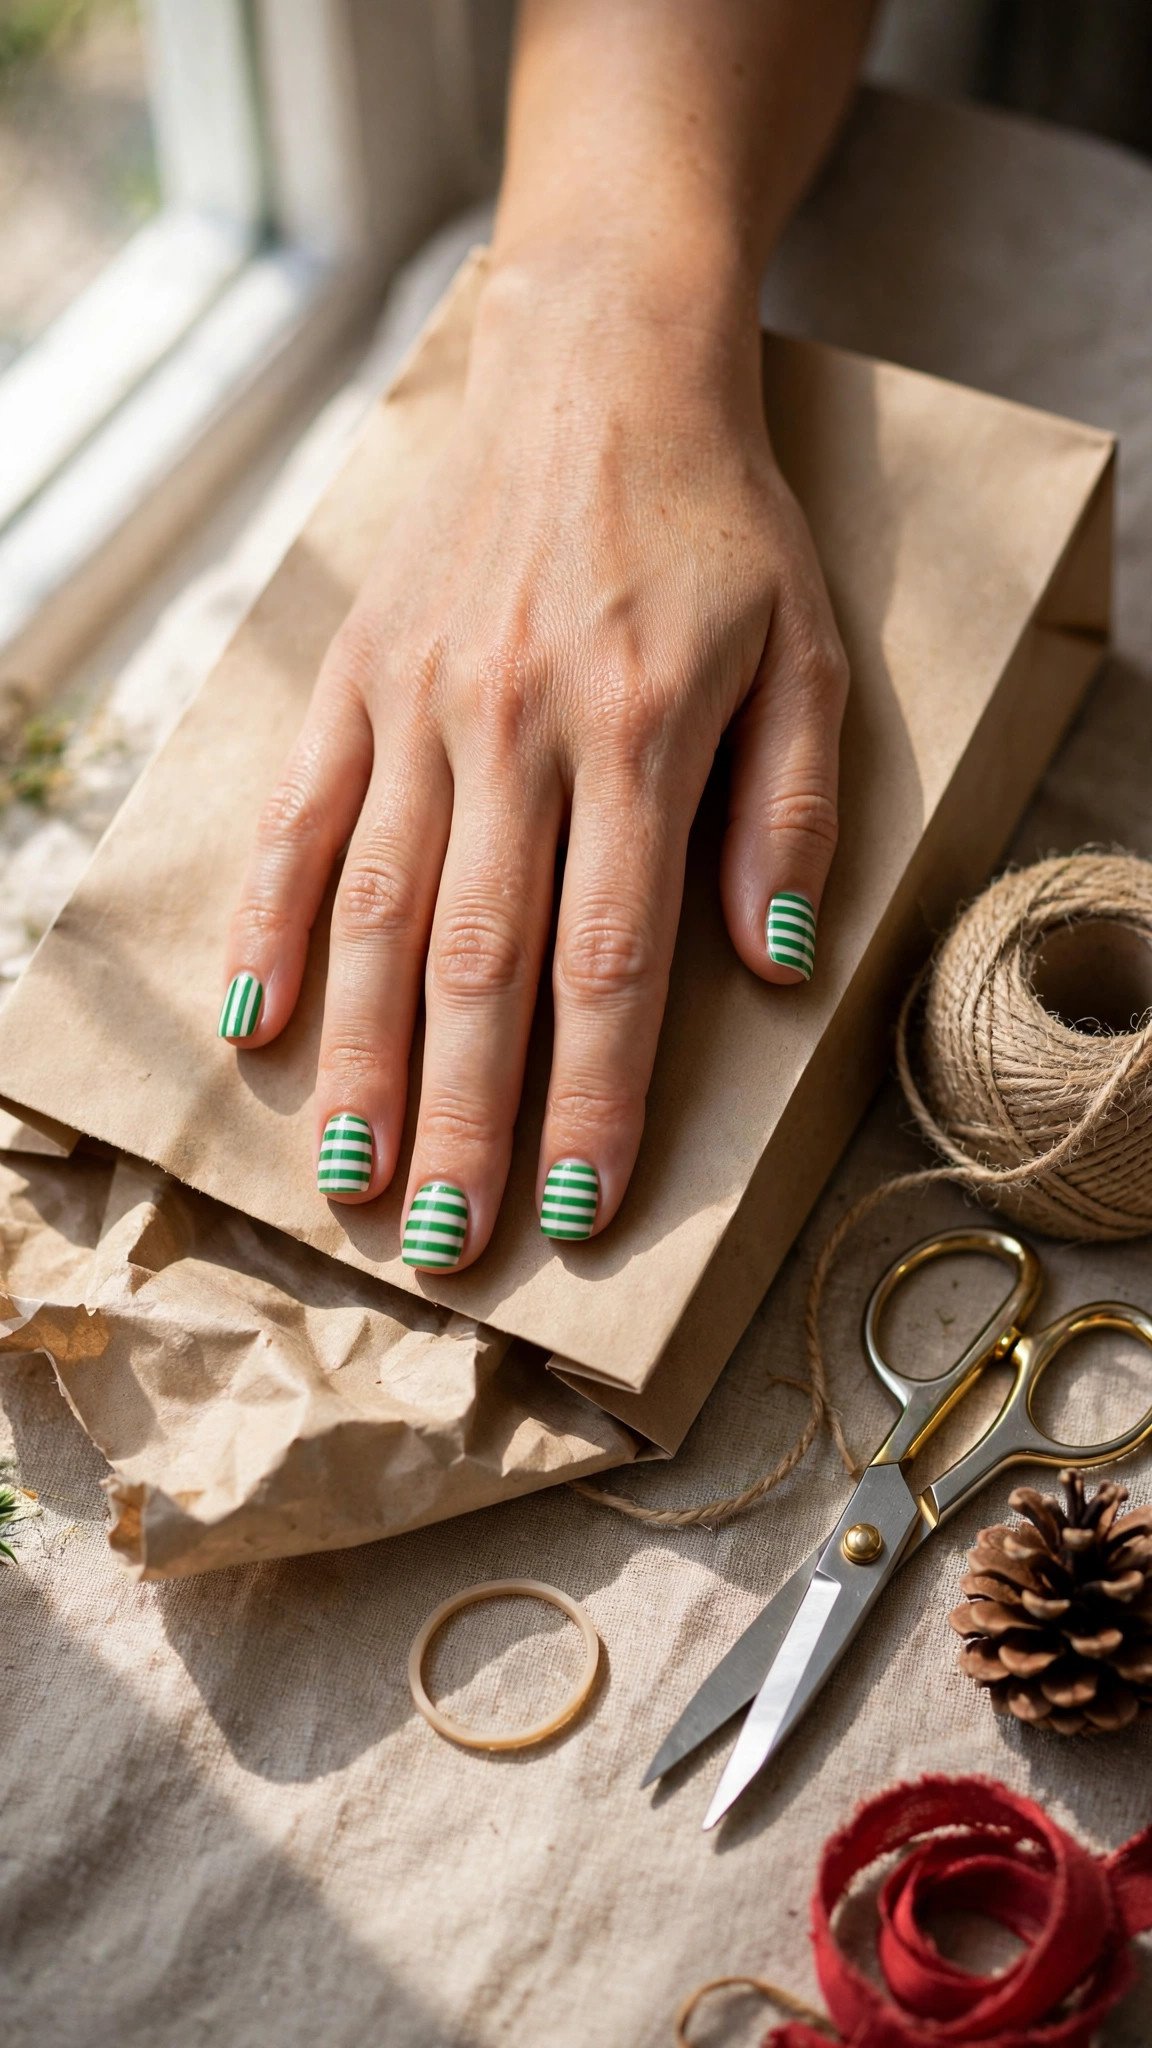
A rubber band from your junk drawer is a stamp.
Paint a cream or white base and let it dry fully. Stretch a thin rubber band across the nail and hold it taut with your other hand, then paint green polish lightly over the band so the color transfers only where the band touches. Lift the band straight up. You can stamp one stripe, or move the band and stamp a second stripe for a ribbon effect.
Pro Tip: Use a thin rubber band, not a thick one. A thick band leaves a heavy stripe that looks painted, while a thin one leaves a delicate ribbon line.
Browse striped nail ideas or rubber band nail art.
This one costs nothing and takes about 25 minutes.
9. Kitchen Sponge Snowy Ombre

The sponge from your kitchen sink, cut into a small square, is the classic gradient tool, and a blue-to-white ombre is the snowiest version of it.
Paint your nails white as a base, which makes colors pop. Dab deep blue polish on one half of a small sponge piece and white polish on the other half, then press the sponge onto the nail two or three times, moving it slightly each time. Seal with a glossy top coat. Oval nails of 4-5 mm free edge give the gradient room to fade. A mistake I made early on was using too much polish on the sponge, and it created thick, bubbly layers.
Pro Tip: Dab the sponge on a paper towel first to remove excess polish. It gives a softer blend and avoids the bubbly texture.
See ombre nail ideas or how to do a sponge gradient.
This one costs nothing and takes about 25 minutes.
10. Tape Stencil Negative-Space Stars

Cut a tiny star out of Scotch tape and you have a stencil.
Paint a sheer nude base or leave the nail bare with a base coat. Cut a small star shape, about 5 mm wide, from a piece of tape using small scissors or a craft knife, and stick it on the nail. Paint gold or red polish over the whole nail, then peel the tape off while the polish is still slightly wet. The star stays bare while the rest of the nail is colored, which looks far more expensive than it is.
Pro Tip: Cut the star from the tape while the tape is stuck to a piece of baking paper, not your finger. It is easier to cut cleanly and peels off the paper without stretching.
Browse negative space nail ideas or tape stencil guide.
This one costs nothing and takes about 30 minutes.
11. Lipstick Red Berry Stain

A red lipstick you never wear is a nail stain waiting to happen.
Push back your cuticles and buff the nail lightly, then dab a small amount of red or berry lipstick onto each nail with a fingertip and blend it out in thin, even strokes. Wipe away the excess from the skin with a cotton swab dipped in micellar water. Seal with two coats of clear top coat, which locks the color in and gives it a glossy finish.
Pro Tip: Use a matte lipstick, not a glossy one. Glossy lipstick stays greasy under top coat and never fully sets, while matte lipstick dries down and holds.
See berry nail ideas or lipstick nail art tips.
This one costs nothing and takes about 15 minutes.
12. Clear Tape French Tips

French tips are the hardest freehand line in nail art, and clear tape makes them easy.
Paint a sheer pink or milky base and let it dry completely. Place a small strip of tape across each nail, just below the free edge, following the curve of the tip. Paint white polish over the tip, then peel the tape off while the white is still slightly wet.
Pro Tip: Round the tape strip slightly by curving it between your fingers before you stick it on. A straight strip makes a flat tip, while a curved strip makes the classic smile shape.
Browse French tip nail ideas or how to draw clean tips.
This one costs nothing and takes about 25 minutes.
13. Broken Necklace Rhinestone Star
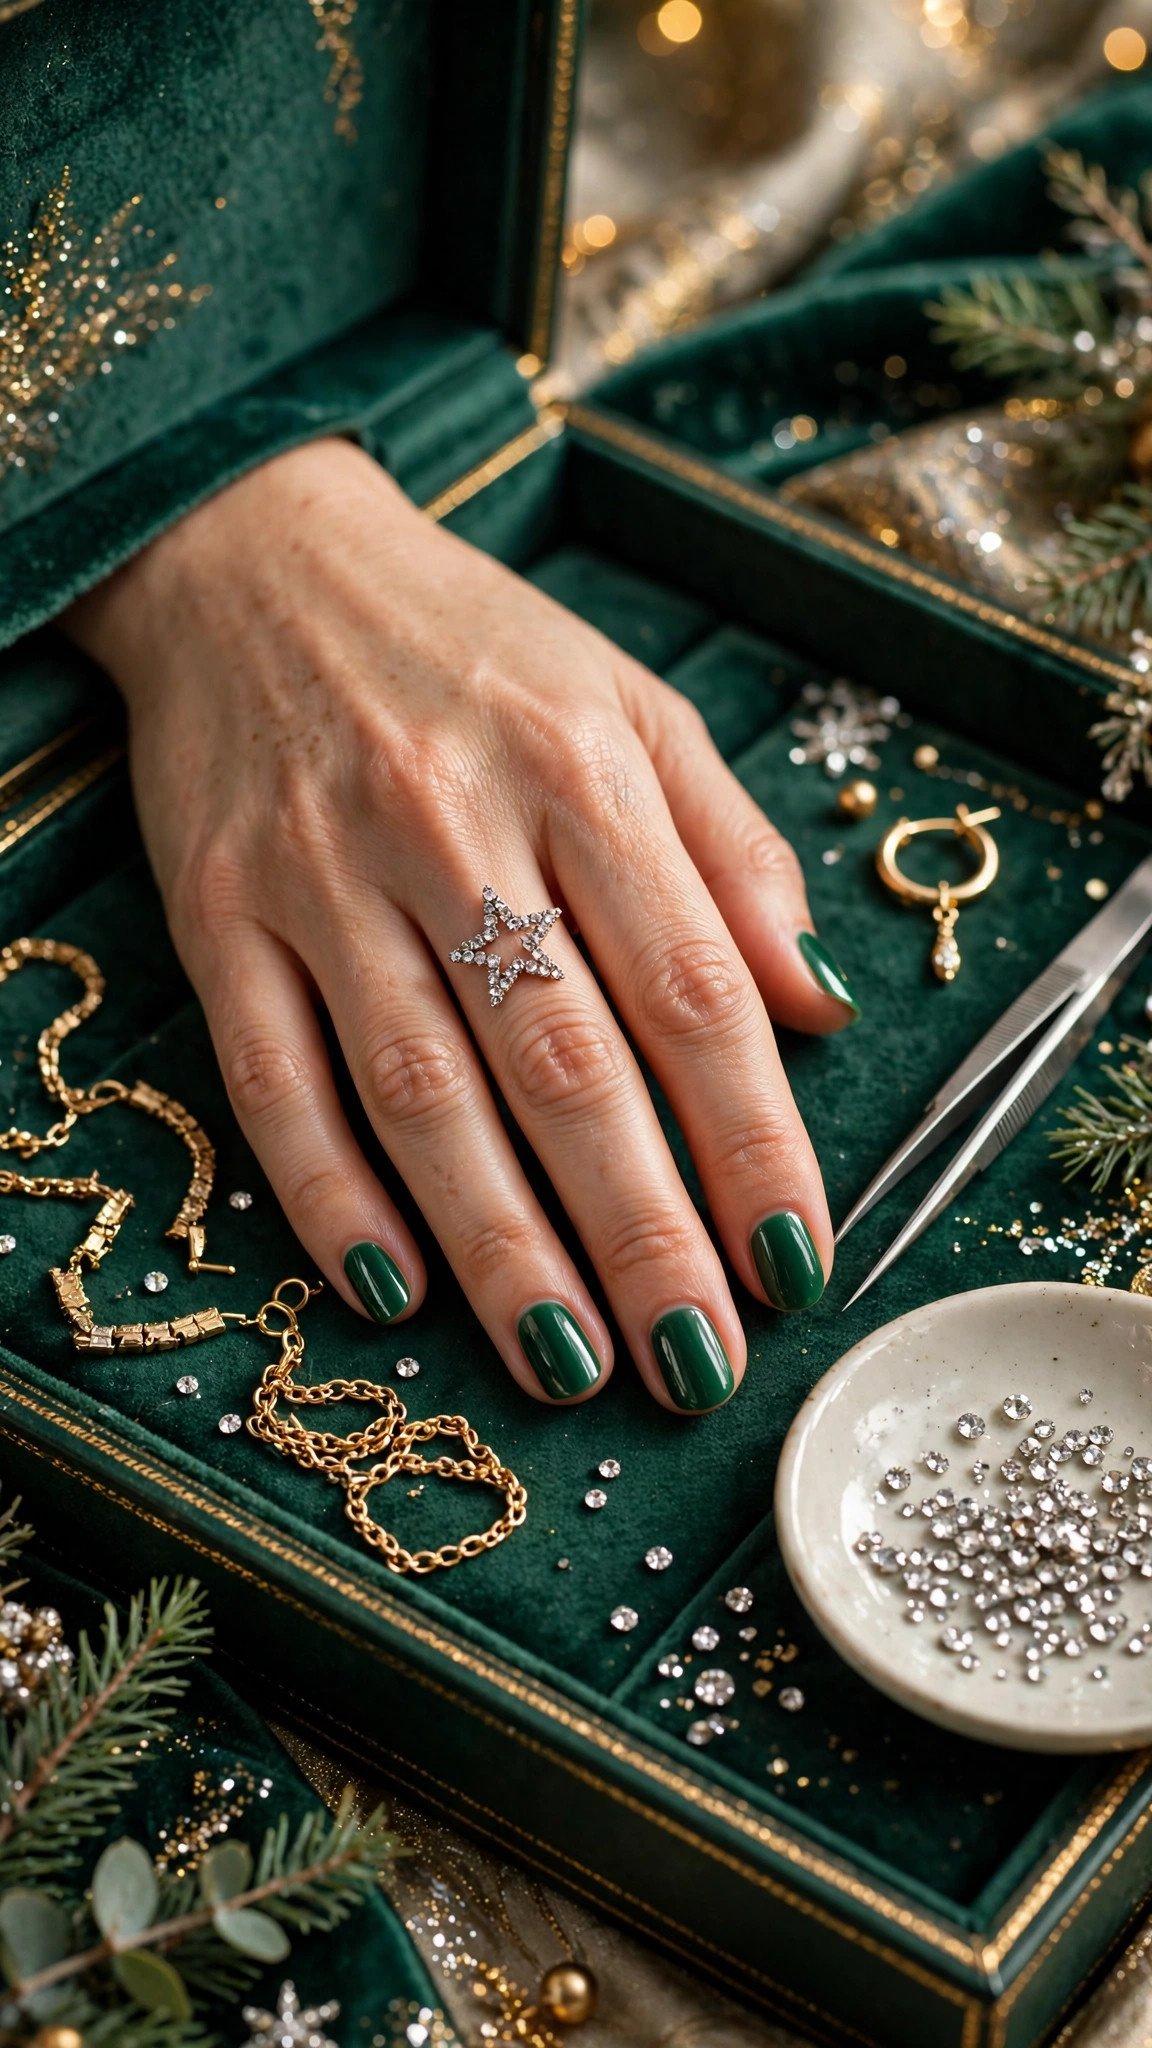
A broken necklace or a single lost earring is a box of nail rhinestones.
Paint a deep emerald green or burgundy base and let it dry. Pick five small rhinestones from the broken jewelry with tweezers and place them in a star shape on the ring finger: one at the top, two at the sides, two at the bottom. Press each stone into a drop of clear top coat while it is still wet, then seal the whole nail with two more coats. Short almond nails suit the star best, because the shape gives you a centered canvas. The stones will last 1-2 weeks if you seal them well.
Pro Tip: Place the stones with a toothpick dipped in top coat instead of tweezers. The sticky tip picks up a stone easily and lets you set it down exactly where you want it.
See rhinestone nail ideas or how to apply nail gems.
This one costs nothing and takes about 30 minutes.
14. Q-Tip Dotted Christmas Lights Garland
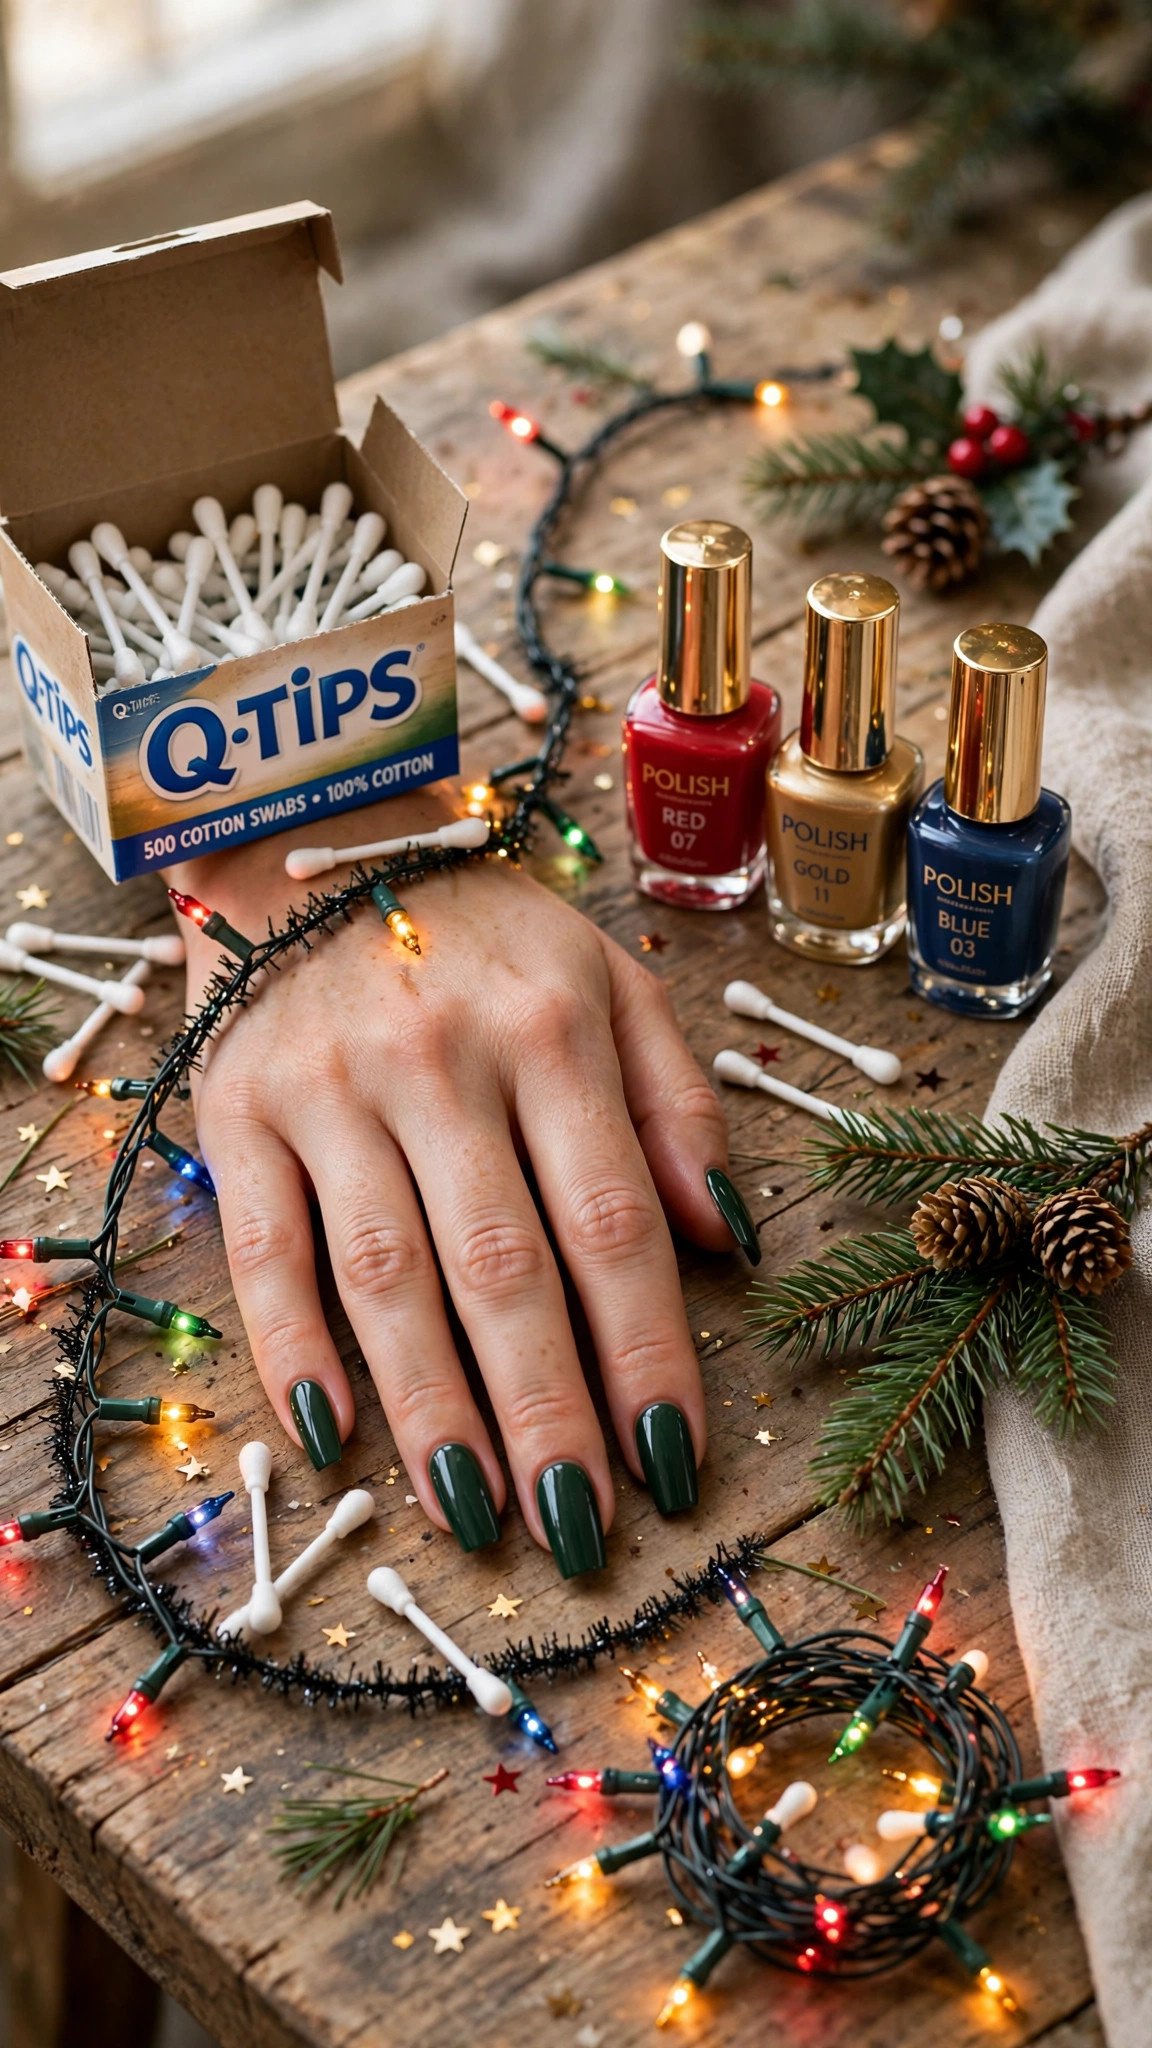
A Q-tip and three polish colors are all you need for a string of Christmas lights across your nails.
Paint a dark green or navy base. Use the tip of a toothpick to draw a loose, swooping black line across each nail, like a sagging string of lights. Then dip a Q-tip into red polish and dot a bulb just below the line, then gold, then blue, repeating the colors along the wire. Keep each bulb about 3 mm across and space them about 4 mm apart.
Pro Tip: Dot the bulbs slightly below the wire, not on it, with a tiny gap. A bulb sitting on the line looks like a blob, while a bulb hanging just below it looks like a real light.
Browse Christmas lights nail ideas or garland nail art.
This one costs nothing and takes about 30 minutes.
15. Bobby Pin Christmas Wreath
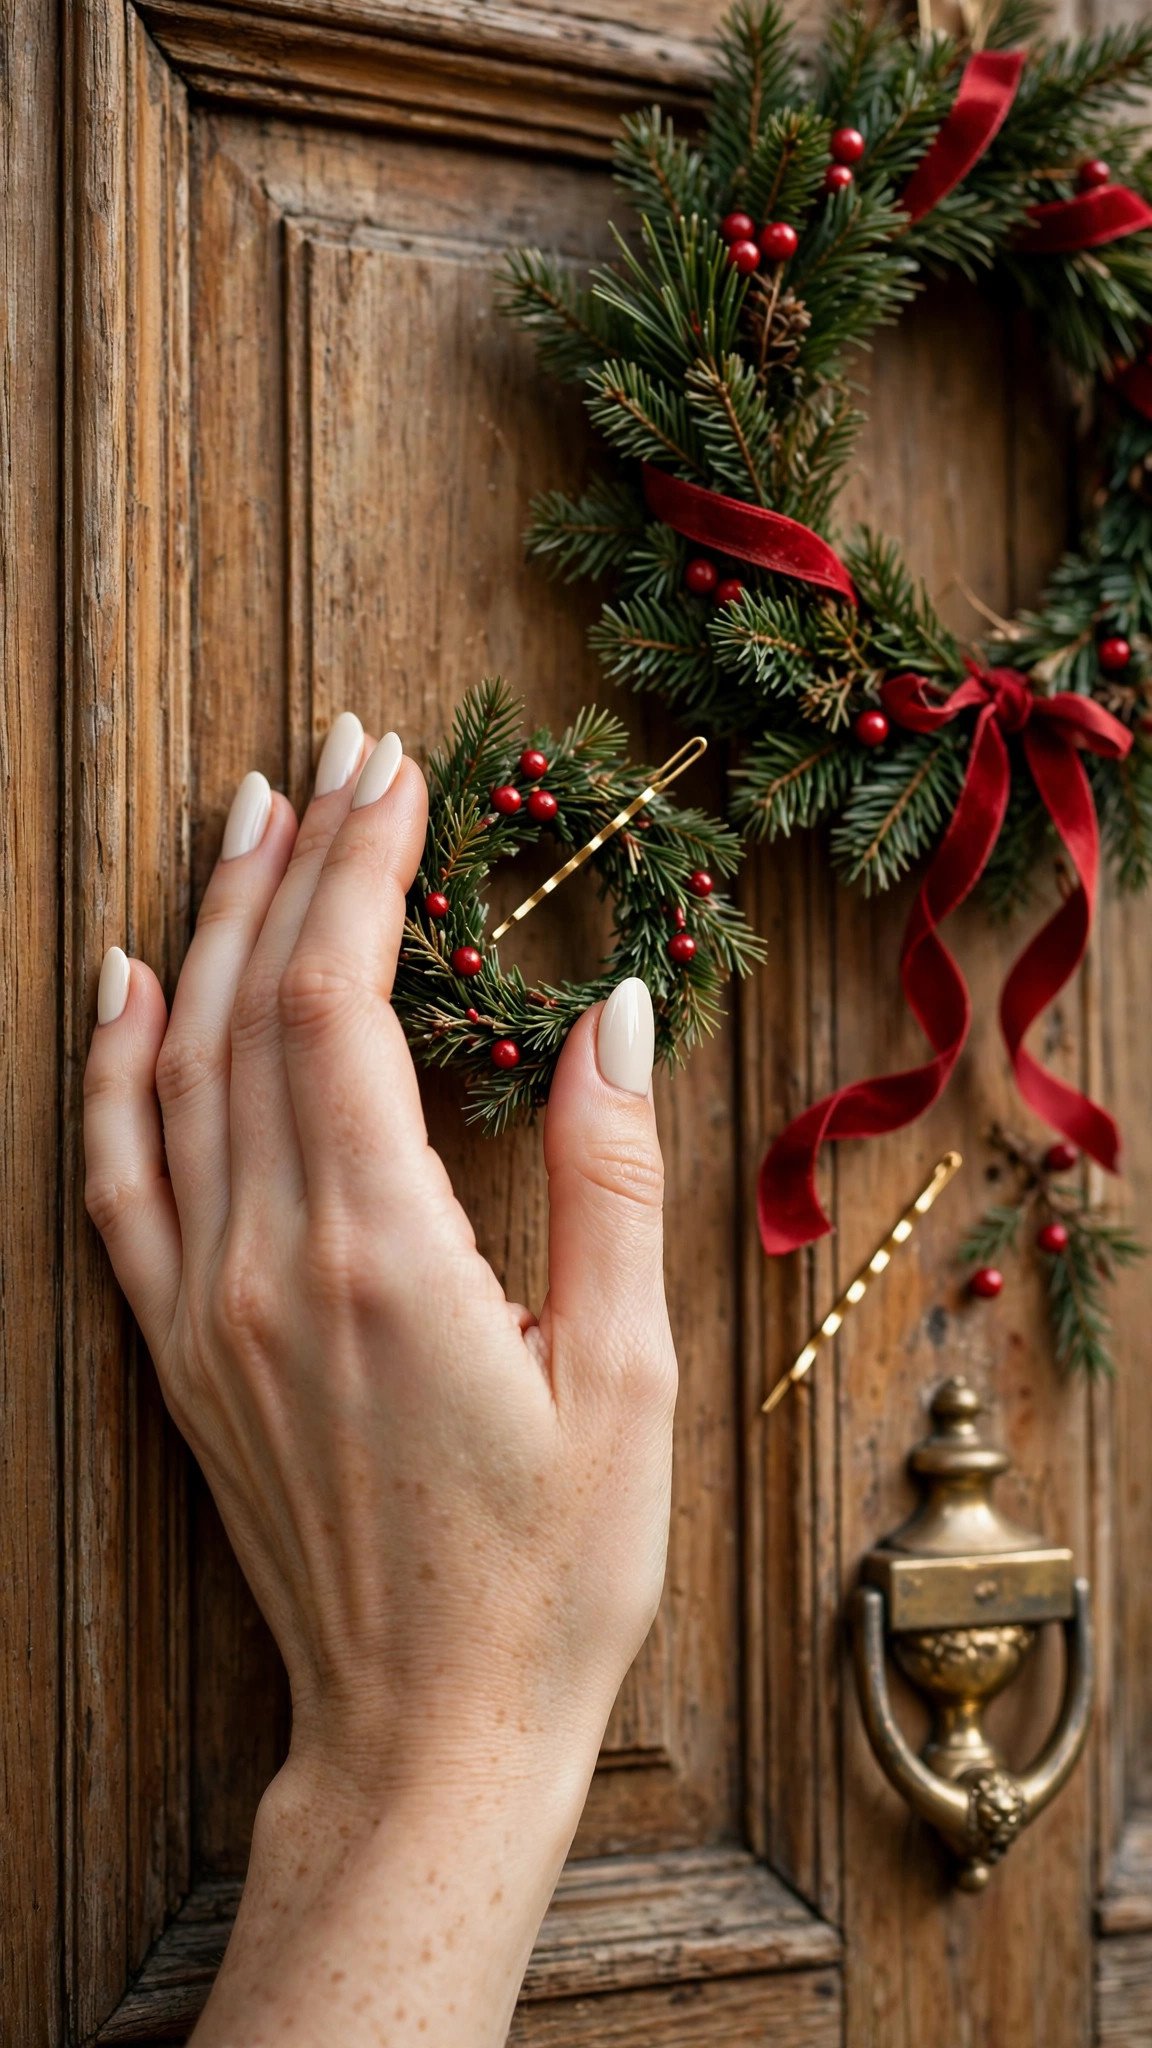
A bobby pin dotted in a circle makes a wreath, and three red dots make its berries.
Paint a cream or sheer nude base. Dip the ball end of a bobby pin into dark green polish and dot a circle of about 8 mm across on the ring finger, placing ten to twelve dots close together so they read as a wreath. Then dip the pin into red polish and add three tiny berry dots on the circle, and use a toothpick to add a small red bow at the bottom.
Pro Tip: Dot the wreath circle in two passes, first a ring of green dots, then a second ring slightly inside the first. The double layer looks full and leafy instead of sparse.
See wreath nail ideas or bobby pin nail art.
This one costs nothing and takes about 30 minutes.
16. Toothpick Candy Cane Swirls

A toothpick dragged through wet red polish makes a candy cane swirl that no brush can copy, because the point is so fine that the swirl stays delicate instead of turning into a blob.
Paint a white base and let it dry. Place a small drop of red polish near the cuticle, then drag the sharp end of a toothpick through it in a slow spiral toward the tip, letting the line thin out as you go. Reload the toothpick for each nail and keep the spiral loose, with two or three turns at most. Oval nails of 4-5 mm free edge give the swirl room to breathe. I tried tight spirals once and they looked like a fingerprint, so loose is better.
Pro Tip: Work while the red drop is still wet and do not go back over a finished swirl. A second pass drags the line and turns the swirl muddy.
Browse candy cane nail ideas or toothpick swirl guide.
This one costs nothing and takes about 25 minutes.
17. Foil Transfer Gold Star Topper

Kitchen foil does more than cut shapes: pressed onto tacky polish and peeled away, it leaves a gold star transfer that looks like real foil nail art.
Paint a deep burgundy or forest green base and let it dry for about ten minutes, until it is tacky to a light touch. Cut a small star from gold or silver foil, press it onto the ring finger with a fingertip, and rub it gently for ten seconds. Peel the foil away slowly and the star shape stays behind as a metallic transfer. Seal with a no-wipe top coat if you have gel, or two coats of regular top coat.
Pro Tip: Test the tackiness on one nail first. If the foil slides, the polish is too wet; if nothing transfers, it is too dry and you need a fresh thin coat.
See foil transfer nail ideas or gold star nail art.
This one costs nothing and takes about 30 minutes.
18. Sewing Thread Present Bow

A few centimeters of red sewing thread, laid into wet top coat, makes a present bow with real texture.
Paint a cream or white base and let it dry. Cut two short lengths of red thread, about 8 mm each, and lay them in a small bow shape on the ring finger: two loops and two tails, like a tiny gift bow. Press each piece gently into a drop of clear top coat while it is wet, then seal the whole nail with two more coats so the thread cannot snag.
Pro Tip: Use polyester thread, not cotton. Cotton thread absorbs top coat and goes limp, while polyester thread keeps its shape and shine.
Browse bow nail ideas or thread nail art guide.
This one costs nothing and takes about 30 minutes.
19. Cotton Ball Snow Texture

Pull a cotton ball apart and you have the fluffiest snow texture in this list.
Paint an icy blue or deep navy base and let it dry. Brush white polish onto the tip half of each nail, then press a tiny pinch of pulled cotton fibers onto it while it is still wet. Pat the fibers down gently with a fingertip, then seal with one light coat of top coat, just enough to hold the fibers without flattening them.
Pro Tip: Use the smallest pinch you can manage. A big clump looks like cotton wool, while a whisper of fibers looks like snow.
See snow texture nail ideas or cotton ball nail art.
The texture can snag, so file the edges smooth.
This one costs nothing and takes about 25 minutes.
20. Hair Pin Dotted Snowman Faces
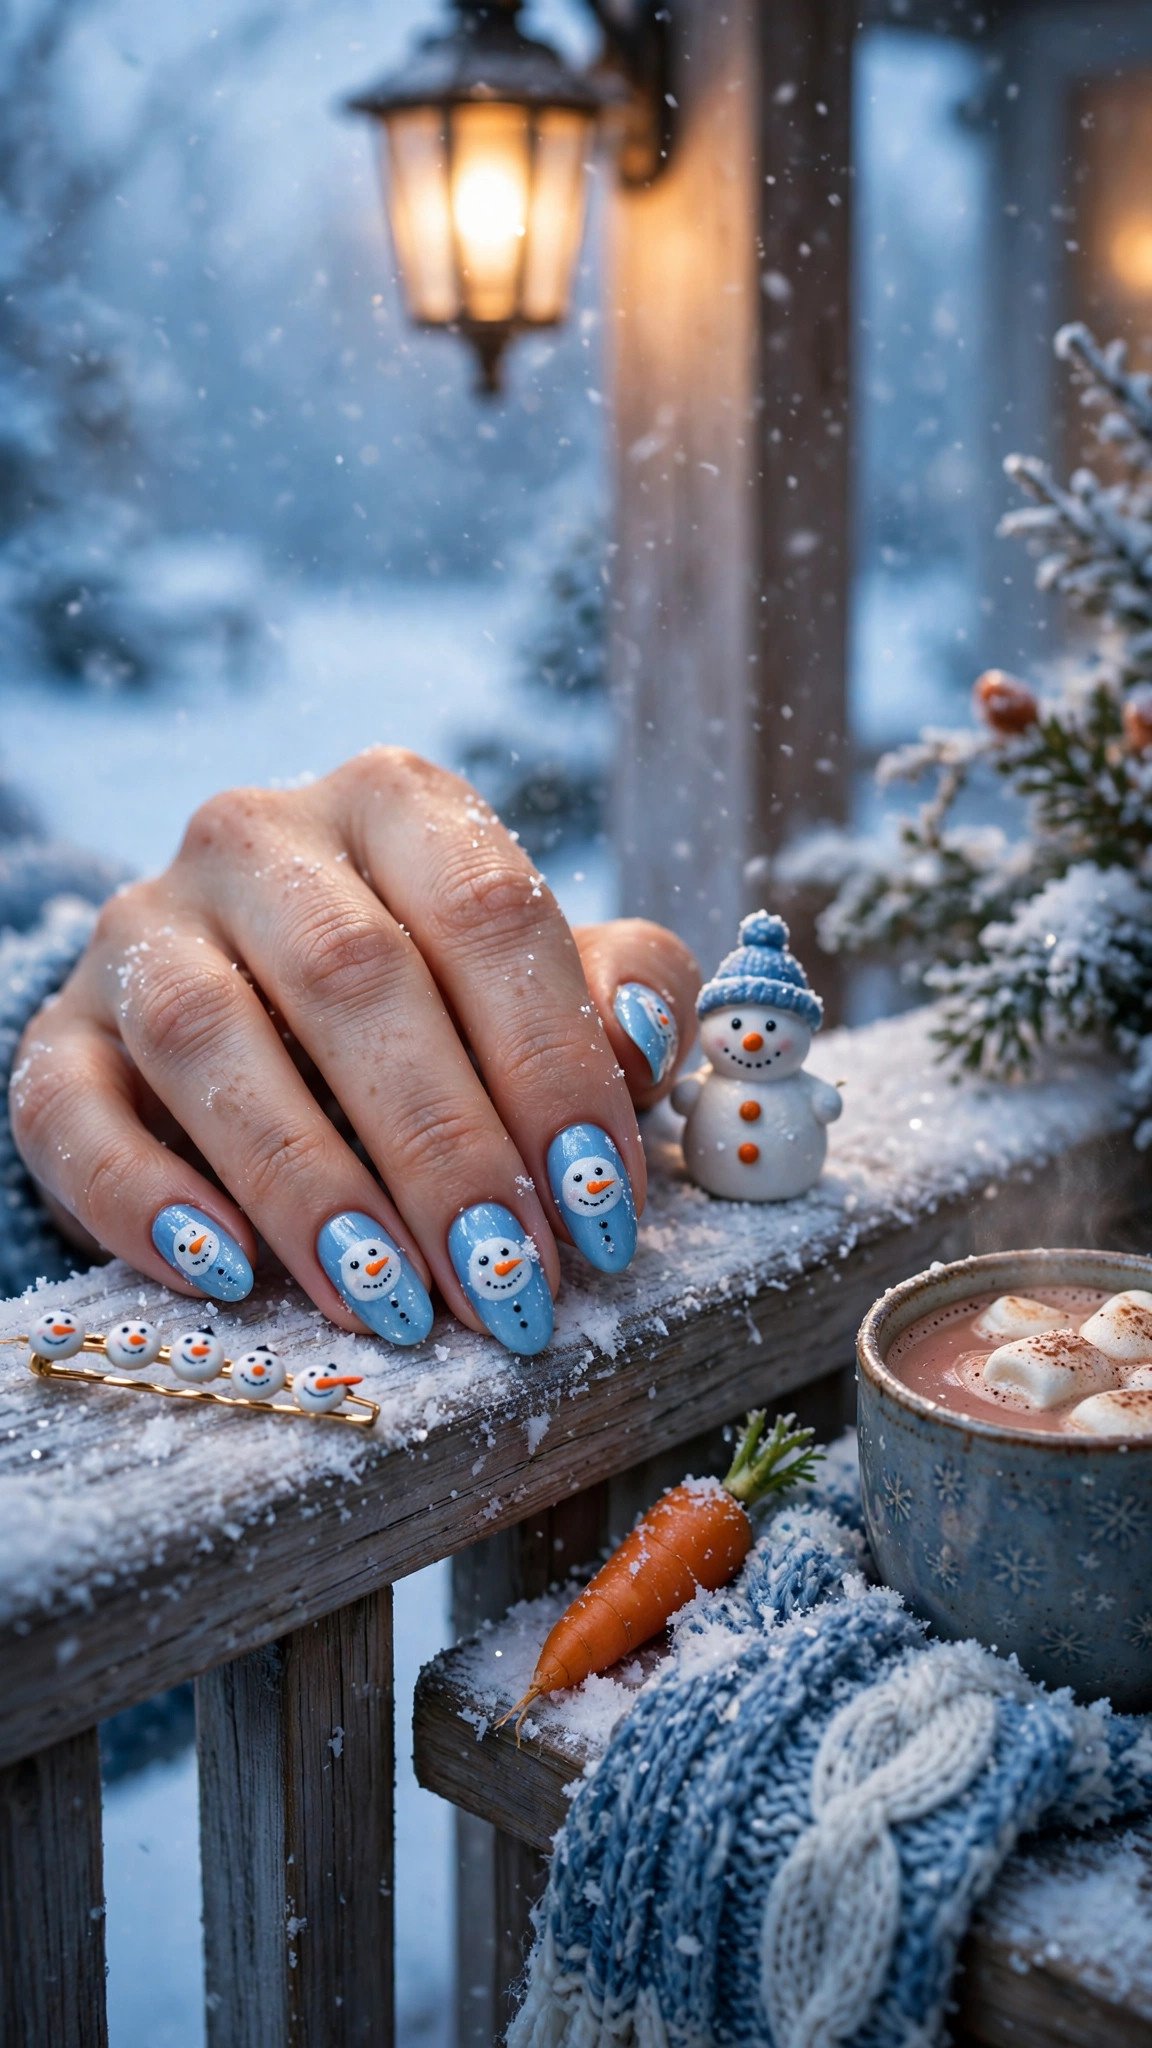
A hair pin is a dotting tool with two ends, and a snowman face needs exactly two sizes of dots: a big white circle for the head and tiny black dots for the eyes.
Paint an icy blue or white base. Use the ball end of a hair pin dipped in white polish to dot a snowman head, about 5 mm across, near the tip of the ring finger. Add two tiny black dots for eyes with a toothpick, a small orange triangle for the carrot nose, and three black dots down the nail for buttons. Keep one snowman per hand and the rest of the nails plain blue, so the design stays cute instead of busy.
Pro Tip: Draw the carrot nose last, after the white head has dried for two minutes. Wet white polish swallows the orange and turns it pink.
Browse snowman nail ideas or hair pin nail art tips.
This one costs nothing and takes about 25 minutes.
21. Old Makeup Brush Snowfall Spray

An old makeup brush you were about to throw away is a snowfall machine.
Paint a deep navy or black base and let it dry fully. Dip an old stiff makeup brush, a fan brush or a toothbrush works too, into white polish and wipe most of it off on a paper towel. Hold the brush about 10 cm above your nails and flick the bristles with your thumb so tiny white specks spray across the nails. Long almond nails of 8-10 mm provide the most room for the snowfall to scatter. Seal with a glossy top coat once the specks are dry.
What to try: Light: one flick per hand for a dusting. Medium: two flicks for a steady snowfall. Heavy: three flicks with a few bigger dots added by toothpick.
See snowfall nail ideas or makeup brush nail art.
This one costs nothing and takes about 20 minutes.
22. Tape Geometric Gift Boxes

Tape is not just for stripes.
Paint a white or cream base and let it dry completely. Cut small tape rectangles, about 6 mm wide, and stick one on each nail as the box. Paint over it in red, green, or gold, then peel the tape off while the polish is still slightly wet. Use a toothpick to draw a thin ribbon line down the middle of each box and a tiny bow at the top.
Pro Tip: Make the ribbon line in a contrasting color, like gold on red or white on green. A ribbon in the same color as the box disappears.
Browse gift box nail ideas or geometric nail art guide.
This one costs nothing and takes about 35 minutes.
23. Sponge Snow-Capped French Tips

A sponge dabbed on the tip of a French manicure makes the white edge look like snow piled on a rooftop, soft and uneven instead of a hard line.
Paint a sheer pink or milky base and let it dry. Dab white polish onto a small piece of kitchen sponge and press it onto the tip of each nail, building the white up in two or three light dabs so the edge fades into the pink instead of stopping in a hard line. Almond nails with a 4-5 mm free edge give the snow room to sit. Seal with a glossy top coat.
Pro Tip: Dab the sponge at a slight angle so the white is thicker at the very tip and fades toward the middle. A flat dab makes a straight line, which defeats the snow effect.
See French tip nail ideas or sponge gradient guide.
This one costs nothing and takes about 25 minutes.
24. Safety Pin Dotted Ornament Baubles

A safety pin from your sewing kit has a head just big enough to dot a bauble, and its point draws the tiny hook at the top.
Paint a deep red, green, or navy base. Dip the head of a clean safety pin into gold or silver polish and press it onto the nail to make a round bauble, about 4 mm across. Then use the point of the pin to draw a tiny hook and a short line above the bauble, like the string it hangs from. Oval nails of medium length let you hang two baubles per nail at different heights.
Pro Tip: Open the safety pin and use the head end only. A closed pin wobbles in your fingers and the dots come out uneven.
Browse ornament nail ideas or safety pin nail art tips.
This one costs nothing and takes about 25 minutes.
25. Junk-Drawer Ornament Marble

The last design uses everything at once: every half-empty polish in your junk drawer, marbled together into an ornament swirl.
Gather three or four old polishes in Christmas colors, red, green, gold, and white work best. Paint a white base and let it dry. Drop a little of each color onto the nail, then drag a toothpick through the drops in slow S-curves to marble them together. Do not overmix: three or four passes are enough, and more turns the marble muddy.
Pro Tip: Use polishes that are still thin and fluid. A thick, gloopy old polish will not marble, it will just sit in a lump, so thin it with a drop of polish thinner first.
See marble nail ideas or how to mix old polishes.
This one costs nothing and takes about 30 minutes.
Getting Started With Christmas Nails Using Stuff You Already Own
The easiest first step is to pick one household tool, not one design. A toothpick, a cotton swab, or a bobby pin each unlock a whole family of designs, and starting with one tool teaches you how it behaves before you try detail work.
The most common beginner mistake is skipping prep. Push back the cuticles, buff the nail surface lightly, and wipe with alcohol before the base coat. Without that, even a perfect design lifts within a few days.
What to buy first: nothing. That is the point of this list. Open your kitchen drawer and your makeup bag and you already have the foil, the toothpicks, the tape, the sponge, and the old eyeshadow. If you do need one thing, buy a good base coat and a good top coat, which cost about $10-15 together and make every design in this list last longer.
For timeline, regular polish takes about 30 minutes and lasts 5-7 days.
Frequently Asked Questions
What are the best Christmas nail designs to do with stuff you already own? The best zero-cost Christmas nail designs are toothpick snowflakes, cotton swab polka-dot ornaments, and a kitchen foil Christmas tree. Each needs only one household item and one or two polish colors. Most take under 30 minutes and cost nothing in new supplies.
Can I really do Christmas nail art without buying any tools? Yes, and most of the designs in this list prove it. A toothpick is a dotting tool, a bobby pin is a finer dotting tool, Scotch tape is a stencil, a kitchen sponge is a gradient tool, and old eyeshadow is loose glitter pigment. The only things worth buying are a good base coat and top coat.
How long do DIY Christmas nails last? Regular polish lasts about 5-7 days, gel lasts 2-3 weeks, and designs sealed with two coats of top coat last the longest. Hand-painted details and foil decorations tend to wear at the tips first. Gel polish should not stay on longer than three weeks, so book a removal or refill.
Can I do these Christmas nail designs on short nails? Yes, and many look better short: try the Toothpick Snowflakes, the Bobby Pin Holly Berries, or the Safety Pin Ornament Baubles. Keep designs small, around 4-6 mm, and avoid dense patterns. Short nails of 2-4 mm free edge hold simple art cleanly.
How much do Christmas nail designs cost at a salon? A simple gel set with an accent nail costs about $45-70, and a hand-painted full set costs $70-85. Foil, rhinestones, and 3D decorations add about $5-15. Prices vary by city and technician, so confirm before booking. Every design in this list costs $0-10 at home because the tools come from your own house.
A Few Final Thoughts
The best Christmas nails using stuff you already own prove that a good manicure is about ideas, not equipment. Across these 25 designs, the pattern is simple: one household item, one clear idea, and a glossy top coat make the biggest difference. Whether you choose a ten-minute toothpick snowflake or a foil Christmas tree on a quiet evening, your nails will look intentional all season. A small change, like one accent nail or a new finish, can transform your whole hand. Open the drawer, pick one of the 25, gather your tools this week, and enjoy the season.