
Somewhere between the 2-inch crop and the 4-inch grown-out stage, every pixie cut hits a wall: the top layer flops into your eyes, and the sides are still too short to tie back. Half-up styles for pixie cuts fix that problem and, honestly, make short hair more fun to style than most people expect. This guide covers 15 looks that work on lengths from about 2.5 inches on top to a chin-grazing long pixie, across fine, thick, straight, and curly textures. Each one comes with the pins, products, and salon wording that made it work in practice. Ready? Let’s explore all 15 of them.
Quick answer: For fine, straight hair, start with the mini top knot (style 1) or pinned-back bangs (style 7); both need only about 3 inches on top. For thick or curly hair, the pineapple pouf (style 10) and braided crown (style 6) hold best. For a wedding or dinner, the pearl-pin waves (style 15) take roughly 10 minutes.
Why Half-Up Styles for Pixie Cuts Are Worth Your Time
A pixie cut is usually sold as a wash-and-go haircut, which is true until the day you want something different. Half-up styling turns the same cut into five or six distinct looks without gaining an inch of length, and most of them take under ten minutes.
The practical benefits add up fast. Lifting the top section off your forehead rescues pixie cuts with bangs that have gotten too long, and it makes growing out a pixie cut far less miserable because you can pin down the stubborn in-between stage. It also suits low-maintenance short haircuts, since you’re working with pins and a little texture spray instead of heat tools.
Here’s the lesser-known part: fine hair often holds pins better than thick hair does. Slightly gritty, second-day strands grip bobby pins, while freshly washed hair slides right out. That’s good news if you have pixie cuts for fine hair, because the usual complaint about limp strands works in your favor here.
These looks suit anyone with at least 2.5 to 3 inches on top, whether you’re mid grow-out or keeping a long pixie. If your top layer is shorter than that, stick to the bang-focused styles, which I flag below. If you have thinning or sensitive areas, check with a dermatologist or stylist before pulling hair tight.
At a Glance
- Most of these styles need just 3 to 4 inches on top and four to six bobby pins.
- Second-day, lightly textured hair holds pins far better than freshly washed hair.
- Styles 1, 5, and 7 take under five minutes and suit beginners.
- Curly and coily textures get the best hold from braids, pouf shapes, and spring clips.
- Trim the nape and sides every 4 to 6 weeks so the half-up shape stays crisp.
| Style | Best Face Shape | Hair Type | Maintenance | Length |
| Mini Top Knot | Oval, long | Straight to wavy | Low | 3-4 in top |
| Pompadour Pouf | Round, square | Medium to thick | Medium | 3.5-4 in front |
| Twisted Crown | Heart, oval | Layered, wavy | Medium | 3+ in layers |
| Tiny Ponytail | Round, diamond | Straight, thick | Low | 4+ in top |
| Snap Barrettes | All shapes | Straight to wavy | Very low | 2.5+ in |
| Braided Crown | Oval, square | Curly, coily | Medium | 4-5 in top |
| Pinned-Back Bangs | Heart, long | Fine, straight | Very low | 2.5-3 in bangs |
| Victory Roll | Oval, heart | Medium, wavy | High | 4 in front |
| Headband Half-Up | Round, square | Any | Very low | 3+ in |
| Pineapple Pouf | Oval, round | Curly (3B-4A) | Low | 4+ in |
| Slicked-Back Wet Look | Oval, square | Straight, thick | Medium | 3-4 in |
| Faux Hawk Fan | Oval, long | Thick, straight | Medium | 3.5+ in |
| Undercut Half-Up | Heart, oval | Thick | High | 4 in top, short sides |
| Mini Claw Clip | Round, oval | Wavy to curly | Very low | 4+ in |
| Pearl-Pin Waves | Oval, heart | Fine to medium | Medium | 3.5-4 in |
1. Mini Top Knot Half-Up on a Grown-Out Pixie

A small knot at the crown is the quickest fix for a top layer that’s too long to ignore and too short for a ponytail.
You need about 3 inches on top, a texture spray, and four bobby pins in your hair color. Section hair from temple to temple, a band roughly 2 inches wide, twist it once, and coil it into a knot the size of a walnut. Push two pins through from opposite directions so they cross.
The first time I tried this on freshly washed hair, it slumped out within an hour. Second-day hair with a little dry shampoo stayed up through a full workday. It suits straight to wavy hair and can look scraggly on very fine strands, so keep the knot small.
Pro Tip: Spritz the section with texture spray before twisting. The grit gives the pins something to grab, which keeps the knot up for 8 hours or more.
See our guide to growing out a pixie cut, and read Byrdie’s pixie grow-out advice for a realistic timeline.
Start with one knot and nudge it forward or back until it flatters your cheekbones.
2. Half-Up Pompadour Pouf With Bobby Pins
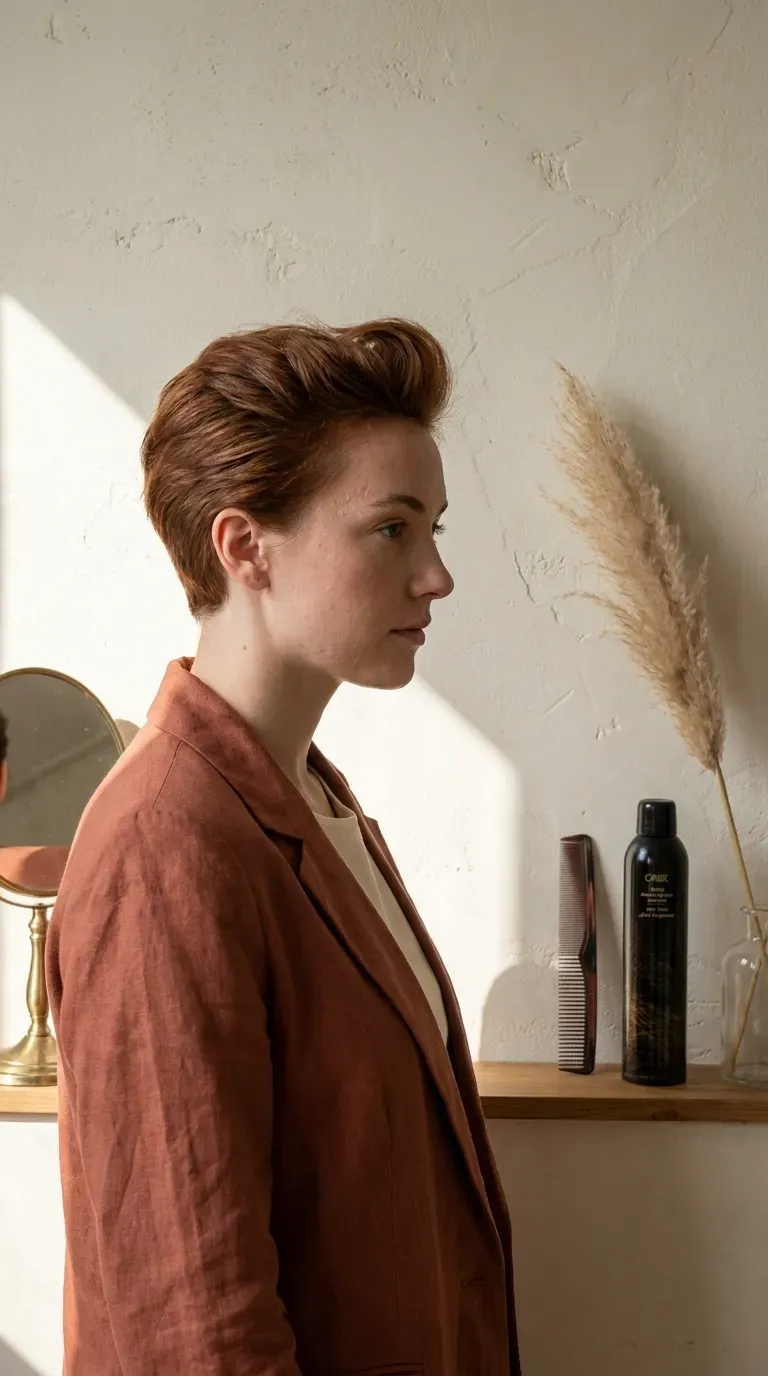
Volume at the front balances a short cut and visually lengthens a round face.
You need 3.5 to 4 inches at the front, a teasing comb, and a strong-hold hairspray. Backcomb the roots of the front 2-inch section lightly, smooth the top layer over it, sweep everything back, and pin at the crown with three crisscrossed bobby pins. The whole routine takes about six minutes.
I over-teased the first time and ended up with something closer to a helmet. Two or three passes of the comb is plenty. This shape works best on medium to thick hair and can collapse on very fine hair by midday.
- Beginner: A smooth side-part pouf with two pins.
- Advanced: A 2-inch lift built with a flat-iron bump at the roots.
- Avoid: Heavy wax, which weighs the pouf down on fine hair.
Browse more pixie volume ideas or read Allure’s hair volume tips before you tease.
A little lift at the front goes a long way, so build it in small steps.
3. Twisted Crown Half-Up for a Layered Pixie
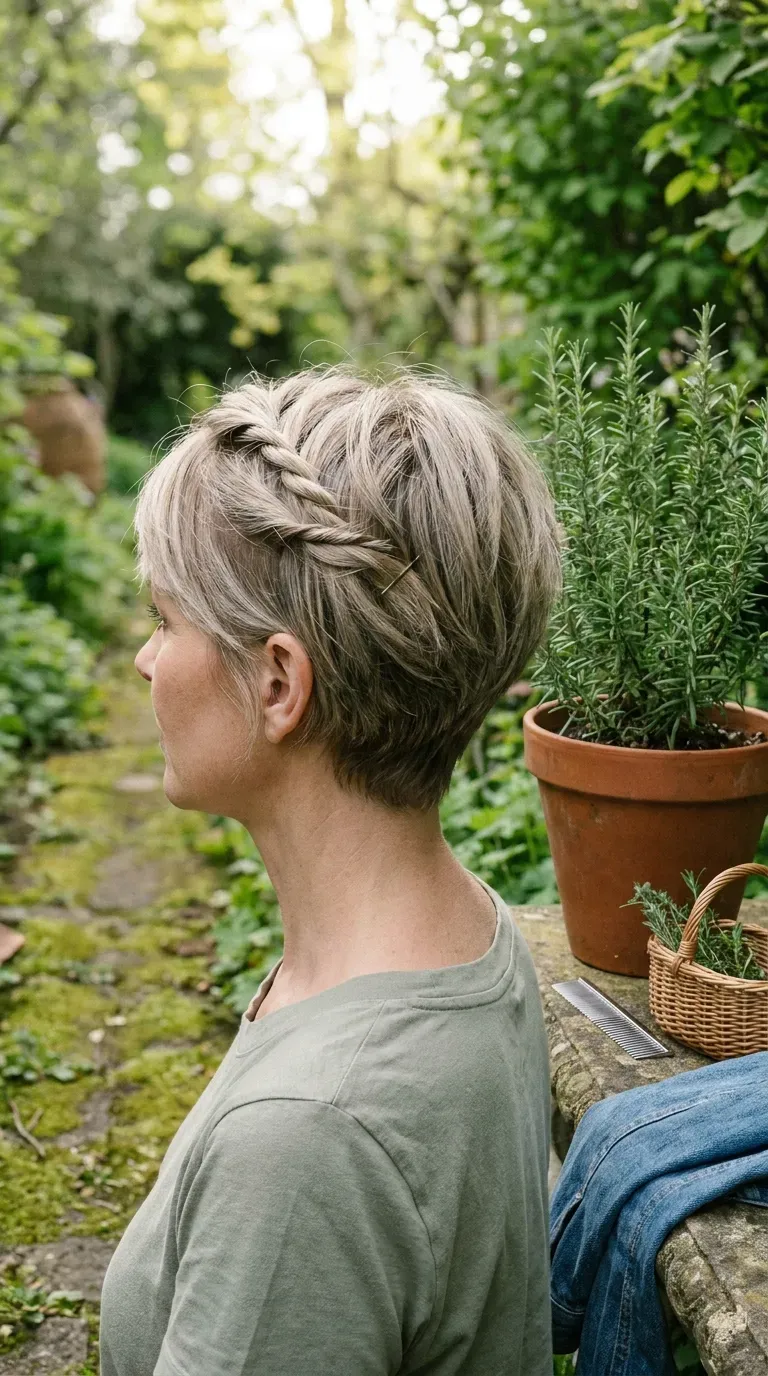
Two rope twists across the crown give a layered pixie a braided look without any braiding skill.
You need 3 inches or more in the layers, six bobby pins, and a light pomade. Take a one-inch section at the temple, twist it away from your face while adding hair from above, and pin behind the ear. Repeat on the other side and cross the pins at the back for hold.
The mistake I made early on was twisting toward the face, which left the ends poking out like tiny antennae. Always twist away. Ask your stylist for soft layers with the crown left 3 to 4 inches long if you want this to be an option.
Pro Tip: Use a dab of pomade the size of a grain of rice on your fingertips first. It smooths the cuticle so the twist stays tight instead of unraveling.
For more shape ideas, check our layered pixie cut guide and Who What Wear’s short hair styling roundup.
It looks intricate, but once you’ve done it twice, it takes under five minutes.
4. Tiny Half-Up Ponytail on a Long Pixie With Bangs

Yes, a pixie can hold a ponytail, as long as the top section is at least 4 inches.
Gather the hair from crown to forehead, tie it with a clear silicone elastic, then pull the bangs out and leave two face-framing strands. Position matters: the ponytail should sit at the crown, not the back of the head. My first attempt pointed at the ceiling until I moved it an inch back and the shape finally looked intentional.
This works especially well on round and diamond face shapes, since the height adds length. It’s not ideal for very fine, thin hair, which can look sparse once pulled together. Trim the nape and sides every 5 to 6 weeks so the ponytail doesn’t look disconnected from the cut.
See our pixie with bangs styling tips and Elle’s guide to short hair accessories.
Keep the elastic clear and the strands loose, and it reads as casual, not costume.
5. Side-Pinned Half-Up With Metal Snap Barrettes
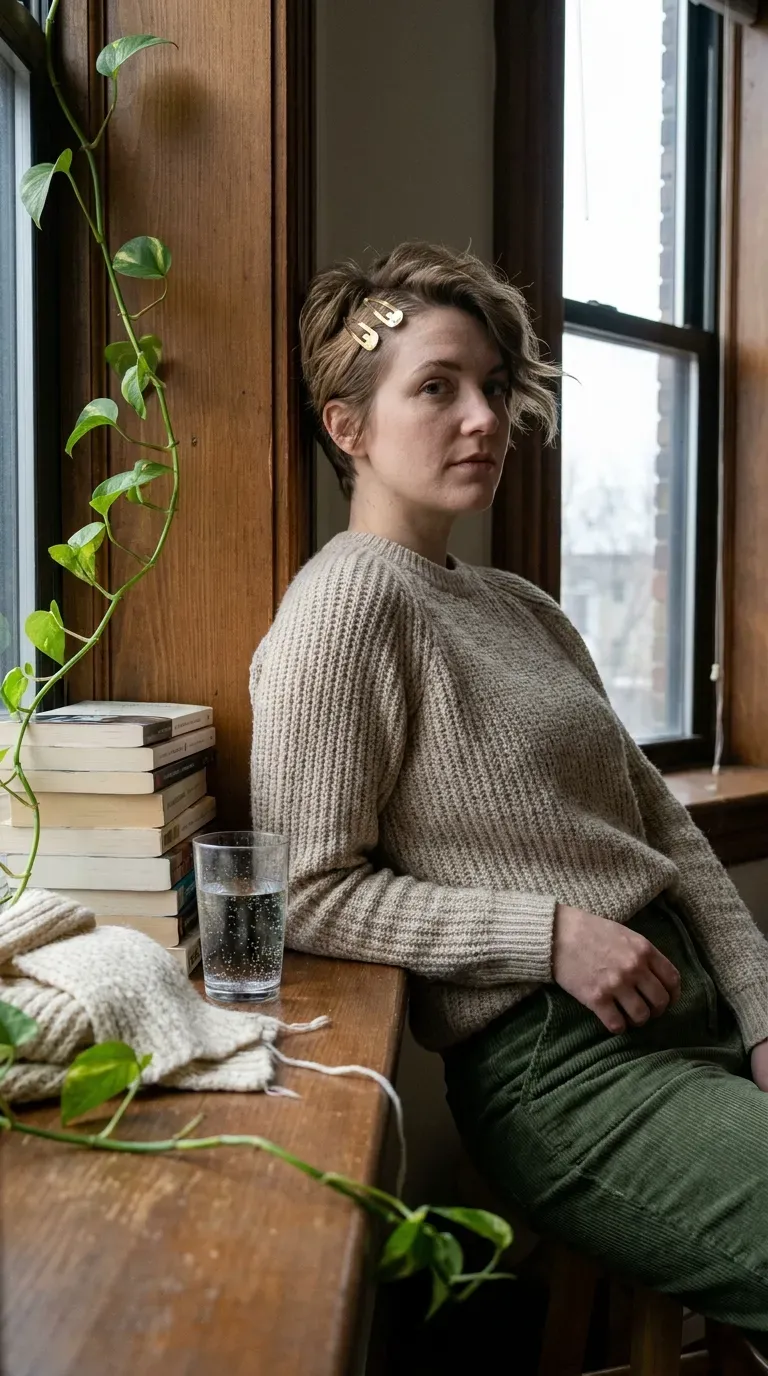
Two barrettes on one side is the least-effort option here and suits any pixie of 2.5 inches or longer.
You need a pair of 2-inch snap clips (about $5 to $12) and a bit of texture cream. Part your hair deeply, sweep the heavier side behind the ear, and snap the barrettes in parallel, roughly half an inch apart. Angle them very slightly so the pair looks deliberate.
I first clipped them at identical angles and the result felt stiff. A small tilt fixed it. Snap clips grip straight to wavy hair well, but coarse curly hair needs a spring or alligator clip instead.
Pro Tip: Clip over a small twisted pinch of hair, not flat strands. The barrette grips the bundle and won’t slide out by lunchtime.
More ideas live in our hair clip styling guide, and Harper’s Bazaar’s accessory coverage shows current trends.
One side, two clips, three minutes: it’s hard to find a quicker fix.
6. Braided Crown Half-Up for Curly Pixie Cuts

Two thin Dutch braids that start at the temples and meet at the crown suit 3B to 4A textures beautifully.
Curly hair shrinks as much as 50% when dry, so you need at least 4 to 5 inches of stretched length to get braids that last. Use a leave-in cream, small clear elastics, and a pick to lift the crown afterward. Braid each side flat, then pin the ends together under a loose curl puff.
- Beginner: One single Dutch braid on the dominant side.
- Advanced: Two braids with the ends tucked and pinned under the puff.
- Avoid: Braiding wet hair, which shrinks and loosens the pattern as it dries.
Read our natural hair pixie care tips and Byrdie’s coily hair styling advice.
Braids tend to look sharper on day two, so don’t redo them too early.
7. Pinned-Back Bangs Half-Up for Fine Hair

If your top layer is only 2.5 to 3 inches, pinning the bangs is the one half-up move that still works.
Twist the front 1.5 inches to the side, then pin it flat above the ear using two bobby pins in an X shape. Fine hair benefits from a pinch of texturizing powder first, since slippery strands otherwise slide out. I lost three pins in one afternoon before I added powder; none disappeared afterward.
This style is great for work because it clears the face without looking fussy. Keep a small gap between your hairline and the pins, so the style looks soft and not scraped back. Avoid it on very short bangs under 2 inches, which will pop out.
Pro Tip: Pin through the twist and into the scalp-level hair beneath it. Anchoring to the base layer, not just the loose ends, keeps fine hair from slipping.
Find more pixie cuts for fine hair on our site, and see Allure’s fine hair product guide.
This one takes under two minutes, which makes it the easiest style on the list.
8. Rolled Victory Roll Half-Up on a Soft Pixie

A small victory roll turns a soft pixie into something that looks pulled from a 1940s photograph.
You need about 4 inches at the front, a tail comb, two bobby pins, and flexible-hold spray. Smooth the front section, wrap it around your finger in a forward-facing roll, slide it off, and pin it flat across the roll’s base. Mist lightly with hairspray and let it set for a minute before touching it.
Expect this to be a fiddly style. The first two attempts at mine unrolled by the end of my commute; the third, with spray applied between each pin, lasted an evening. It works on medium, wavy hair and struggles on very slippery, fine hair.
Browse our vintage hairstyle ideas and Vogue’s hair coverage for reference.
Give yourself 15 minutes the first time, and expect it to speed up with practice.
9. Headband Half-Up for Short Pixie Layers

A wide headband is the lowest-effort way to hold the top section up and the front off your face.
Choose a 2-inch-wide knit, satin, or fabric headband (typically $8 to $25). Place it about an inch behind the hairline, then tease the top layer forward and up over the band so a soft half-up shape forms. Any pixie with 3 inches or more on top works, and this suits round and square faces since the lift adds height.
I tested satin against knit on fine hair. The knit grips better; the satin slid back by midmorning. Rubber-lined bands are worth the extra few dollars.
Pro Tip: Slide the headband on over damp hair, then blow-dry. The hair dries around the band and stays lifted all day.
Explore our headband hairstyle ideas and Elle’s headband trend report.
It’s a two-minute look that works for errands and office days alike.
10. Pineapple Pouf Half-Up for Curly Pixie Cuts

Curls need volume more than polish, and the pineapple shape delivers it in about three minutes.
Use a scrunchie or a soft elastic, a curl gel, and a wide-tooth pick. Flip your head forward, gather the top 3 to 4 inches loosely at the crown with a soft band, then pick out the ends so the pouf expands outward. Leave the sides and nape down.
The mistake to avoid is pulling too tightly. My first try created tension at the temples and flattened the curl pattern. Keep it loose and let the pick do the work. This style is ideal for 3B to 4A textures with at least 4 inches on top.
- Best variation: A side-leaning pouf for oval faces.
- Easiest option: A scrunchie over a flat-twist base.
- What to skip: Heavy oils, which weigh down definition by day two.
Read our curly pixie cut guide and Allure’s curl-care advice.
Freshen it with a spritz of water between wash days and the pouf keeps its shape.
11. Slicked-Back Wet-Look Half-Up Pixie

A wet-look finish makes short hair look deliberate, sleek, and slightly dramatic.
Work a pea-sized amount of water-based gel through damp hair, comb the top 3 to 4 inches straight back, and pin at the crown with two flat bobby pins. A fine-tooth comb gives the cleanest lines. This works best on straight, thick hair and can look flat on fine strands, so skip it if your hair is very thin.
I used a firm-hold gel the first time and the result felt crunchy by evening. A flexible, alcohol-free formula kept the finish glossy and let me restyle later.
See our slicked-back hairstyle ideas and GQ’s grooming guides.
One firm comb pass at the end sets the lines cleanly.
12. Faux Hawk Fan Half-Up on a Thick Pixie
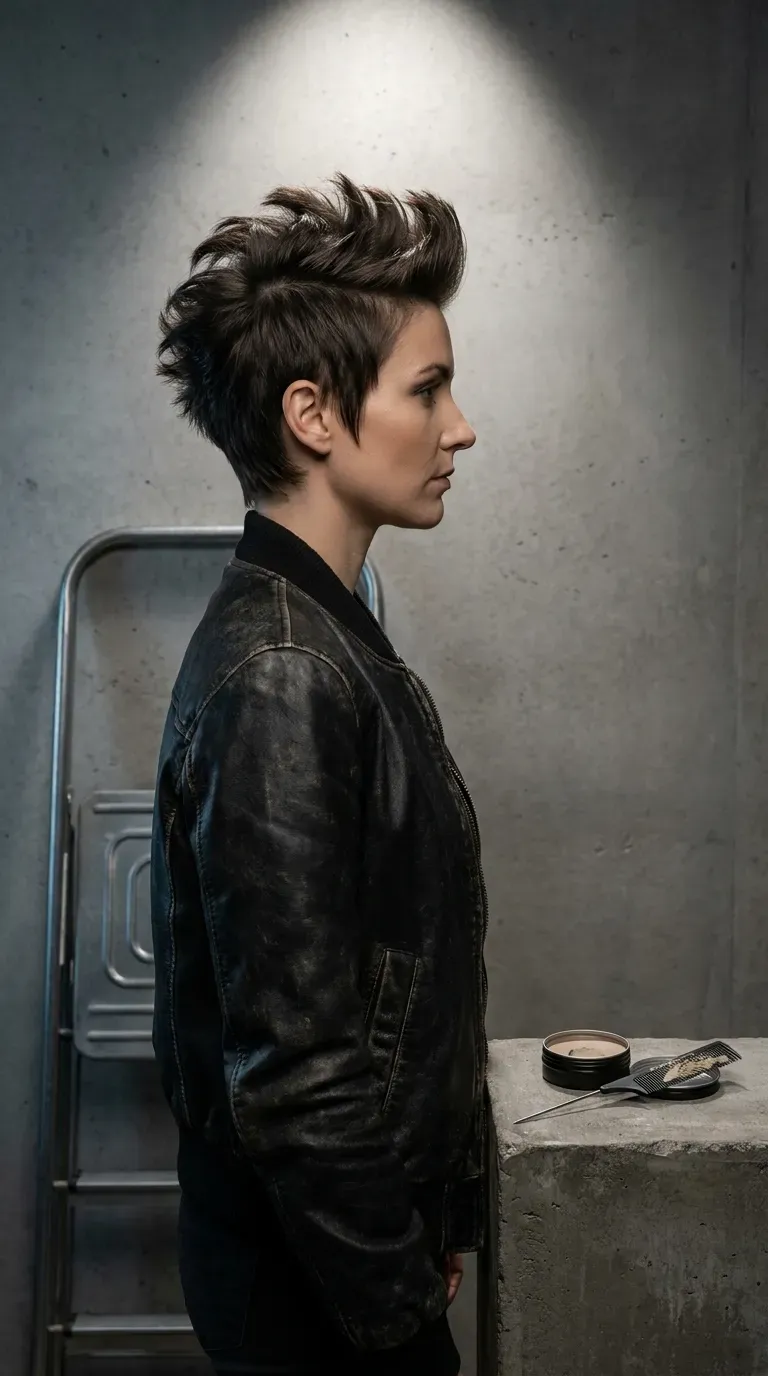
A fanned center ridge gives thick pixie hair a sculpted, high-fashion shape that holds up on its own.
You need 3.5 or more inches on top, matte clay, and four to five bobby pins. Push the top section toward the center, pinch it into a ridge from forehead to crown, and pin from both sides with crossed pins every inch and a half. Finish with clay on the fingertips to separate the tips.
My first try looked like a limp mohawk because I’d used too much product at the base. Apply clay from mid-lengths to ends only. Thick, straight hair holds this beautifully, while fine hair needs a stronger spray or it flops by lunchtime.
Pro Tip: Blow-dry the top section upward with a round brush before pinning. The heat-set lift means you need fewer pins and less product.
See our edgy pixie styling ideas and Allure’s short hair texture guide.
This is the boldest look on the list, so wear it when you want to be noticed.
13. Undercut Half-Up Pixie With a Pinned Top

If you already have an undercut, a pinned top gives you contrast between short sides and a long, sculpted crown.
Ask your stylist for sides clippered to a #2 or #3 guard and the top left at 4 inches. Twist the top section into a flat coil, pin it across the crown, and leave a few loose strands near the front. The shaved sides need a touch-up every 3 to 4 weeks to stay crisp, which is the main upkeep cost.
- Salon wording: Short sides, disconnected top, leave 4 inches.
- Best for: Thick hair, heart and oval faces.
- Skip if: You don’t want to commit to monthly clipper maintenance.
Browse our undercut pixie ideas and Byrdie’s undercut hairstyle roundup.
If you want contrast, this style gives it without any extra length.
14. Mini Claw Clip Half-Up on a Long Pixie

A mini claw clip is the easiest way to get a half-up look from a pixie without any pins at all.
Choose a clip about 2 inches wide with flexible teeth ($6 to $15). Gather the top section, give it a quick twist, and clamp the clip at the crown so the ends fan out. Pixies with 4 or more inches of wavy or curly hair hold best, because the texture gives the teeth something to grip.
I found that smooth, straight hair slipped out of larger clips within an hour, while a mini clip with a matte coating stayed in place. If your hair is very fine, add a bit of texture spray first.
Pro Tip: Twist before you clamp. A single twist adds tension so the clip grips the hair instead of sliding, and it keeps the shape for 6 to 8 hours.
Find more in our claw clip hairstyle guide and Who What Wear’s claw clip coverage.
It’s a one-handed style, which makes it ideal for rushed mornings.
15. Pearl-Pin Waves Half-Up for Weddings and Events
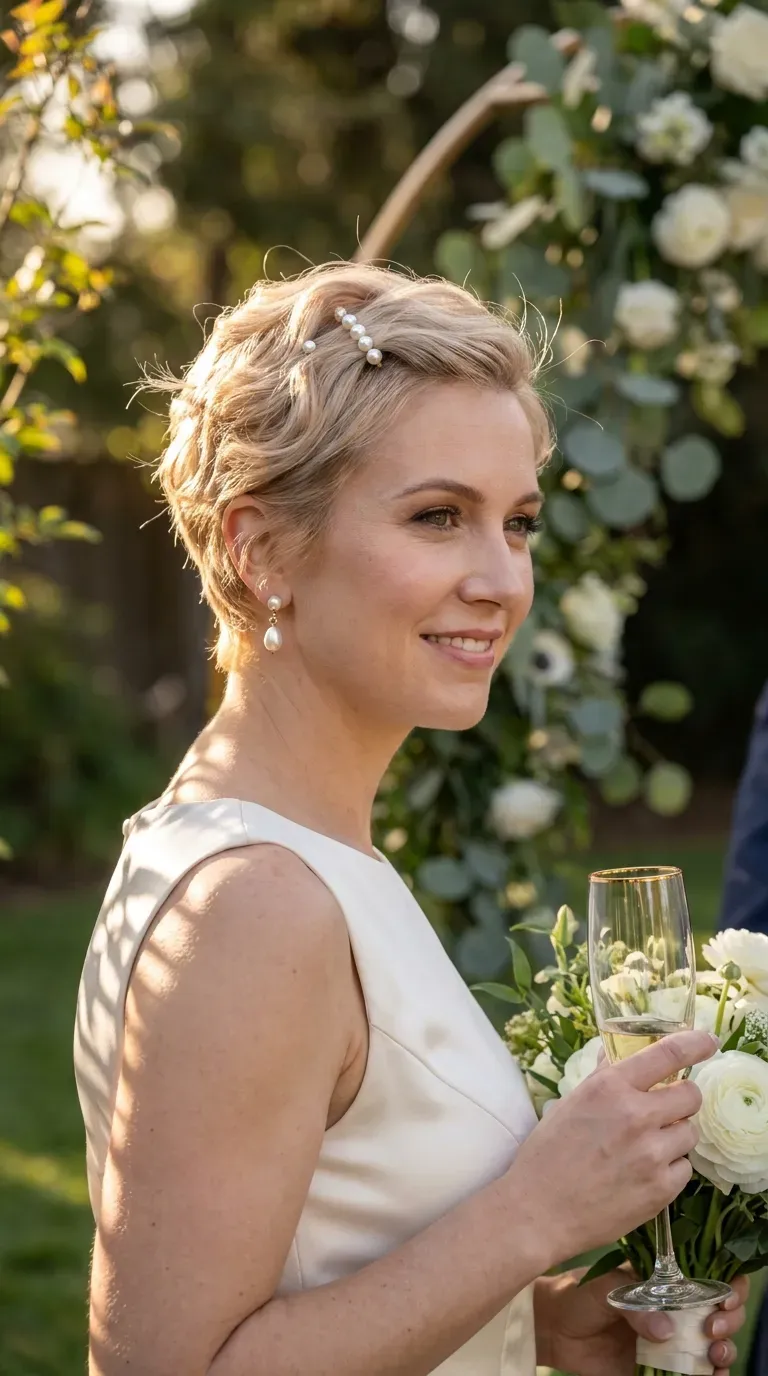
Soft waves with pearl pins turn a short cut into a formal style that still feels personal.
Curl the top 3.5 to 4 inches with a 1-inch curling iron at about 300°F (150°C) for fine hair, then brush out lightly with your fingers. Sweep the front back, and pin it with three small pearl pins about an inch apart. A flexible-hold spray locks the waves in for the evening. Expect roughly 10 minutes of work.
The common mistake is brushing out the waves with a brush, which strips them into frizz. Use fingers and a bit of shine serum. This works best on fine to medium hair and may need extra pins on thick strands.
See our wedding pixie hairstyle ideas and Harper’s Bazaar’s bridal hair coverage.
Test it once before the event so you know how long it lasts.
Getting Started With Half-Up Styles for Pixie Cuts
The easiest first step is pinned-back bangs (style 7). It takes two bobby pins and about two minutes, and you’ll learn right away how your hair responds to pins.
The most common beginner mistake is working on freshly washed, slippery hair. Pins and elastics slide off clean strands, so start with second-day hair or add a dry texture spray before you begin. Over-teasing is the runner-up: two or three passes is plenty.
If you’re buying one thing, get a pack of 20 bobby pins in your hair color (around $4 to $8) and a small bottle of texture spray. If you want a salon consultation first, ask your stylist to leave 3 to 4 inches on top with soft layers, and mention that you want to try half-up looks.
For a realistic timeline, expect the first style to feel clumsy for about a week. By the third try, most people can pin a top knot or twist in under five minutes. If you’re growing out a pixie cut, add 4 to 6 weeks to reach the comfortable 4-inch mark, since hair grows about half an inch a month.
Frequently Asked Questions
Can you wear half-up styles with a pixie cut?
Yes, as long as you have at least 2.5 to 3 inches on top. Shorter hair can still be pinned back at the bangs, while 4 inches or more opens up knots, twists, and tiny ponytails. Very short crops under 2 inches won’t hold pins reliably.
How long should a pixie cut be for a half-up style?
Aim for 3 to 4 inches on top for most half-up styles for pixie cuts. Pinned bangs work from about 2.5 inches, and braided or ponytail looks need 4 to 5 inches. Curly hair needs extra length because of shrinkage.
What are the best half-up pixie styles for fine hair?
Pinned-back bangs, snap barrettes, and the mini top knot work best on fine hair. They need little volume and rely on gentle texture, not heavy product. Avoid slick wet-look styles on very fine hair, which can look sparse.
How do I keep bobby pins from sliding out of short hair?
Start with second-day hair or spritz in a dry texture spray, then slide the pin in with the wavy side against the scalp. Cross two pins in an X for extra grip. If pins still slip, a small snap clip or mini claw clip is a better tool.
How often should I trim a pixie to keep half-up styles looking neat?
Trim every 4 to 6 weeks to keep the nape and sides tidy. Undercut styles need a touch-up every 3 to 4 weeks. If you’re growing out, a trim every 8 to 10 weeks shapes the in-between stage.
A Few Final Thoughts
The best thing about these 15 half-up styles for pixie cuts is how little it takes to change the whole look. A couple of bobby pins, a texture spray, and about five minutes can turn a plain cut into something that feels new. Start with the easiest style, then work toward the braided crowns and pearl-pin waves as your confidence grows. The right choice depends on your hair length and texture, not on how daring you feel. Remember that small changes often make the biggest difference, so pick one style this week and wear it out. Your pixie has more range than you think.