
If braiding feels impossible, a twisted bun is your answer. Twisting is the simplest thing you can do with hair: you take a section, twist it until it coils, and wrap it into a bun. There is no over-under pattern to remember, no third strand to drop, and no mirror gymnastics. A twist locks itself in place as you work, which means the style holds itself together while you pin it.
This guide collects 16 twisted bun styles, from a simple two-strand twist bun you can learn in two minutes to a French twist bun that looks like it came from a salon. Every style lists the hair length it needs, the skill level, how long it holds, and the occasion it suits. Every section has a full how-to, one mistake to avoid, and an honest note on hold time and cost. If you can twist a towel, you can do every style in this guide.
Quick Answer: For your first twisted bun, start with the Simple Two-Strand Twist Bun (#1) or the Rope Twist Bun (#5), which need no braiding at all. For a polished work look, try the Twisted Low Bun (#2) or the French Twist Bun (#4). For a romantic evening, the Twisted Chignon (#9) is the best pick. A salon twisted bun costs $35-70, while doing it yourself costs under $5 in pins.
Why Twisted Buns Are Worth Your Time
A twisted bun is the easiest updo that still looks like you tried. Twisting takes seconds to learn, because it is one motion repeated, and it works on almost any hair type, from fine and slippery to thick and heavy. The twist creates texture and grip, so the bun holds far better than a plain bun made from untwisted hair. That is why a twisted bun survives a full workday, a long dinner, or a humid afternoon without sliding loose.
Twisted buns are also wonderfully forgiving. A twist does not need to be neat to look good, because the wrapping hides the uneven parts and leaves only the pretty ridges showing. If a piece falls out, it looks intentional. If the twist loosens a little, the bun looks softer and more romantic. This makes twisted buns the perfect first updo for anyone who has ever given up on braiding, and a reliable everyday style for everyone else.
Finally, twisted buns are endlessly versatile. The same basic twist-and-wrap technique makes a sleek low bun for the office, a messy top knot for the weekend, a romantic chignon for a wedding, or a pair of double twist buns for a festival. Change the bun height, add a scarf or a hair fork, or leave a few pieces loose, and you have a completely different style. Sixteen ideas in this guide all start from that one simple twist.
At a Glance
- All 16 styles take 10 minutes or less, and most take under 5 minutes once you know the twist.
- Fourteen of the 16 styles are beginner-friendly and need no braiding skill at all.
- Twisted buns hold 8-12 hours on average, because the twist locks the hair in place.
- They work best on medium to long hair, but two styles in this guide are made for short hair.
- A salon twisted bun costs $35-70, while a DIY version costs under $5 in pins and elastics.
- Every style works on second-day hair, and most look better with a little texture from dry shampoo.
| # | Style | Hair Length | Skill Level | Hold Time | Occasion |
|---|---|---|---|---|---|
| 1 | Simple Two-Strand Twist Bun | Medium to long | Beginner | 8-10 hours | Everyday and work |
| 2 | Twisted Low Bun | Medium to long | Beginner | 10-12 hours | Office and formal |
| 3 | Twisted Top Knot | Medium to long | Beginner | 8-10 hours | Everyday and gym |
| 4 | French Twist Bun | Medium to long | Intermediate | 10-12 hours | Wedding and formal |
| 5 | Rope Twist Bun | Medium to long | Beginner | 8-10 hours | Everyday and office |
| 6 | Twisted Side Bun | Medium to long | Beginner | 8-10 hours | Date night |
| 7 | Messy Twisted Bun | Medium to long | Beginner | 6-8 hours | Weekend and brunch |
| 8 | Twisted Bun With a Scarf | Medium to long | Beginner | 8-10 hours | Vacation and casual |
| 9 | Twisted Chignon | Medium to long | Intermediate | 10-12 hours | Wedding and formal |
| 10 | Double Twist Buns | Medium to long | Beginner | 10-12 hours | Festival and casual |
| 11 | Twisted Bun for Thick Hair | Thick, medium to long | Intermediate | 10-12 hours | Everyday and work |
| 12 | Twisted Bun for Fine Hair | Fine, medium to long | Beginner | 6-8 hours | Everyday and office |
| 13 | Twisted Bun With Loose Curls | Medium to long | Beginner | 8-10 hours | Date night and party |
| 14 | Twisted Bun for Second-Day Hair | Medium to long | Beginner | 8-10 hours | Everyday |
| 15 | Twisted Bun With a Hair Fork | Medium to long | Beginner | 8-10 hours | Everyday and work |
| 16 | Twisted Bun for Short Hair | Short to medium | Intermediate | 6-8 hours | Everyday |
1. Simple Two-Strand Twist Bun

The simple two-strand twist bun is the easiest updo in this entire guide, and the best place to start if you have never done an updo before. You split your hair into two sections, twist them around each other, and wrap the twist into a bun. That is the whole style, and it takes about two minutes. The twist gives the bun texture and grip, so it looks deliberate and holds far better than a plain bun.
Gather your hair into a low ponytail at the nape and split it into two equal sections. Twist each section clockwise until it coils tightly, then twist the two sections around each other counterclockwise and secure the ends with a small elastic. Wrap the twist around its base into a bun, pin it with bobby pins, and smooth any flyaways with a light-hold hairspray.
Pro Tip: Twist each section tightly before wrapping them together, because a loose twist unravels and you have to start over.
See twisted bun ideas or easy two-strand twist tutorials.
Hold time is 8-10 hours, difficulty is beginner, and cost is under $5. A salon version runs $35-50 and takes about 15 minutes.
2. Twisted Low Bun

A twisted low bun is the most polished style in this guide, and the one to choose for the office or any formal occasion. It sits low at the nape, which keeps the silhouette elegant and understated, while the twist adds just enough texture to make it look intentional. It suits almost every face shape, pairs beautifully with a blazer or an evening dress, and stays neat for hours without needing a single touch-up.
Brush your hair back smoothly and gather it into a low ponytail at the nape. Split the ponytail into two sections, twist them around each other, then wrap the twist around its base into a bun and pin it securely with bobby pins placed in a crisscross pattern. Smooth the top with a boar bristle brush and finish with a light-hold hairspray for a sleek finish.
A mistake I made early on was twisting the sections in the same direction as the wrap, which made the twist loosen. Twist the sections one way and wrap the other way, and the twist locks itself.
See twisted bun ideas or sleek low bun tutorials.
Hold time is 10-12 hours, difficulty is beginner, and cost is under $5. A salon version runs $40-60 and takes about 20 minutes.
3. Twisted Top Knot

A twisted top knot is the fastest way to get your hair completely out of the way and still look put-together. It takes the classic top knot and replaces the plain twist with a two-strand twist, which adds texture and grip. It keeps every strand off your neck, so it is ideal for the gym, a hot day, or a long shift, and it holds so well that you can forget about your hair entirely once it is up.
Pull your hair into a high ponytail at the crown and secure it with an elastic. Split the ponytail into two sections, twist them around each other, then wrap the twist around the base into a knot and pin it with bobby pins. For a fuller knot, tease the ponytail lightly before twisting. Finish with hairspray and pull out a couple of soft pieces at the front if you like.
Pro Tip: Place the ponytail at the very crown, where your head starts to curve, so the knot sits high and flattering instead of sliding toward the back.
See twisted bun ideas or easy top knot tutorials.
Hold time is 8-10 hours, difficulty is beginner, and cost is under $5. A salon version runs $35-50 and takes about 15 minutes.
4. French Twist Bun

A French twist bun is the most elegant style in this guide, and the one to choose when the occasion is formal. The hair sweeps up the back of the head in a vertical roll and tucks into a bun, which creates a long, graceful line that flatters the neck and shoulders. It is a favorite for brides, bridesmaids, and black-tie events, because it stays neat for hours and looks beautiful from every angle in photos.
Gather your hair into a low ponytail, then twist the ponytail upward along the back of your head, rolling it into a vertical twist. Tuck the ends inside the roll and pin the twist in place with long bobby pins or hairpins, working from the bottom up. Shape the top of the twist into a small bun, pin it securely, and smooth any bumps with a brush. Finish with a strong-hold hairspray.
A mistake I made early on was using short bobby pins, which slipped out of the twist within an hour. Use long, strong pins made for updos, and the twist will hold all evening.
See twisted bun ideas or French twist tutorials for weddings.
Hold time is 10-12 hours, difficulty is intermediate, and cost is under $5 in pins. A salon version runs $55-70 and takes about 30 minutes.
5. Rope Twist Bun

A rope twist bun uses the simplest twist of all, and it is the style to learn if you have never twisted your hair before. You twist two sections in the same direction, then twist them around each other in the opposite direction, and the twist locks itself in place. It creates a clean, rope-like texture that looks much more complicated than it is, and it wraps into a neat bun in seconds.
Gather your hair into a ponytail and split it into two equal sections. Twist each section clockwise until it is tightly coiled, then twist the two sections around each other counterclockwise and secure the ends with a small elastic. Wrap the rope twist around its base into a bun, pin it in place, and smooth flyaways with a light-hold hairspray. For a softer look, pull the twist edges outward slightly before wrapping.
Pro Tip: Keep both sections twisted tightly before you wrap them together, because if one section loosens, the rope unravels.
See twisted bun ideas or rope twist hairstyles for beginners.
Hold time is 8-10 hours, difficulty is beginner, and cost is under $5. A salon version runs $35-50 and takes about 15 minutes.
6. Twisted Side Bun

A twisted side bun is the most romantic style in this guide, and the one to choose for date night. The bun sits to one side instead of the center, which creates a soft, asymmetrical line that flatters the face and shows off your neckline. The twist adds texture and movement, so the whole style feels flowing and feminine rather than severe. It works beautifully with waves or curls, and it is one of the easiest twisted buns to do on yourself.
Create a side part, then gather your hair into a low ponytail just behind one ear. Split the ponytail into two sections, twist them around each other, then wrap the twist into a bun and pin it securely. Loosen the twist slightly by pulling the edges outward, and pull out a few soft pieces around your face to frame it. A light mist of hairspray finishes the look without stiffness.
A mistake I made early on was placing the bun too far back, which made it look like a regular low bun. Place it behind the ear, not at the nape, so the side placement is obvious.
See twisted bun ideas or side bun hairstyles for date night.
Hold time is 8-10 hours, difficulty is beginner, and cost is under $5. A salon version runs $40-60 and takes about 20 minutes.
7. Messy Twisted Bun

The messy twisted bun is the beginner’s best friend, because it is the one style where imperfection is the whole point. A loose twist wrapped into an undone bun with pieces falling out looks effortless and cool, and it hides every mistake a new twister makes. If your twist is uneven, the messiness covers it. If a piece falls out, it looks intentional. This is the style to start with if you have never done an updo before.
Do a loose two-strand twist starting at the crown or the nape, and do not worry about keeping it neat. Wrap it loosely around itself into a bun and pin it with just a few bobby pins, leaving the ends poking out a little. Pull the twist edges outward to widen it, tug a few pieces loose around your face and at the nape, and shake your head gently to settle everything. A light texturizing spray adds grip and makes the messy texture last longer.
Pro Tip: Do the twist with your head flipped upside down, because it adds volume at the roots and makes the bun look fuller when you flip back up.
See twisted bun ideas or messy bun tutorials for beginners.
Hold time is 6-8 hours, difficulty is beginner, and cost is under $5. A salon version runs $35-50 and takes about 15 minutes.
8. Twisted Bun With a Scarf

A twisted bun with a scarf is the easiest way to make a simple style look special, and it is perfect for vacation, a festival, or any day when you want a pop of color. The scarf weaves through the twist as you work, which adds color and texture, and tying it into a bow at the base of the bun gives you a finished look that takes almost no extra time. Choose a silk scarf for a polished look or a cotton bandana for a casual one.
Fold a square scarf into a long band, then twist it together with your hair as you make a two-strand twist, letting the scarf become one of the strands. Wrap the twist into a bun and tie the remaining scarf into a bow at the base, or wrap it around the bun and tuck the ends underneath. Keep the scarf flat so it does not bunch up, and finish with a light mist of hairspray.
Pro Tip: Use a scarf that is at least 70 cm long, because a short scarf runs out before you finish the twist and leaves you with nothing to tie.
See twisted bun ideas or scarf hairstyles for vacation.
Hold time is 8-10 hours, difficulty is beginner, and cost is under $10 for a scarf and pins. A salon version runs $40-60 and takes about 20 minutes.
9. Twisted Chignon

A twisted chignon is the most elegant style in this guide, and the one to choose when the occasion is formal. A chignon is a low, rolled bun at the nape, and adding a twist gives it texture and interest that a plain chignon does not have. It is a favorite for brides, bridesmaids, and anyone attending a black-tie event, because it stays neat for hours and looks beautiful from every angle in photos.
Start by creating a low ponytail at the nape, leaving out a section of hair at the side for the twist. Twist that section into a rope twist, then wrap it around the base of the ponytail. Twist the ponytail into a roll and tuck it into a chignon shape, pinning it securely with bobby pins placed in a crisscross pattern. Drape the twist over the chignon, pin the end underneath, and smooth the top with a light-hold hairspray.
A mistake I made early on was pinning the chignon with too few pins, which made it sag by the end of the evening. Use at least six to eight bobby pins, placed in a crisscross pattern, and the chignon will stay exactly where you put it.
See twisted bun ideas or elegant chignon tutorials for weddings.
Hold time is 10-12 hours, difficulty is intermediate, and cost is under $5 in pins. A salon version runs $55-70 and takes about 30 minutes.
10. Double Twist Buns

Double twist buns are two twists and two buns, and they are twice as fun as a single twisted bun. They are the festival favorite in this guide, but they also work for the gym, a casual weekend, or any day when you want your hair completely out of the way and still looking cute. The twists keep the top of the head smooth and secure, and the two buns balance each other, which makes the style surprisingly flattering on most face shapes.
Part your hair straight down the middle from forehead to nape, and clip one side out of the way. Twist the first side from the front hairline to the nape, then wrap the twist into a small bun at the back of that side and pin it securely. Repeat on the other side, making sure both buns sit at the same height. Gently pull the twists outward to make them look fuller, and finish with hairspray.
A mistake I made early on was making the middle part crooked, which made the whole style look lopsided. Use the tip of a comb and a mirror to check the part from the front and the back before you start twisting.
See twisted bun ideas or double bun tutorials for festivals.
Hold time is 10-12 hours, difficulty is beginner, and cost is under $5. A salon version runs $45-65 and takes about 25 minutes.
11. Twisted Bun for Thick Hair

Thick hair makes a gorgeous, full twisted bun, but it is heavy, and heavy buns fall out. The trick is to use the twist to distribute the weight and to anchor the bun in several places instead of one. A thick twist wrapped into a bun looks substantial and luxurious in a way that fine hair cannot match, and once it is pinned properly it holds all day, because the twist itself acts like a built-in hair tie.
Work with damp or slightly textured hair, because dry thick hair is slippery and hard to control. Split your hair into two sections and twist each one separately, which makes the hair easier to handle than one giant twist. Wrap the two twists around each other into a bun at the back or low at the nape, and pin it with large bobby pins placed in a crisscross pattern. Use at least eight pins, and finish with a strong-hold hairspray.
A mistake I made early on was using small bobby pins on thick hair, which bent open and slid out within an hour. Use large, strong bobby pins or U-shaped hairpins, which are made for thick hair and hold far better.
See twisted bun ideas or hairstyles for thick hair.
Hold time is 10-12 hours, difficulty is intermediate, and cost is under $10 in strong pins. A salon version runs $50-70 and takes about 30 minutes.
12. Twisted Bun for Fine Hair
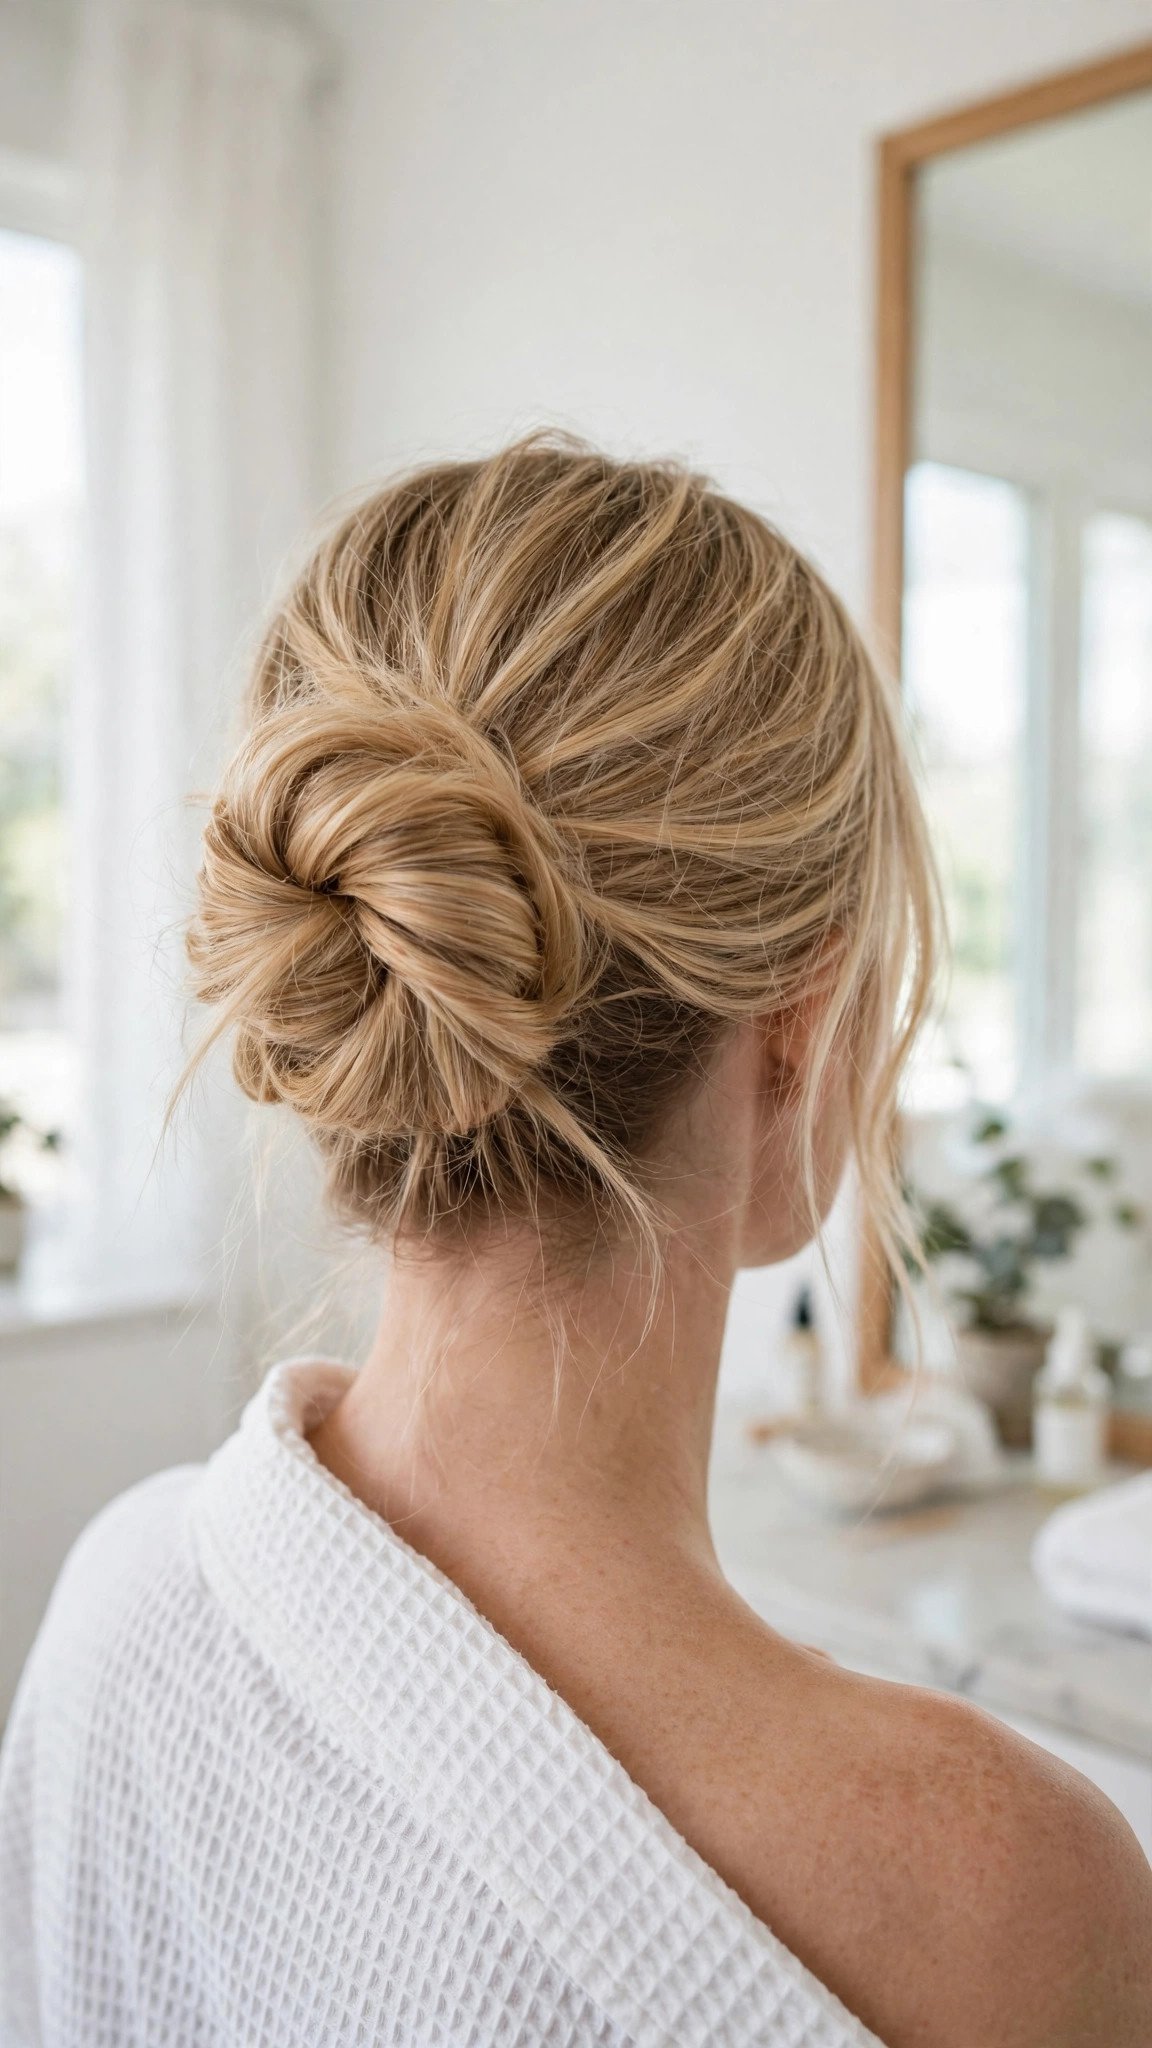
Fine hair can be tricky for buns, because it slips out of pins and looks thin when it is pulled tight. A twisted bun solves both problems: the twist adds grip so the hair stays put, and pulling the twist apart, called pancaking, makes it look much fuller than it is. This style is for anyone whose hair is fine, silky, or slippery, and who has ever watched a bun slide out within an hour.
Start with dry shampoo or a texturizing spray worked through your hair, because grip is everything for fine hair. Twist your hair into a two-strand twist, then gently pull the edges of the twist outward to make it look wider and fuller before you wrap it into a bun. Pin the bun with bobby pins placed in a crisscross pattern, and use a light-hold hairspray rather than a heavy one, which can weigh fine hair down.
Pro Tip: Backcomb the ponytail lightly before you twist, because the extra texture makes the twist look twice as thick and stops it from slipping.
See twisted bun ideas or hairstyles for fine hair.
Hold time is 6-8 hours, difficulty is beginner, and cost is under $5. A salon version runs $40-60 and takes about 20 minutes.
13. Twisted Bun With Loose Curls

A twisted bun with loose curls is the most romantic party style in this guide. The bun keeps most of your hair up and out of the way, while the loose curls falling around it soften the whole look and add movement. It is perfect for date night, a party, or any evening when you want an updo that does not look severe. It works best on naturally wavy or curly hair, but you can also curl straight hair first and get the same effect.
Curl your hair into loose waves with a curling iron, then gather the top half into a twist and wrap it into a bun, leaving the bottom curls and a few face-framing pieces out. Pin the bun securely, then arrange the loose curls around it so they fall naturally. A light-hold hairspray keeps the curls in place without making them stiff, and a shine spray adds a healthy glow.
A mistake I made early on was curling the hair after the bun was up, which pulled the bun apart. Curl first, twist second, and the style stays intact.
See twisted bun ideas or curly bun hairstyles for parties.
Hold time is 8-10 hours, difficulty is beginner, and cost is under $5. A salon version runs $45-65 and takes about 25 minutes.
14. Twisted Bun for Second-Day Hair

A twisted bun for second-day hair is the style that saves you on the days between washes. Second-day hair has natural texture and a little oil at the roots, which gives the twist grip and stops it from sliding apart. That means the style actually works better on unwashed hair than on freshly washed hair, and it takes about three minutes from start to finish. It is the perfect choice for busy mornings, travel days, and the days when a blowout is out of the question.
Spray dry shampoo at the roots and work it through with your fingers, then brush your hair back and gather it into a ponytail. Twist the ponytail into a two-strand twist and wrap it into a bun, pinning it with bobby pins. The dry shampoo absorbs oil and adds volume at the same time, so the bun looks fresh even though the hair is not. Finish with a light mist of hairspray and you are done.
Pro Tip: Focus the dry shampoo at the crown and the hairline, because those are the places where oil shows first and where the bun needs the most grip.
See twisted bun ideas or second-day hairstyles for busy mornings.
Hold time is 8-10 hours, difficulty is beginner, and cost is under $5 plus dry shampoo. A salon version runs $35-50 and takes about 15 minutes.
15. Twisted Bun With a Hair Fork

A twisted bun with a hair fork is the most elegant everyday style in this guide, and it needs no bobby pins at all. A hair fork is a two-pronged pin, usually made of wood or metal, that slides through the bun and holds it in place by itself. It looks beautiful, it is gentler on your hair than elastics and pins, and it turns a simple twisted bun into something that looks deliberate and chic. It is perfect for work, for long hair that is too heavy for pins, and for anyone who wants a kinder way to wear an updo.
Twist your hair into a two-strand twist and wrap it into a bun, holding it in place with one hand. Slide the hair fork through the bun at an angle, catching some hair from the bun and some from the scalp underneath, then push it all the way through. Wiggle it gently to check that it holds, and add a second fork in the opposite direction if your hair is very thick or heavy. The fork should feel secure but not tight.
A mistake I made early on was pushing the fork straight through the middle of the bun, which made it slide out. Slide it through at an angle, catching scalp hair underneath, and it locks in place.
See twisted bun ideas or hair fork hairstyles for long hair.
Hold time is 8-10 hours, difficulty is beginner, and cost is under $15 for a hair fork. A salon version runs $40-60 and takes about 20 minutes.
16. Twisted Bun for Short Hair

A twisted bun for short hair proves that you do not need long hair to wear a twisted bun, you just need a different approach. Short hair cannot make one big twist and one big bun, but it can make two small twists that meet at the back and gather into a tiny bun, and that small bun looks just as cute. The key is to work in sections, twist what you can, and use pins and texture spray to hold the pieces that are too short to twist.
Part your hair in the middle or on the side, then twist a small section on each side, starting at the front hairline and working toward the back. When the twists reach the back of your head, gather all of the hair into a small ponytail at the nape and twist it into a tiny bun, pinning it with bobby pins placed in a crisscross pattern. Use a texturizing spray before you start, because it adds grip and stops short layers from slipping out.
Pro Tip: Twist with damp hair and a little styling cream, because damp short hair stays where you put it, while dry short hair slips out of the twist before you can pin it.
See twisted bun ideas or short hair updo tutorials.
Hold time is 6-8 hours, difficulty is intermediate, and cost is under $5. A salon version runs $40-60 and takes about 20 minutes.
Getting Started
The easiest first step is to learn one twist, not sixteen styles. A basic two-strand twist is the foundation for most of the styles in this guide: split your hair into two sections, twist them around each other, and wrap the result into a bun. Practice it once on a relaxed evening, and you can do the Simple Two-Strand Twist Bun, the Twisted Top Knot, the Messy Twisted Bun, and half of this list. Add a rope twist next, which is the same idea with each section twisted first, and you unlock the rest.
The most common beginner mistake is twisting on clean, slippery hair, which unravels before you can pin the bun. Always start with second-day hair, or work a little dry shampoo or texturizing spray through clean hair first. The second mistake is twisting both sections and wrapping them in the same direction, which loosens the twist instead of locking it. Twist the sections one way and wrap the other way, and the twist holds itself.
What to buy first: a pack of bobby pins in your hair color, a few small clear elastics, a rattail comb for clean parts, and a light-hold hairspray. That is about $10-15 in total and covers every style in this guide. If you want to try the scarf style, add a silk scarf at least 70 cm long. If you want to try the hair fork style, buy a wooden or metal fork, which costs about $10-15 and replaces pins entirely.
For timeline, a simple twisted bun takes 3-5 minutes once you know the twist, and a more detailed style like the French twist bun or the twisted chignon takes 15-20 minutes. A salon twisted bun takes 15-30 minutes and costs $35-70 depending on the style and the salon. Give yourself extra time the first few times you try a new twist, and practice on a relaxed evening rather than a rushed morning.
Frequently Asked Questions
How long does a twisted bun last?
A twisted bun lasts 8-12 hours on average, and many styles in this guide hold for a full day. The twist locks the hair in place, so twisted buns hold longer than plain buns. Use enough bobby pins, placed in a crisscross pattern, and finish with a light-hold hairspray for the longest hold. Fine hair may need extra pins and a texturizing spray for grip.
Can I do a twisted bun if I cannot braid at all?
Yes, and that is the whole point of this guide. Twisting is not braiding: it uses two strands instead of three, and there is no over-under pattern to remember. The Simple Two-Strand Twist Bun (#1) and the Rope Twist Bun (#5) are the best places to start, and both take under five minutes to learn.
What hair length do I need for a twisted bun?
Most twisted buns need medium to long hair, which means hair that reaches at least the shoulders. Two styles in this guide work on short hair, including the Twisted Bun for Short Hair (#16), which uses two small twists that meet at the back. If your hair is too short for a bun, try twisting the front sections and pinning them back, which gives you the twisted look without needing a full bun.
How much does a twisted bun cost at a salon?
A salon twisted bun costs $35-70 depending on the style and the salon. Simple styles like a twisted top knot cost $35-50, while detailed styles like a French twist bun or a twisted chignon cost $55-70. Doing it yourself costs under $5 in pins and elastics, and most styles take 10 minutes or less once you know the twist.
Will a twisted bun work on second-day hair?
Yes, and it works better on second-day hair than on freshly washed hair. A little natural oil or dry shampoo gives the hair grip, which stops the twist from unraveling and helps the bun stay in place. Freshly washed hair is slippery, so if you want to twist on wash day, work a texturizing spray or a little styling cream through your hair first.
A Few Final Thoughts
A twisted bun is proof that a hairstyle does not need to be complicated to look polished. Across these 16 ideas, the pattern is simple: one twist, one bun, and a few bobby pins are all it takes to create a style that holds all day and looks like you spent an hour on it. Whether you choose a three-minute two-strand twist bun for work or a French twist bun for a wedding, your hair will look intentional and beautiful. Pick one style from this list, practice the twist once this week, and enjoy how easy a twisted bun can be.