
A hard line between two colours can make a Christmas manicure look painted on in a hurry. Ombre nails do the opposite: one shade melts into the next so softly that you cannot tell where red ends and nude begins, or where emerald turns to gold. That gentle blend is why ombre christmas nails suit December so well. They are festive without being loud, elegant without being plain, and forgiving in a way that sharp French tips and fiddly hand-painted art never are. This guide collects 18 ombre Christmas nail designs, each with a nail shape, a skill level, an honest wear time, and one mistake I have made so you do not have to. Ready? Let us explore all 18 of them.
Quick Answer: For beginners, start with the Classic Red-to-Nude Ombre (#1) or the Blush Pink-to-White Ombre (#6). For short nails, try the Frosted White-to-Silver Ombre (#4) or the Hot Cocoa Brown-to-Cream Ombre (#18). For a salon-level finish, ask for the Midnight Navy-to-Ice Blue Ombre (#5) or the Ruby-to-Black Ombre (#13). Salon sets run $50-95, and DIY versions cost about $15-35 in supplies.
Why Ombre Christmas Nails Are Worth Your Time
Ombre nails flatter almost every hand because the blend does the decorating for you. There is no straight line to wobble, no tiny picture to smudge, and no symmetry to match across ten nails. A soft gradient from a deep festive shade at the cuticle to a pale shade at the tip lengthens the fingers, and the same blend in reverse — pale at the cuticle, deep at the tip — makes short nails look longer too.
There are practical wins too. Ombre designs range from a ten-minute sponge gradient with two regular polishes to a two-hour airbrushed gel set with glitter and chrome. When the colour grows out, a gradient hides the regrowth line far better than a solid colour does, so a gel ombre still looks tidy at two weeks.
Here is the lesser-known part: the sponge is more forgiving than the brush. A slightly uneven sponge dab disappears under a glossy top coat, and a second thin layer fixes almost any patchiness.
This guide suits anyone looking for soft Christmas nail ideas, blended colour inspiration, or a salon reference photo to hand your tech.
At a Glance
- Seven designs are beginner-friendly and need only two polish colours and a sponge.
- Wear times are listed for each design, from 5-7 days for regular polish to 2-3 weeks for gel.
- Short nails, long nails, and every common shape appear, from short round to long coffin.
- Salon prices run $50-95, while DIY kits cost about $15-35.
- Finishes include glossy, matte, glitter, and chrome, so you can match your outfit and mood.
| # | Design | Nail Shape | Skill Level | Wear Time | Occasion |
|---|---|---|---|---|---|
| 1 | Classic Red-to-Nude Ombre | Medium almond | Beginner | 2-3 weeks | Holiday party |
| 2 | Emerald-to-Gold Ombre | Long almond | Intermediate | 2-3 weeks | Evening |
| 3 | Burgundy-to-Rose Ombre | Medium oval | Beginner | 2-3 weeks | Dinner |
| 4 | Frosted White-to-Silver Ombre | Short square | Beginner | 5-7 days | Everyday |
| 5 | Midnight Navy-to-Ice Blue Ombre | Long coffin | Salon | 2-3 weeks | Holiday party |
| 6 | Blush Pink-to-White Ombre | Short oval | Beginner | 2-3 weeks | Brunch |
| 7 | Forest Green-to-Cream Ombre | Medium square | Intermediate | 2 weeks | Office |
| 8 | Champagne Gold-to-Nude Ombre | Medium almond | Intermediate | 2-3 weeks | Date night |
| 9 | Plum-to-Lavender Ombre | Long almond | Intermediate | 2-3 weeks | Evening |
| 10 | Cranberry-to-Copper Ombre | Short almond | Intermediate | 2-3 weeks | Dinner |
| 11 | Pine Green-to-Gold Glitter Ombre | Medium coffin | Intermediate | 2-3 weeks | Party |
| 12 | Snow White-to-Pale Blue Ombre | Medium oval | Beginner | 5-7 days | Weekend |
| 13 | Ruby-to-Black Ombre | Long stiletto | Salon | 2-3 weeks | New Year’s Eve |
| 14 | Rose Gold-to-Blush Ombre | Medium almond | Intermediate | 2-3 weeks | Date night |
| 15 | Hunter Green-to-Emerald Ombre | Short square | Beginner | 2 weeks | Office |
| 16 | Silver-to-Charcoal Ombre | Medium squoval | Salon | 2-3 weeks | Evening |
| 17 | Candy Cane Red-to-White Ombre | Medium almond | Intermediate | 2-3 weeks | Christmas Day |
| 18 | Hot Cocoa Brown-to-Cream Ombre | Short round | Beginner | 2 weeks | Cozy day |
1. Classic Red-to-Nude Ombre on Medium Almond Nails
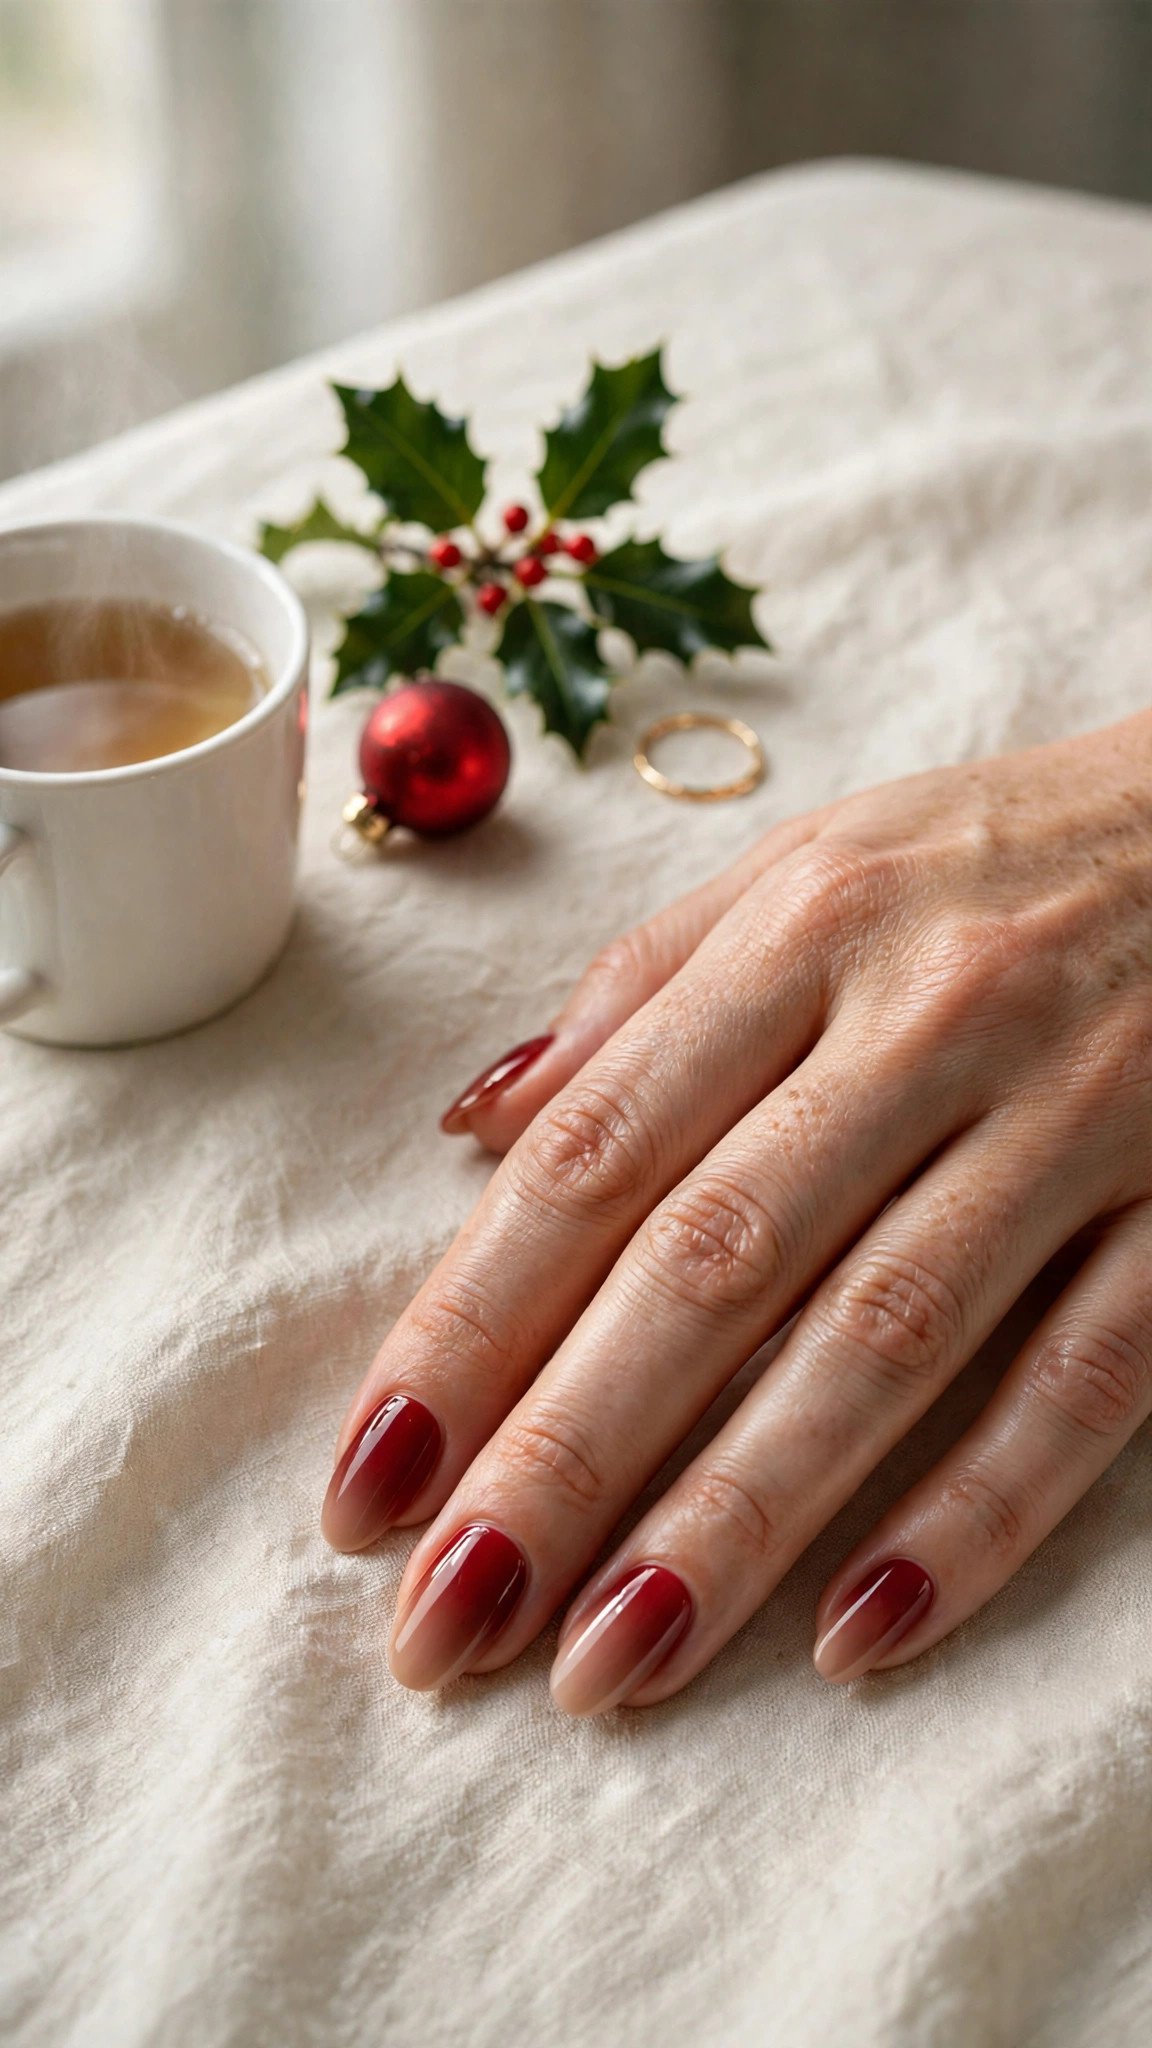
Classic red melting into nude is the ombre every other ombre is measured against, and it is the easiest place to start. The deep red at the cuticle gives you the Christmas colour, while the nude tip keeps the whole hand soft and wearable, even at the office the next morning. Medium almond nails suit the blend perfectly, because the tapered tip gives the pale end room to breathe.
You need two polishes, a red and a nude, plus a white base coat and a makeup sponge. Paint the nails white first, which makes both colours brighter, then dab red and nude side by side on the sponge and press it onto the nail two or three times, moving the sponge slightly each time so the middle stays blended. Seal with a glossy top coat. I once used too much polish on the sponge and it created thick, bubbly layers that never dried properly; a thin layer, pressed twice, is always better than one heavy press.
Regular polish lasts 5-7 days, and gel lasts 2-3 weeks.
Pro Tip: Dab the sponge on a paper towel first to remove excess polish. It gives a softer blend and stops the colours from turning muddy where they meet.
See easy Christmas nail ideas or how to do a sponge gradient.
This one costs under $15 and takes about 25 minutes.
2. Emerald-to-Gold Ombre on Long Almond Nails
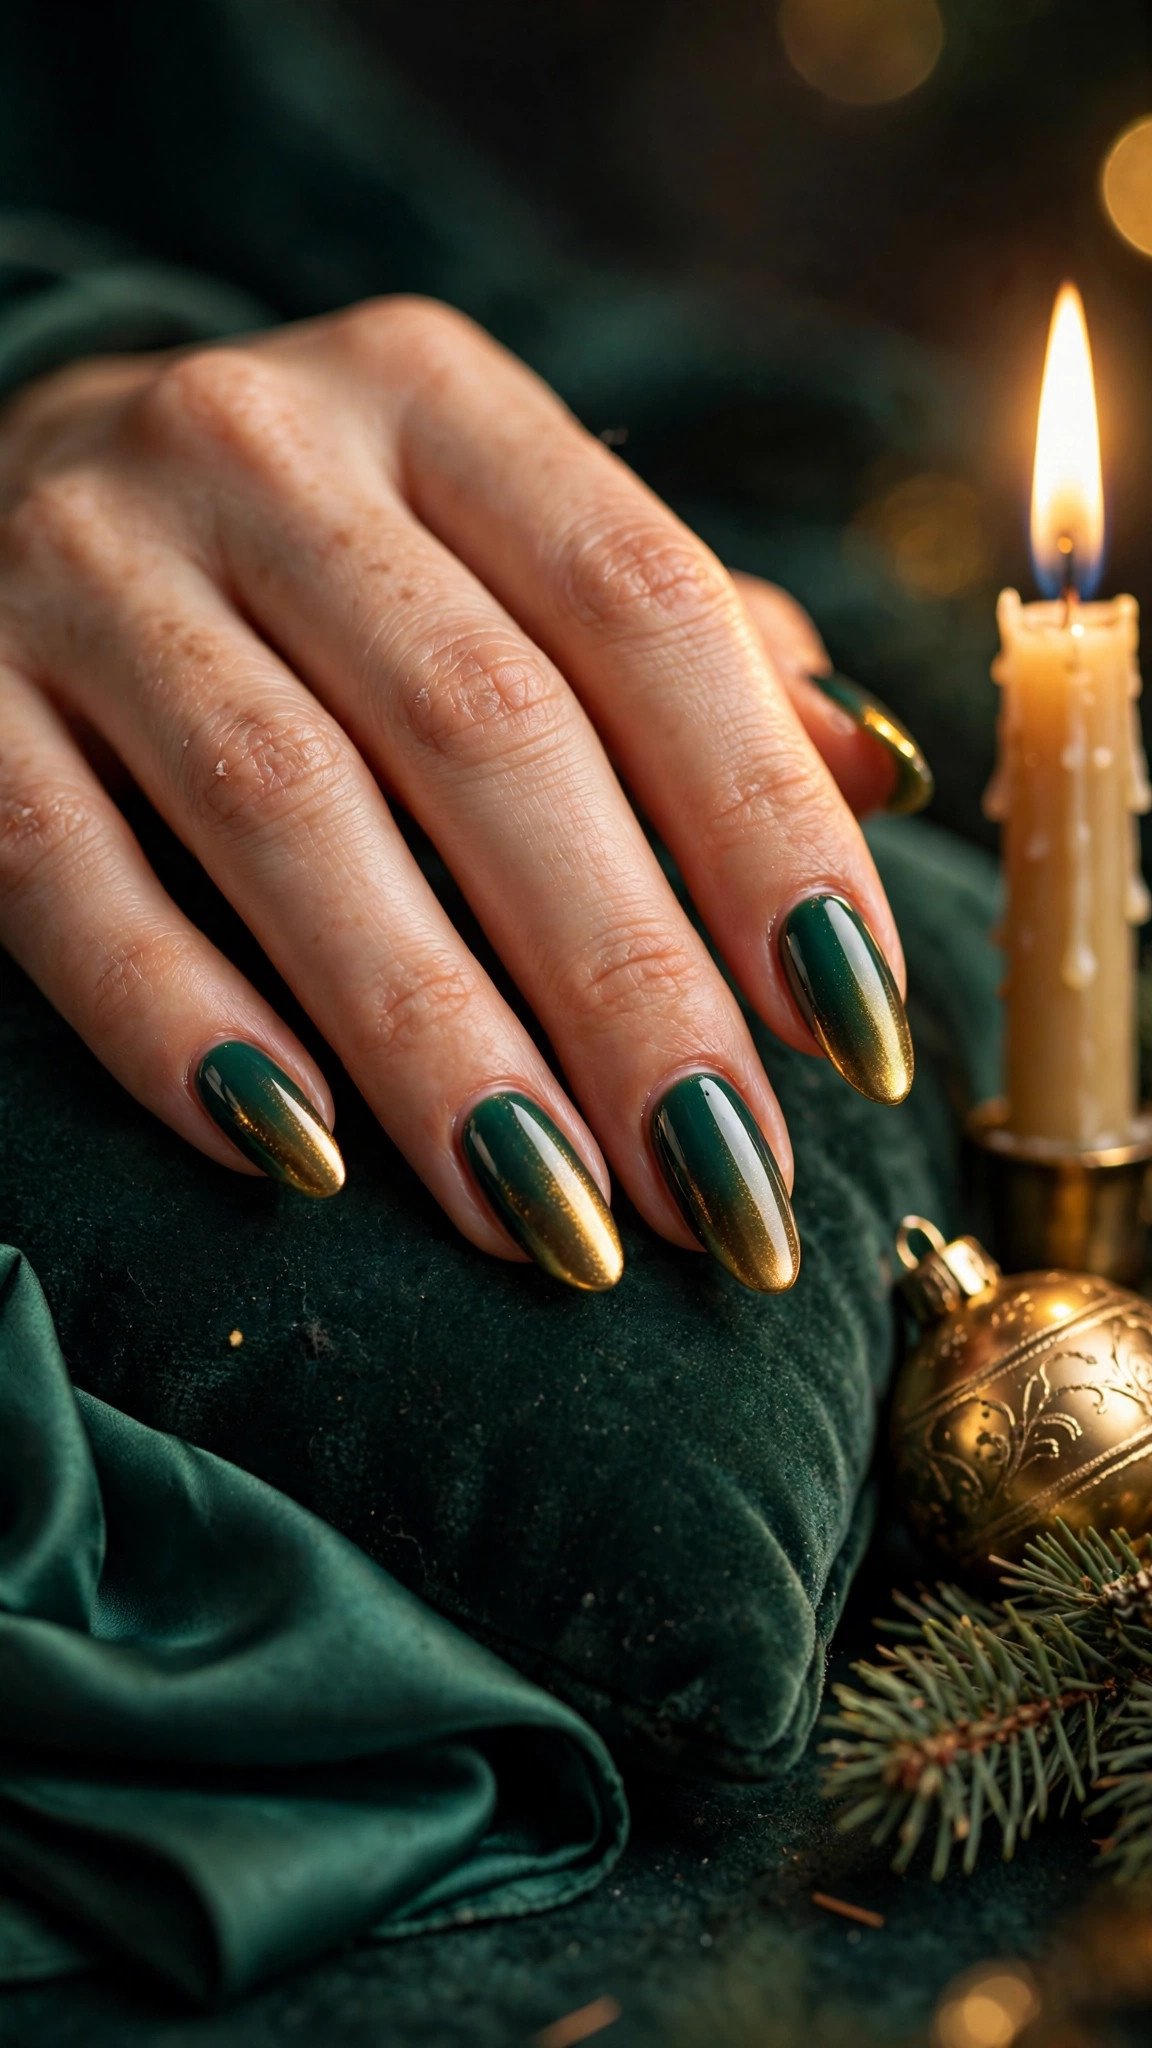
Emerald fading into gold looks like a Christmas tree lit from within, and long almond nails give the gradient the length it needs to show off. The dark green at the base is rich and grown-up, the gold at the tip catches every light in the room, and the blend between them is where the magic sits. This is the design to choose for an evening party when you want your hands noticed.
Paint a white base, then sponge emerald from the cuticle upward and gold from the tip downward, overlapping in the middle. Use a fine glitter gold for the tip rather than a flat metallic, because the sparkle hides the join. Cure each layer for 60 seconds under an LED lamp if you are using gel.
Gel lasts 2-3 weeks, and the glitter tip wears well because chips show less on sparkle.
Pro Tip: Add the gold in two thin sponge layers rather than one thick one. The second layer deepens the sparkle without dragging the green underneath.
See emerald Christmas nail ideas or how to blend glitter gradients.
Salon price runs about $55-85, and the set lasts 2-3 weeks.
3. Burgundy-to-Rose Ombre on Medium Oval Nails
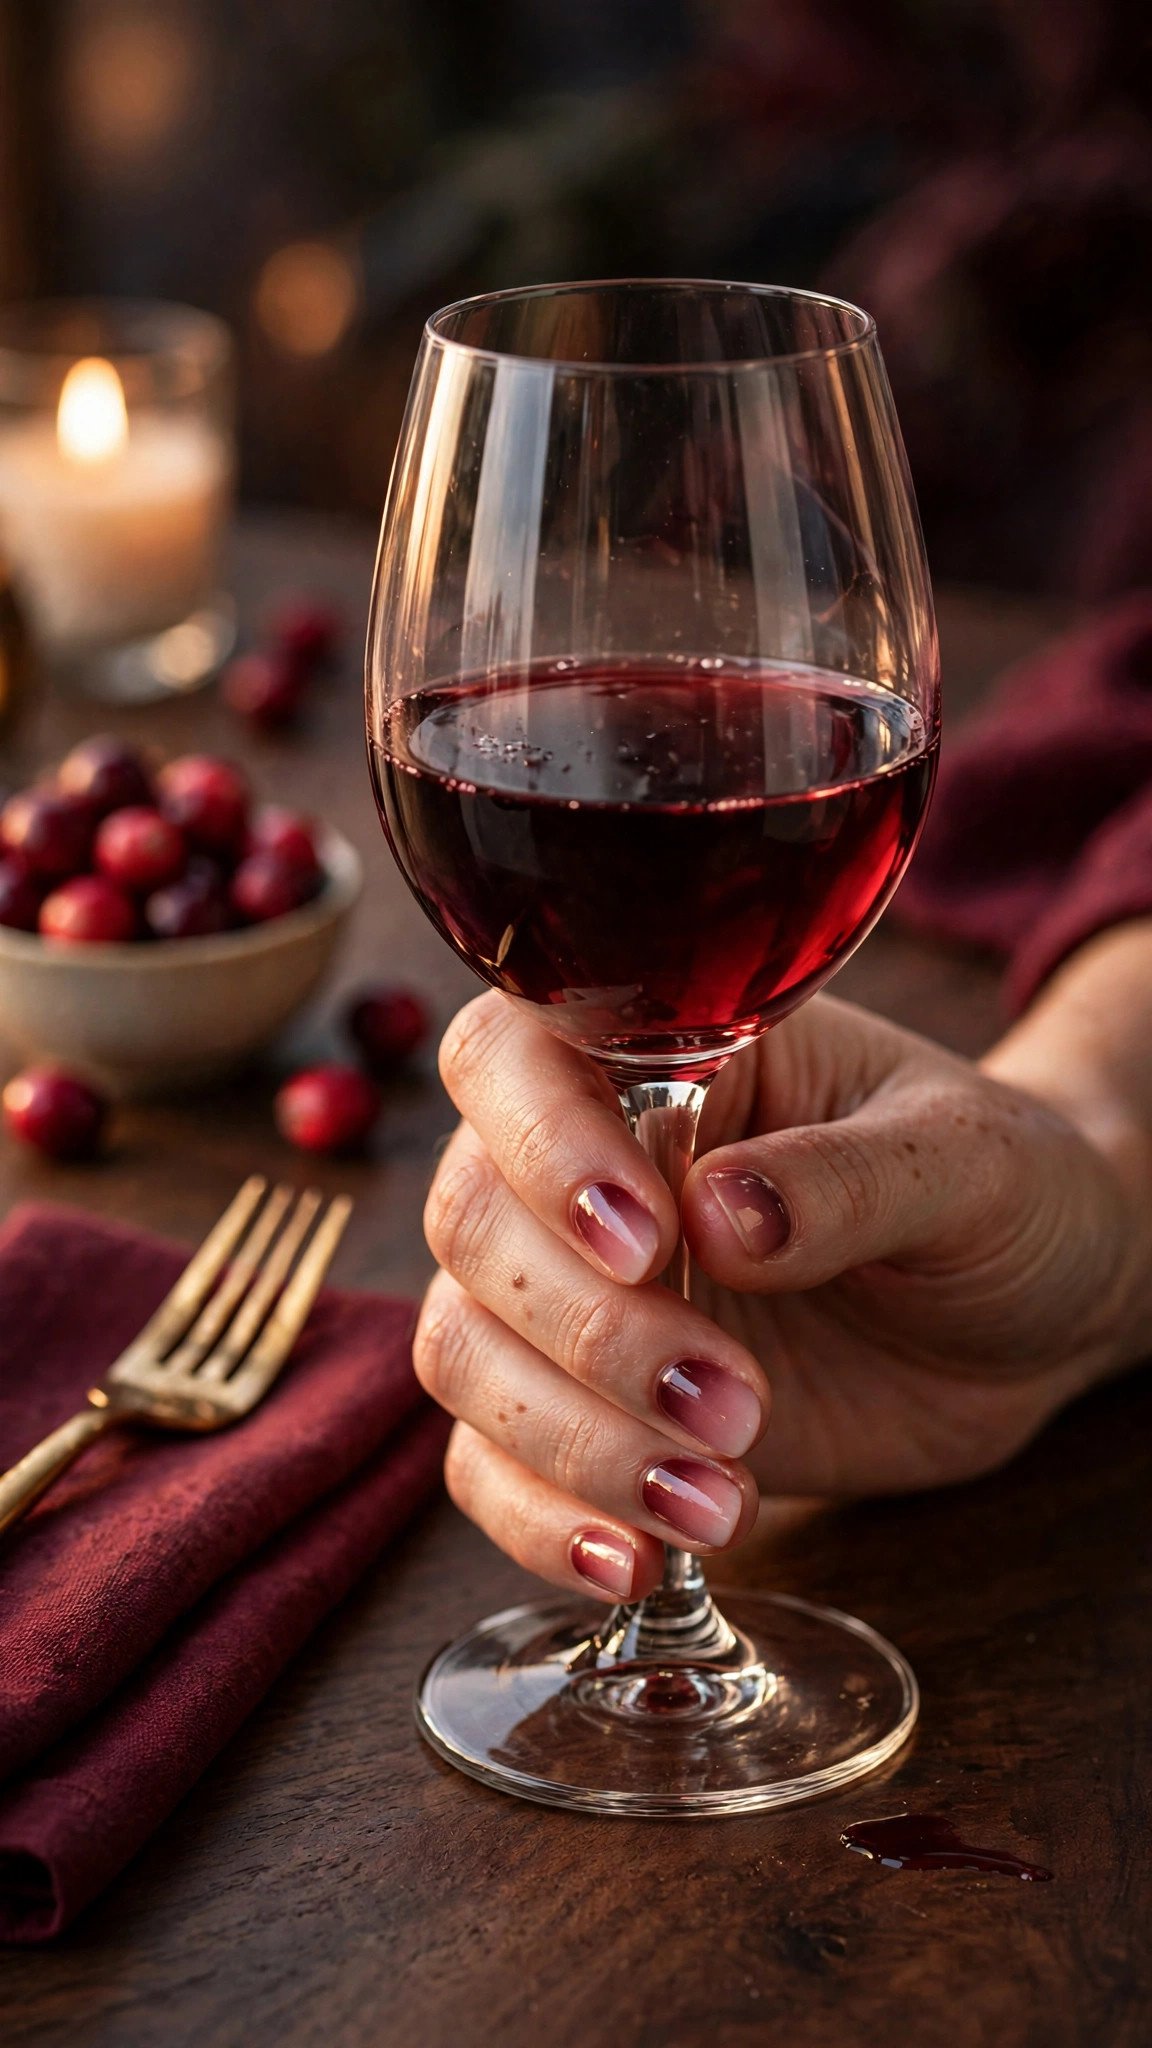
Burgundy melting into rose is the softest way to wear a dark Christmas colour, and it suits a dinner or a family gathering better than a bright red. The deep wine shade at the cuticle is festive and flattering on most skin tones, while the rose tip lightens the whole hand so it never looks heavy. Medium oval nails keep the shape gentle, which matches the softness of the blend.
Use a white base, then sponge burgundy from the base and rose from the tip, meeting in the middle. Because both colours sit in the same pink-red family, the join blends almost by itself, which is why this is a genuine beginner design.
This is a forgiving design for a first sponge ombre, so allow about 30 minutes. Gel lasts 2-3 weeks.
Pro Tip: Choose a rose with a warm undertone, not a cool bubblegum pink. A warm rose melts into burgundy; a cool pink leaves a visible grey line where they meet.
Browse burgundy nail ideas or soft ombre nail how-to.
It costs about $45-70 in a salon.
4. Frosted White-to-Silver Ombre on Short Square Nails

Frosted white fading into silver looks like fresh snow catching the light, and it is the prettiest ombre for short nails. There is no dark colour to shrink the nail, so a short square shape still looks long, and the silver tip adds just enough sparkle for December without turning the manicure into a party look. It works for everyday wear, the office, and a quiet Christmas at home.
Paint a sheer white base, then sponge silver glitter from the tip upward, fading toward the middle, and leave the cuticle end soft white. Seal with two coats of glossy top coat to smooth the glitter texture. I once skipped the second top coat and the glitter felt rough and caught on my sweater; two coats make all the difference.
Regular polish lasts 5-7 days, and gel lasts 2-3 weeks.
Pro Tip: Use a fine silver glitter, not chunky glitter, for the fade. Fine glitter blends smoothly; chunky pieces leave hard edges that break the ombre.
See white Christmas nail ideas or glitter fade nail tips.
This one costs under $15 and takes about 20 minutes.
5. Midnight Navy-to-Ice Blue Ombre on Long Coffin Nails
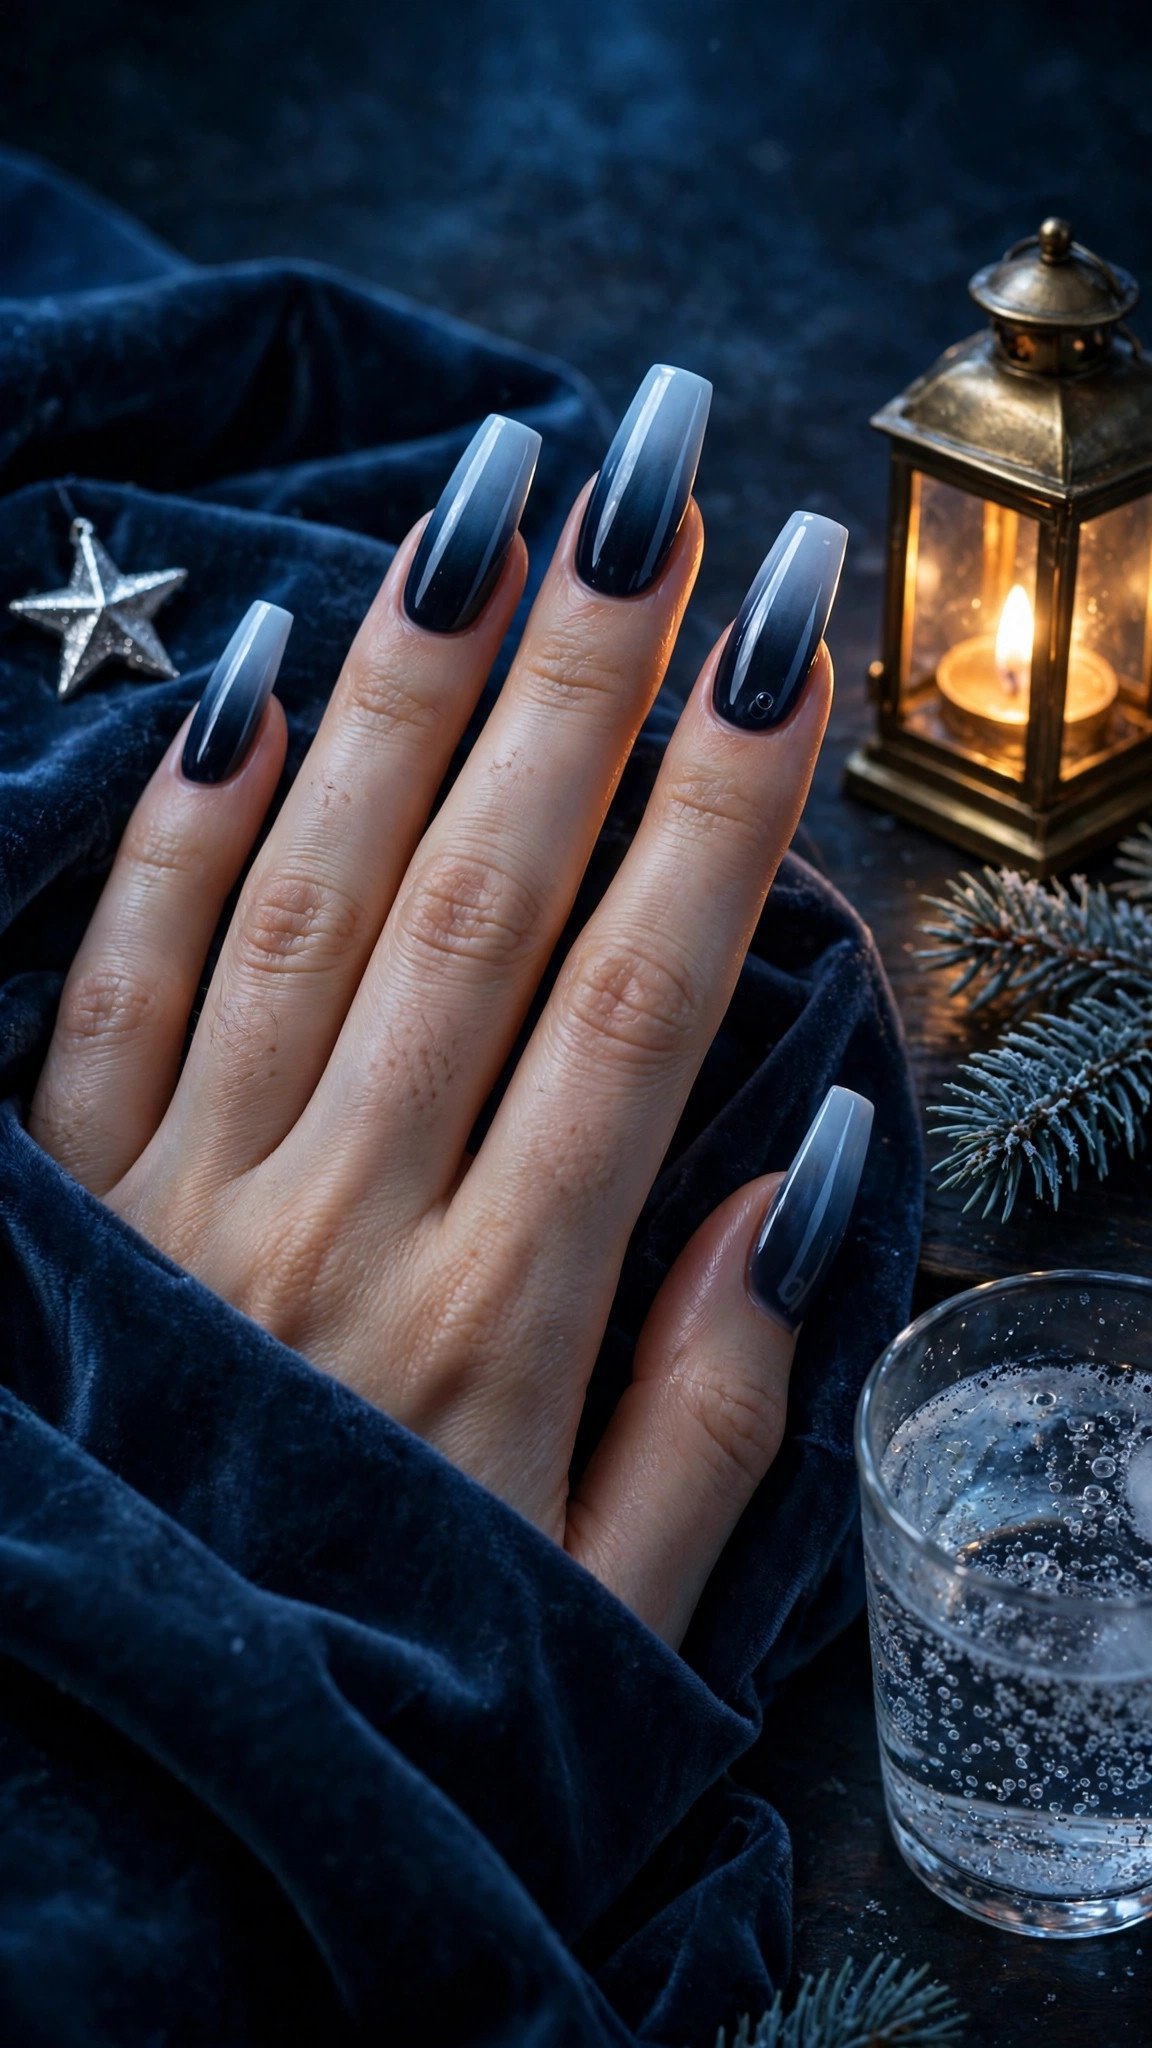
Midnight navy melting into ice blue looks like a winter sky at dusk, and long coffin nails give the gradient the drama it deserves. In truth, a salon airbrush is the best way to get this one perfect, because navy is an unforgiving colour that shows every sponge mark.
This is a salon design. Ask your tech for a navy gel base, then an airbrushed or carefully sponged ice-blue fade from the tip, sealed with a glossy top coat. Long coffin nails of 8-10 mm free edge give the fade room to stretch.
Gel lasts 2-3 weeks, though long nails chip at the tips more easily, so avoid using them as tools.
Pro Tip: Keep the navy away from the very tip. The palest blue should own the last third of the nail, or the fade reads as two colours rather than one blend.
See navy Christmas nail ideas or airbrush ombre nail guide.
Salon price runs about $60-95, and the set lasts 2-3 weeks.
6. Blush Pink-to-White Ombre on Short Oval Nails
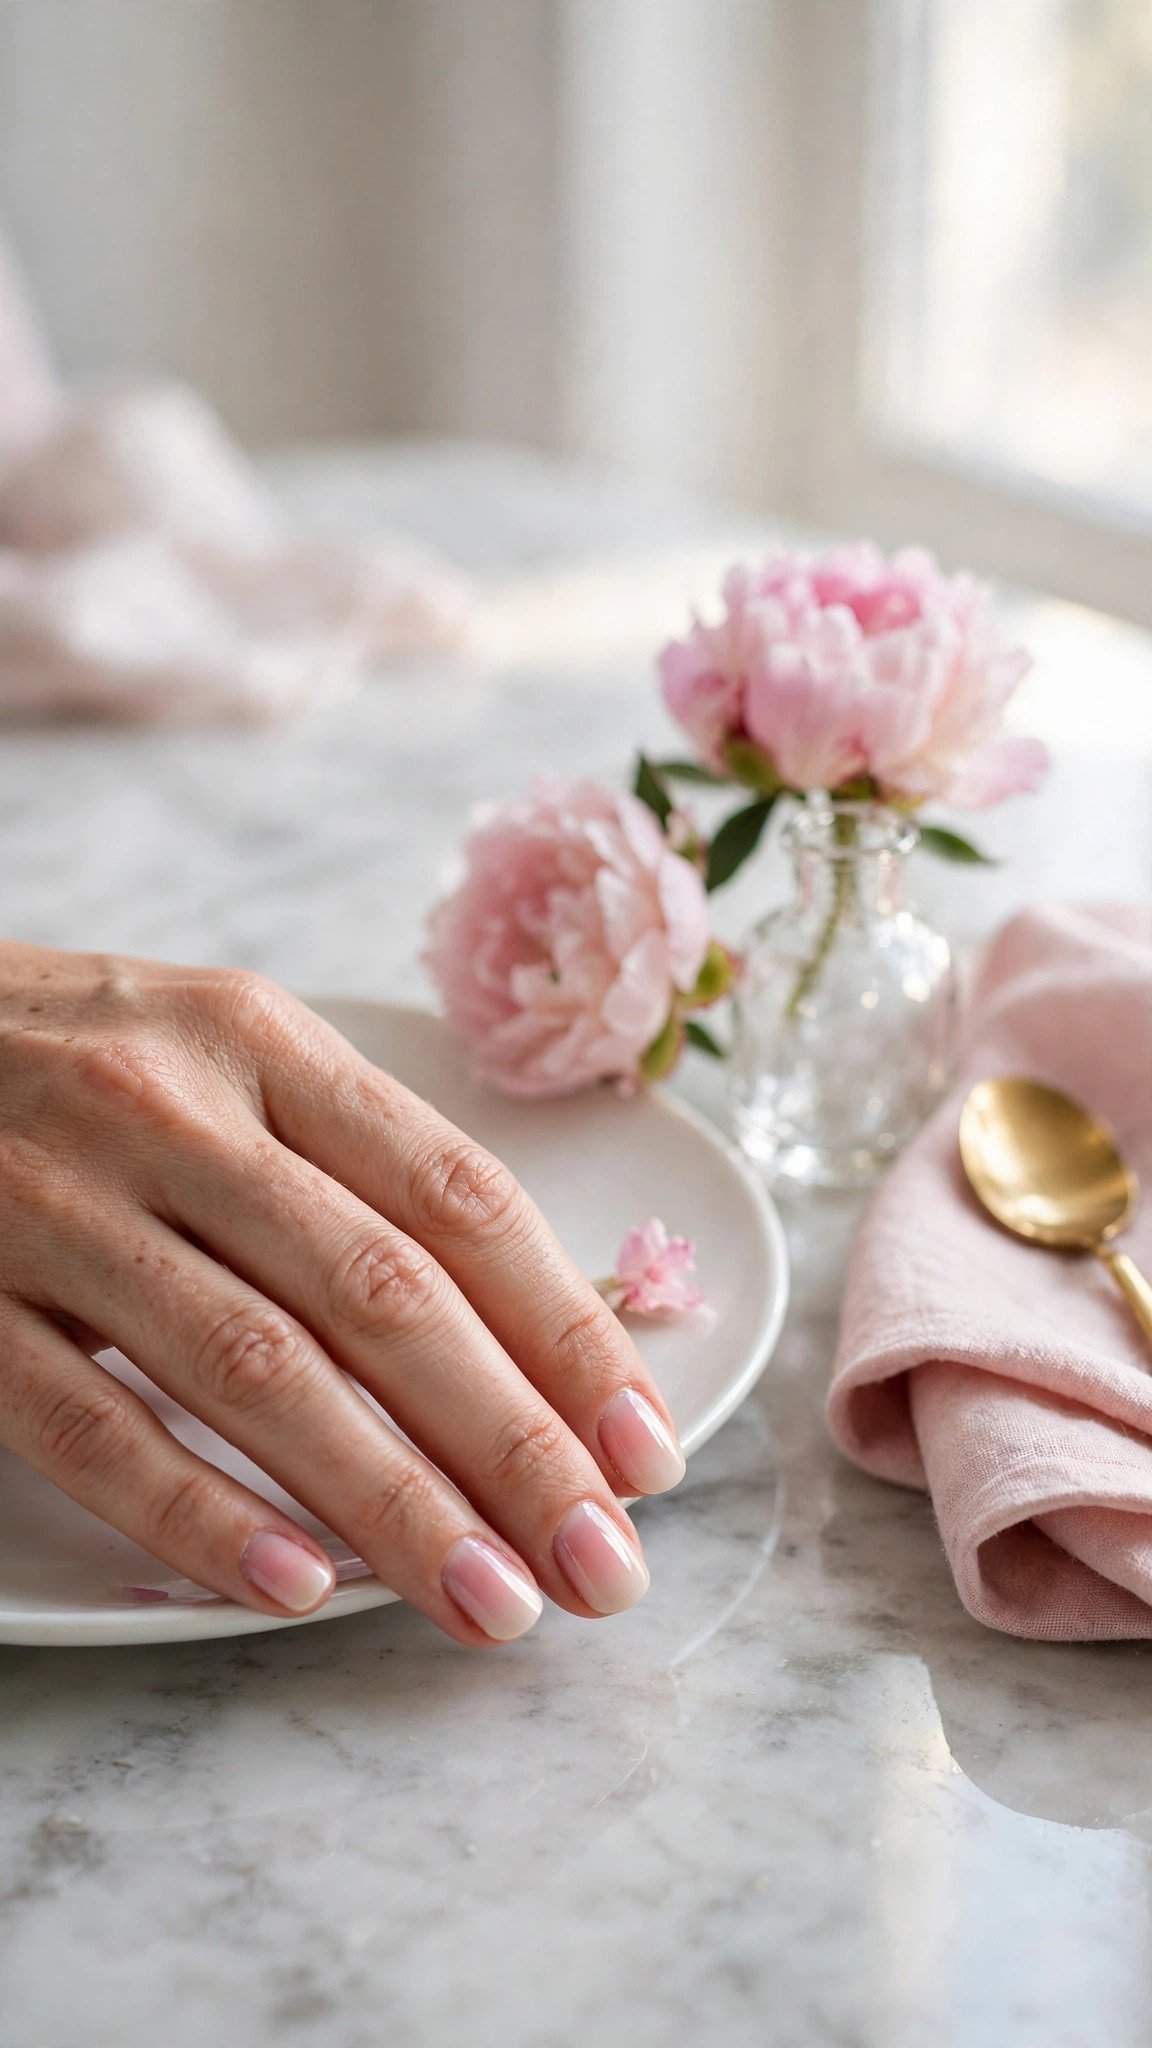
Blush pink fading into white is the ombre version of a French manicure, and it is the gentlest design in this whole list. It suits brunch, a daytime party, and anyone who wants Christmas nails that whisper rather than shout. Short oval nails keep it neat and practical, and the pale palette flatters every skin tone because there is no harsh contrast anywhere on the nail.
Paint a sheer pink base, then sponge white from the tip downward, fading toward the middle, and finish with a glossy top coat. Because both colours are pale, the blend is almost automatic, which makes this one of the best beginner ombres. Keep the white soft and milky rather than stark, or the tip will look painted on.
Regular polish lasts 5-7 days, and gel lasts 2-3 weeks.
Pro Tip: Use a milky white, not a bright opaque white, for the tip. Milky white melts into blush; opaque white leaves a hard edge.
Browse blush nail ideas or French ombre nail how-to.
This one costs under $15 and takes about 20 minutes.
7. Forest Green-to-Cream Ombre on Medium Square Nails
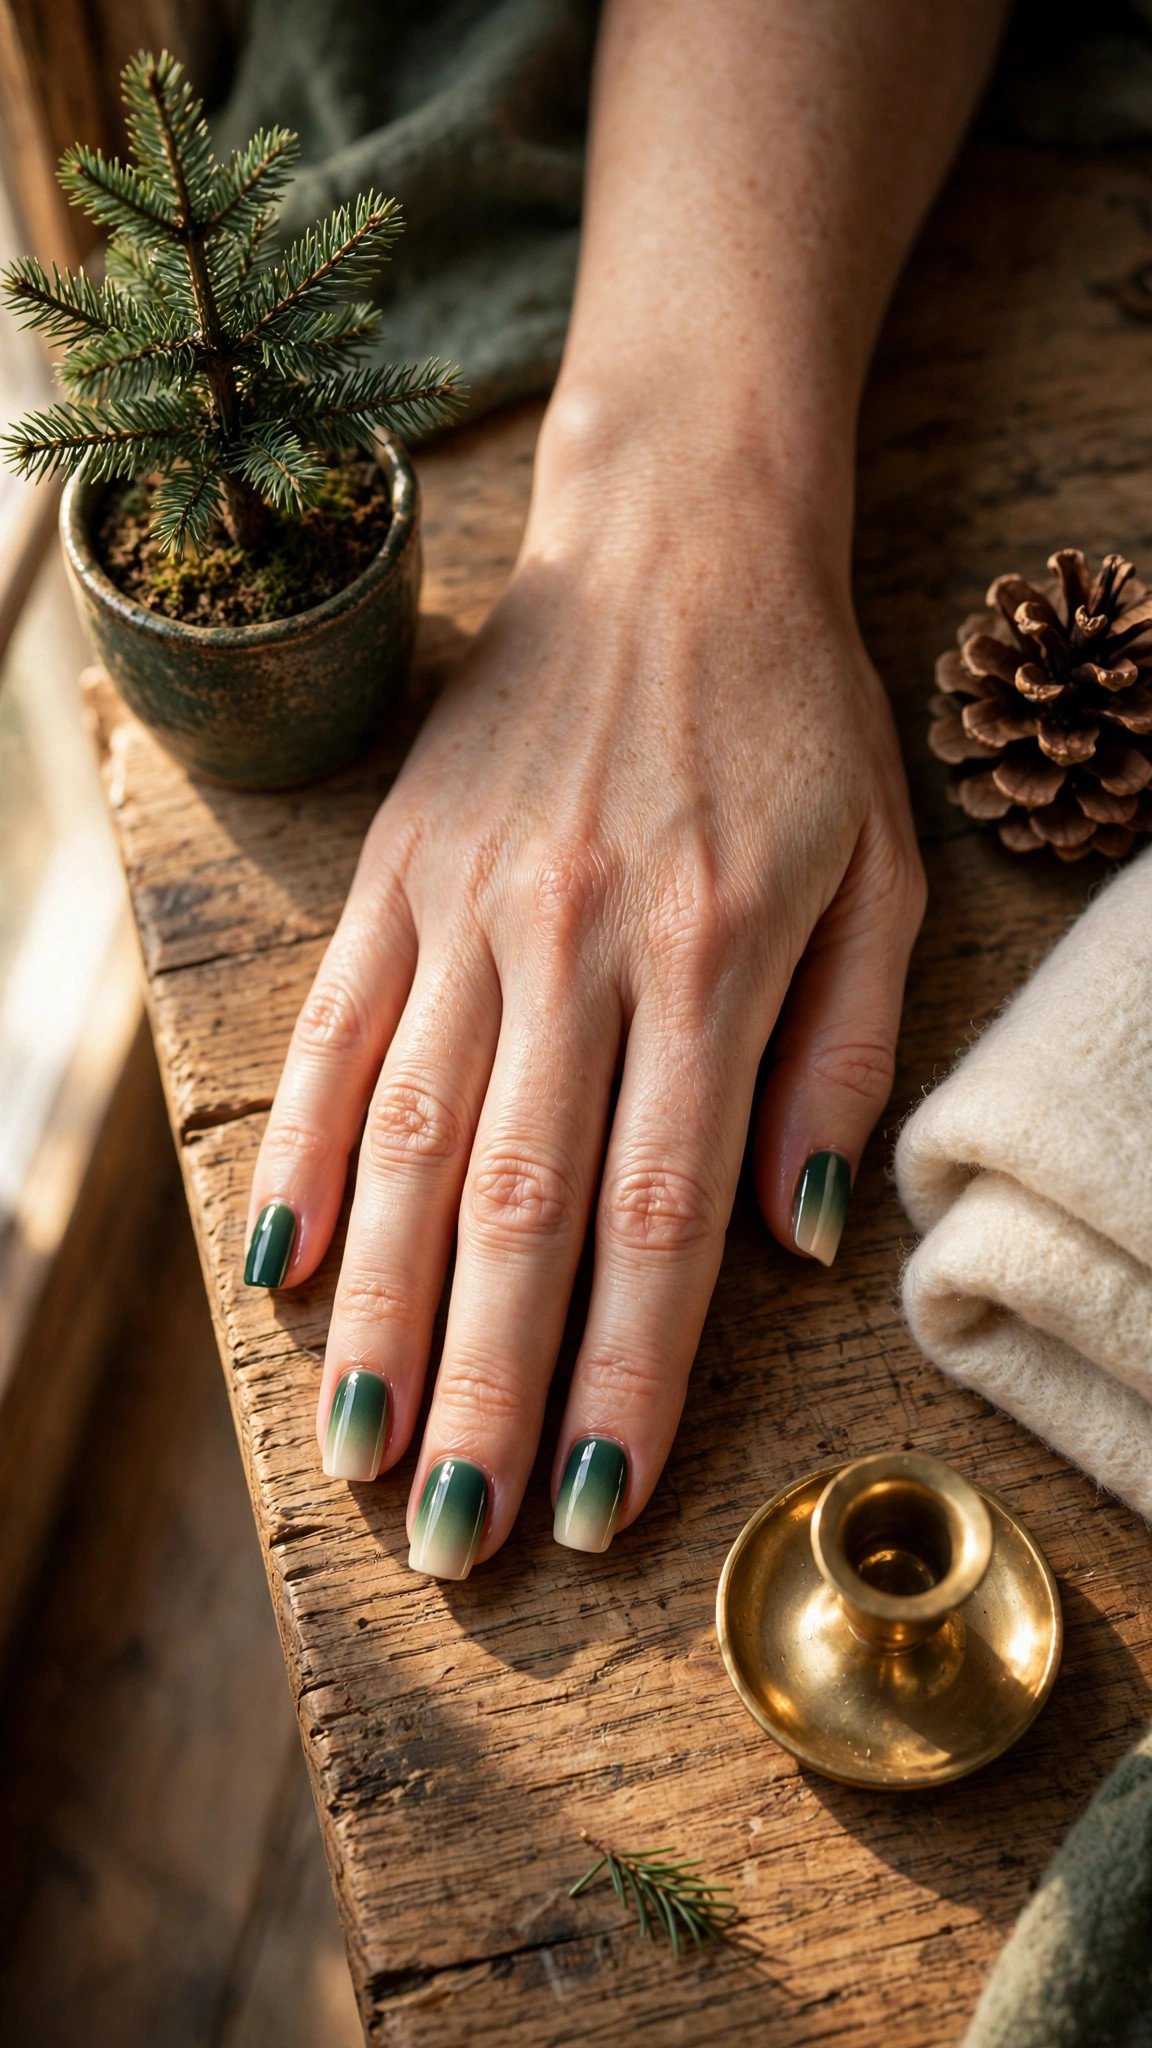
Forest green melting into cream looks like a pine tree dusted with snow, and it is one of the most wearable green ombres for the office. The deep green at the cuticle is rich and seasonal, the cream tip softens it, and the whole hand reads as polished rather than party-ready. Medium square nails suit the blend because the flat tip gives the cream a clean, even edge.
Paint a white base, then sponge forest green from the cuticle and cream from the tip, overlapping in the middle. Green and cream sit far apart in tone, so take your time with the middle: three thin sponge passes, each slightly higher or lower than the last,
Gel lasts about two weeks, and the cream tip shows growth less than a dark tip would.
Pro Tip: Add a single thin coat of sheer nude over the finished blend before the top coat. It softens the join between green and cream without dulling either colour.
See green Christmas nail ideas or office-friendly nail designs.
It costs about $50-75 in a salon.
8. Champagne Gold-to-Nude Ombre on Medium Almond Nails
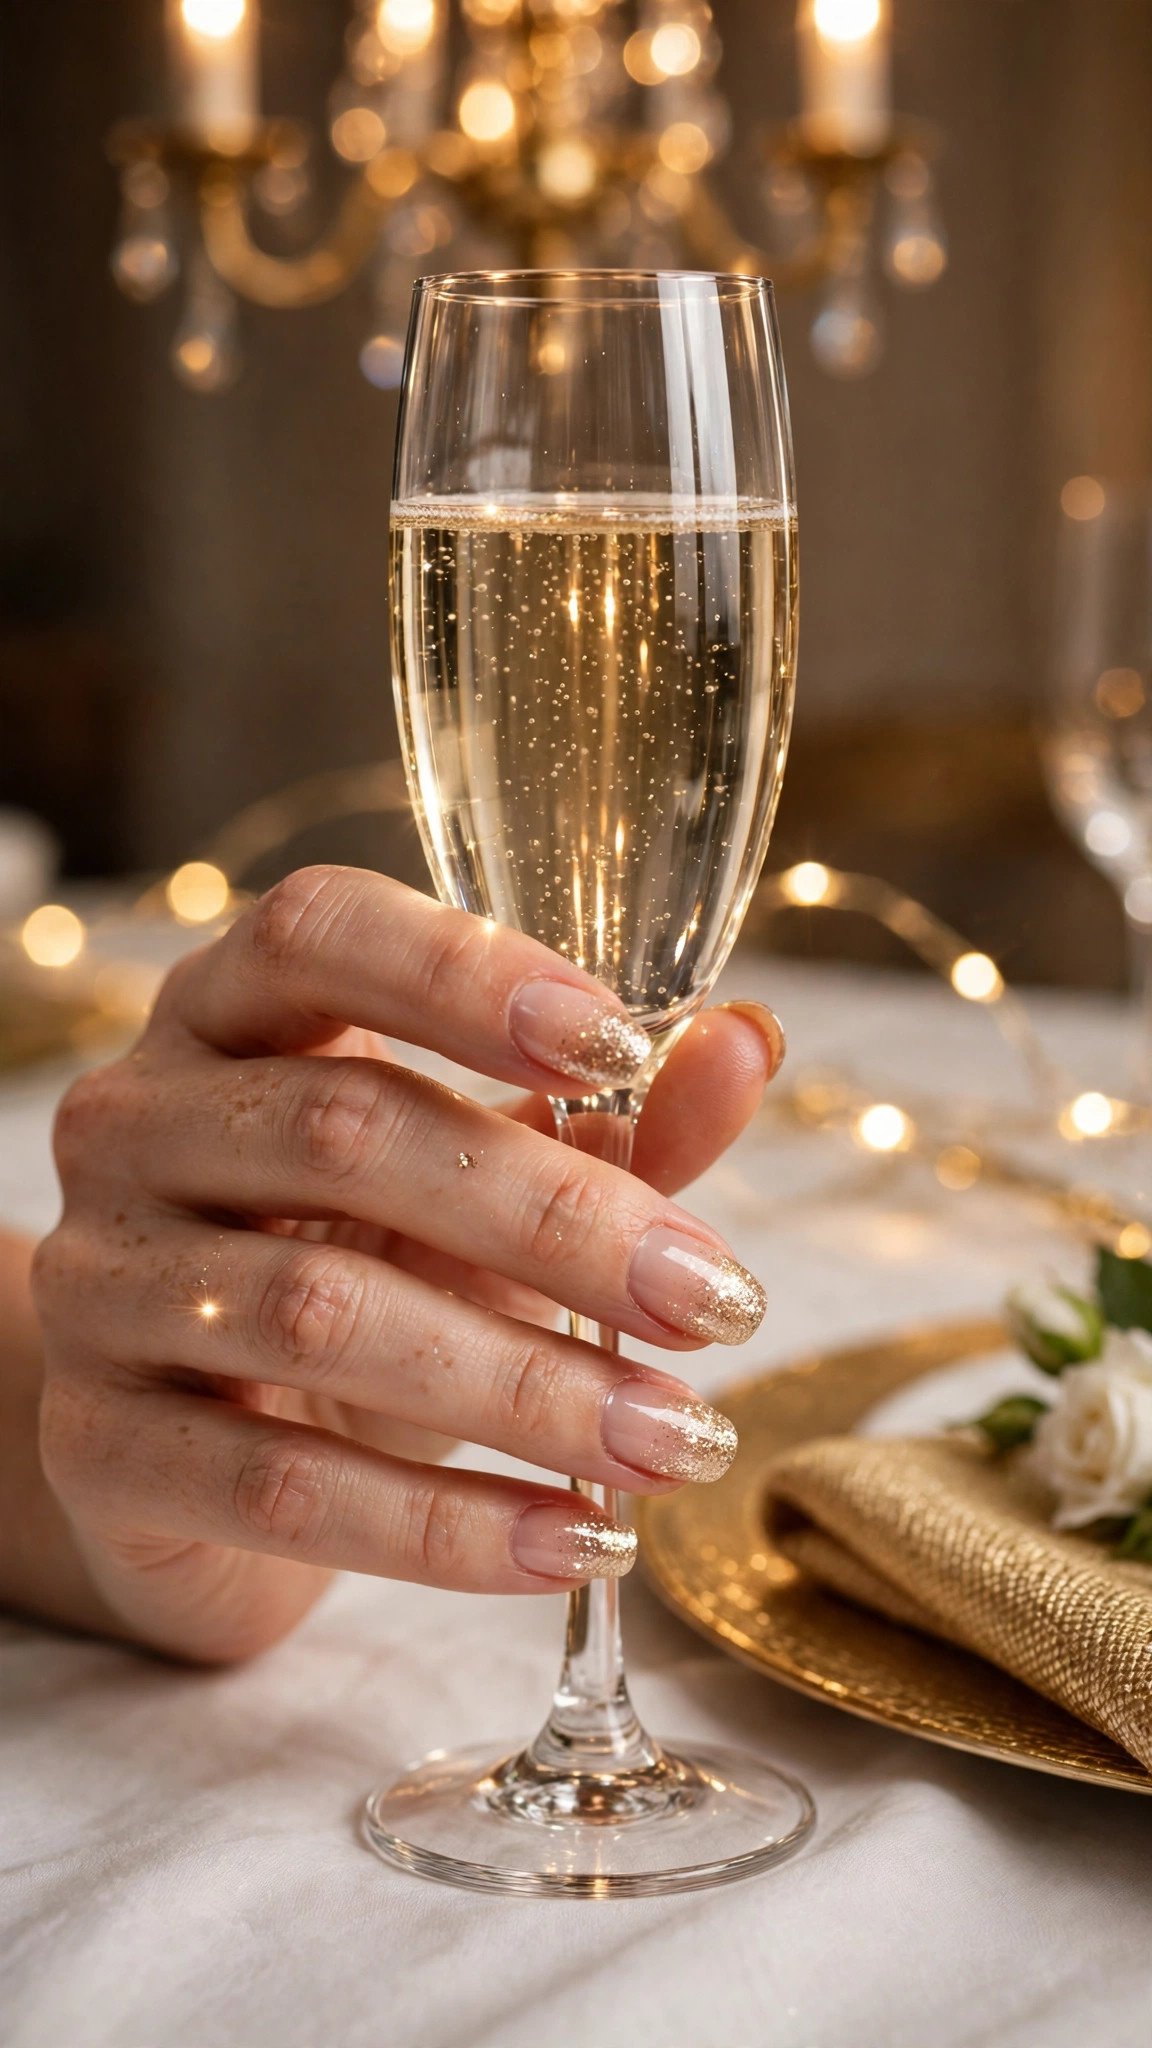
Champagne gold fading into nude is the ombre to wear when the dress is already doing the talking. The glitter tip catches the light every time you lift a glass, while the nude base keeps the hand elegant and understated. Medium almond nails are the perfect shape, because the tapered tip concentrates the sparkle exactly where the eye lands.
Paint a nude base that matches your skin tone, then sponge champagne glitter from the tip upward, fading toward the middle. Use a fine glitter rather than chunky pieces, and press the sponge twice: once for coverage, once for the fade. Seal with two coats of glossy top coat to smooth the glitter.
Gel lasts 2-3 weeks, and glitter tips hide small chips well.
Pro Tip: Match the nude base to your skin, not to the bottle. A nude that disappears against your hand makes the gold fade look like it is floating.
Browse gold ombre nail ideas or glitter nail how-to.
Salon price runs about $55-80, and the set lasts 2-3 weeks.
9. Plum-to-Lavender Ombre on Long Almond Nails
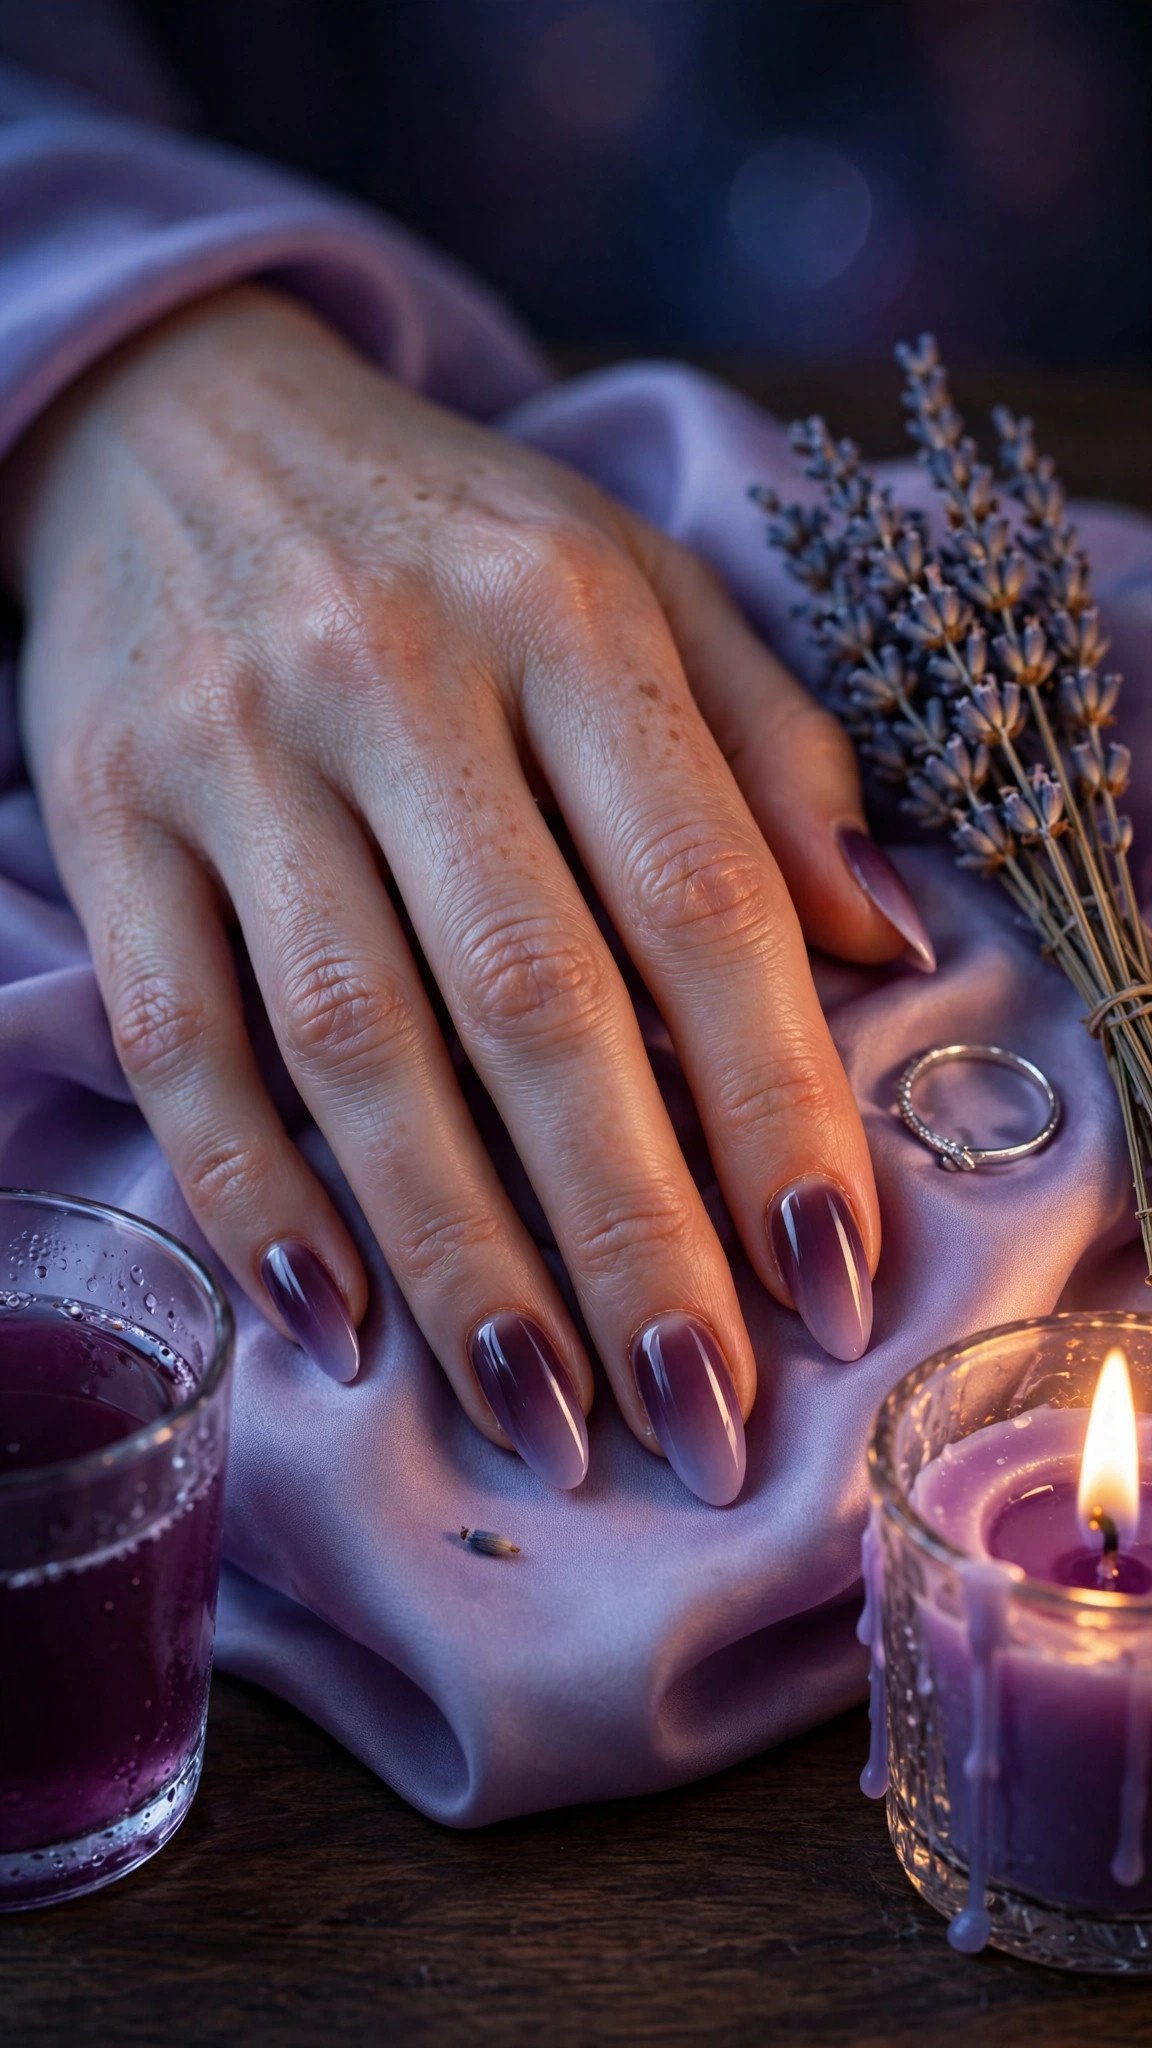
Plum melting into lavender is the most unexpected ombre in this list, and that is exactly why it works. Purple is not the first colour anyone reaches for at Christmas, but deep plum at the cuticle feels rich and wintry, and the lavender tip keeps it soft and feminine. Long almond nails give the two shades room to blend slowly, which is what makes the fade look expensive rather than rushed.
Paint a white base, then sponge plum from the cuticle upward and lavender from the tip downward, meeting in the middle. Both colours sit in the same purple family, so the join blends easily, but use three thin passes rather than two, because plum is a strong pigment that can overpower the lavender.
Gel lasts 2-3 weeks, and the dark base hides tip wear well.
Pro Tip: Add a drop of the plum polish into the lavender on the sponge for the middle pass. That shared colour is what makes the blend look seamless instead of striped.
See purple Christmas nail ideas or plum nail inspiration.
It costs about $55-80 in a salon.
10. Cranberry-to-Copper Ombre on Short Almond Nails

Cranberry melting into copper looks like a glass of mulled wine held up to the firelight, and it is a beautiful ombre for short nails. The deep berry at the cuticle is festive without being a flat red, the copper tip adds warmth and shimmer, and the blend between them is naturally soft because both shades are warm. Short almond nails suit it perfectly, because the shape keeps the look neat while the colours do the work.
Paint a white base, then sponge cranberry from the cuticle and copper shimmer from the tip, overlapping in the middle. Use a metallic copper rather than a glitter copper for the tip, because the smooth metal blends more evenly into a cream-based red.
Gel lasts 2-3 weeks, and the warm tones flatter most skin undertones.
Pro Tip: Warm the copper polish by rolling the bottle between your palms for a minute before you start. Cold metallic polish goes on streaky and ruins the blend.
Browse cranberry nail ideas or copper nail inspiration.
It costs about $50-75 in a salon.
11. Pine Green-to-Gold Glitter Ombre on Medium Coffin Nails

Pine green fading into gold glitter is the Christmas tree in nail form, and medium coffin nails give it the stage it needs. The deep green at the base is the tree, the gold glitter at the tip is the lights, and the blend between them is where the whole design comes alive. This is a party design, unashamedly festive, and it photographs beautifully.
Paint a white base, then sponge pine green from the cuticle upward and gold glitter from the tip downward, overlapping in the middle. Press the glitter on in two thin layers: the first for coverage, the second for sparkle. Seal with two coats of glossy top coat, because glitter without a smooth seal feels rough and catches on fabric.
Gel lasts 2-3 weeks, and glitter is harder to remove, so soak cotton pads in acetone and wrap each nail for ten minutes rather than peeling it off.
Pro Tip: Clean the glitter off the skin around the nail with a small brush dipped in acetone before the top coat. Glitter on the cuticle ruins the clean look of the fade.
See Christmas tree nail ideas or glitter ombre nail guide.
Salon price runs about $60-85, and the set lasts 2-3 weeks.
12. Snow White-to-Pale Blue Ombre on Medium Oval Nails

Snow white fading into pale blue looks like a snowdrift under a winter sky, and it is the calmest ombre in this guide. There is no dark colour and no glitter, just two pale shades melting into each other, which makes it perfect for a weekend, a daytime gathering, or anyone who wants Christmas nails that feel fresh rather than festive. Medium oval nails keep the shape soft, which matches the softness of the colours.
Paint a white base, then sponge pale blue from the tip upward, fading toward the middle, and leave the cuticle end clean white. Because both colours are pale, the blend is almost automatic, but use a milky blue rather than a bright sky blue, or the tip will look painted on.
Regular polish lasts 5-7 days, and gel lasts 2-3 weeks.
Pro Tip: Try a matte top coat on this one. Matte makes pale blue look like fresh snow, while glossy makes it look like ice; both are lovely, but matte is softer.
Browse winter ombre nail ideas or pale blue nail inspiration.
This one costs under $15 and takes about 20 minutes.
13. Ruby-to-Black Ombre on Long Stiletto Nails

Ruby melting into black is the boldest ombre in this list, and it belongs on New Year’s Eve. The deep red at the cuticle is rich and jewel-like, the black tip is dramatic and sharp, and the blend between them looks like velvet fading into midnight. Long stiletto nails give the gradient the length and the point it needs to look deliberate rather than accidental.
This is a salon design. Ask your tech for a ruby gel base, then an airbrushed or carefully sponged black fade from the tip, sealed with a glossy top coat. Black is the least forgiving colour in nail art, so a steady hand and thin layers matter more here than anywhere else in this guide.
Gel lasts 2-3 weeks, though long stiletto nails chip at the tips more easily, so avoid using them as tools.
Pro Tip: Ask for a thin layer of black glitter over the very tip. It softens the black edge and makes the fade look intentional rather than unfinished.
See New Year’s Eve nail ideas or black ombre nail guide.
Salon price runs about $65-95, and the set lasts 2-3 weeks.
14. Rose Gold-to-Blush Ombre on Medium Almond Nails

Rose gold fading into blush is the ombre for a date night, a dinner, or any evening when you want your nails to look soft and expensive at the same time. The blush base is gentle and flattering, the rose gold tip adds warmth and shimmer without shouting, and the blend between them is so smooth that it looks like the colour is glowing from inside the nail. Medium almond nails suit it perfectly, because the tapered tip concentrates the shimmer exactly where it belongs.
Paint a blush base, then sponge rose gold shimmer from the tip upward, fading toward the middle. Use a fine rose gold shimmer rather than chunky glitter, and press the sponge twice for a smooth fade. Seal with a glossy top coat.
Gel lasts 2-3 weeks, and the shimmer tip hides small chips well.
Pro Tip: Add the rose gold in a thin layer first, let it dry, then add a second thin layer only on the outer third of the nail. That builds depth at the tip while keeping the middle soft.
Browse rose gold nail ideas or date night nail inspiration.
Salon price runs about $55-80, and the set lasts 2-3 weeks.
15. Hunter Green-to-Emerald Ombre on Short Square Nails

Hunter green melting into emerald is a tone-on-tone ombre, and that subtlety is what makes it so wearable at work. Both shades are green, but the dark base and the brighter tip create depth without contrast, so the hand looks polished and festive without drawing attention in a meeting. Short square nails suit the design because the flat tip gives the emerald a clean, even edge.
Paint a white base, then sponge hunter green from the cuticle and emerald from the tip, overlapping in the middle. Because the two greens are close in tone, the join blends easily, which makes this a genuine beginner design. Two thin sponge passes are enough; the third pass usually pushes the emerald too far down and loses the dark base.
Gel lasts about two weeks, and the dark tones hide tip wear well.
Pro Tip: Use a white base, not a nude one, under green ombre. A nude base dulls green; a white base makes both greens brighter and the blend cleaner.
See green ombre nail ideas or office Christmas nail designs.
It costs about $45-70 in a salon.
16. Silver-to-Charcoal Ombre on Medium Squoval Nails
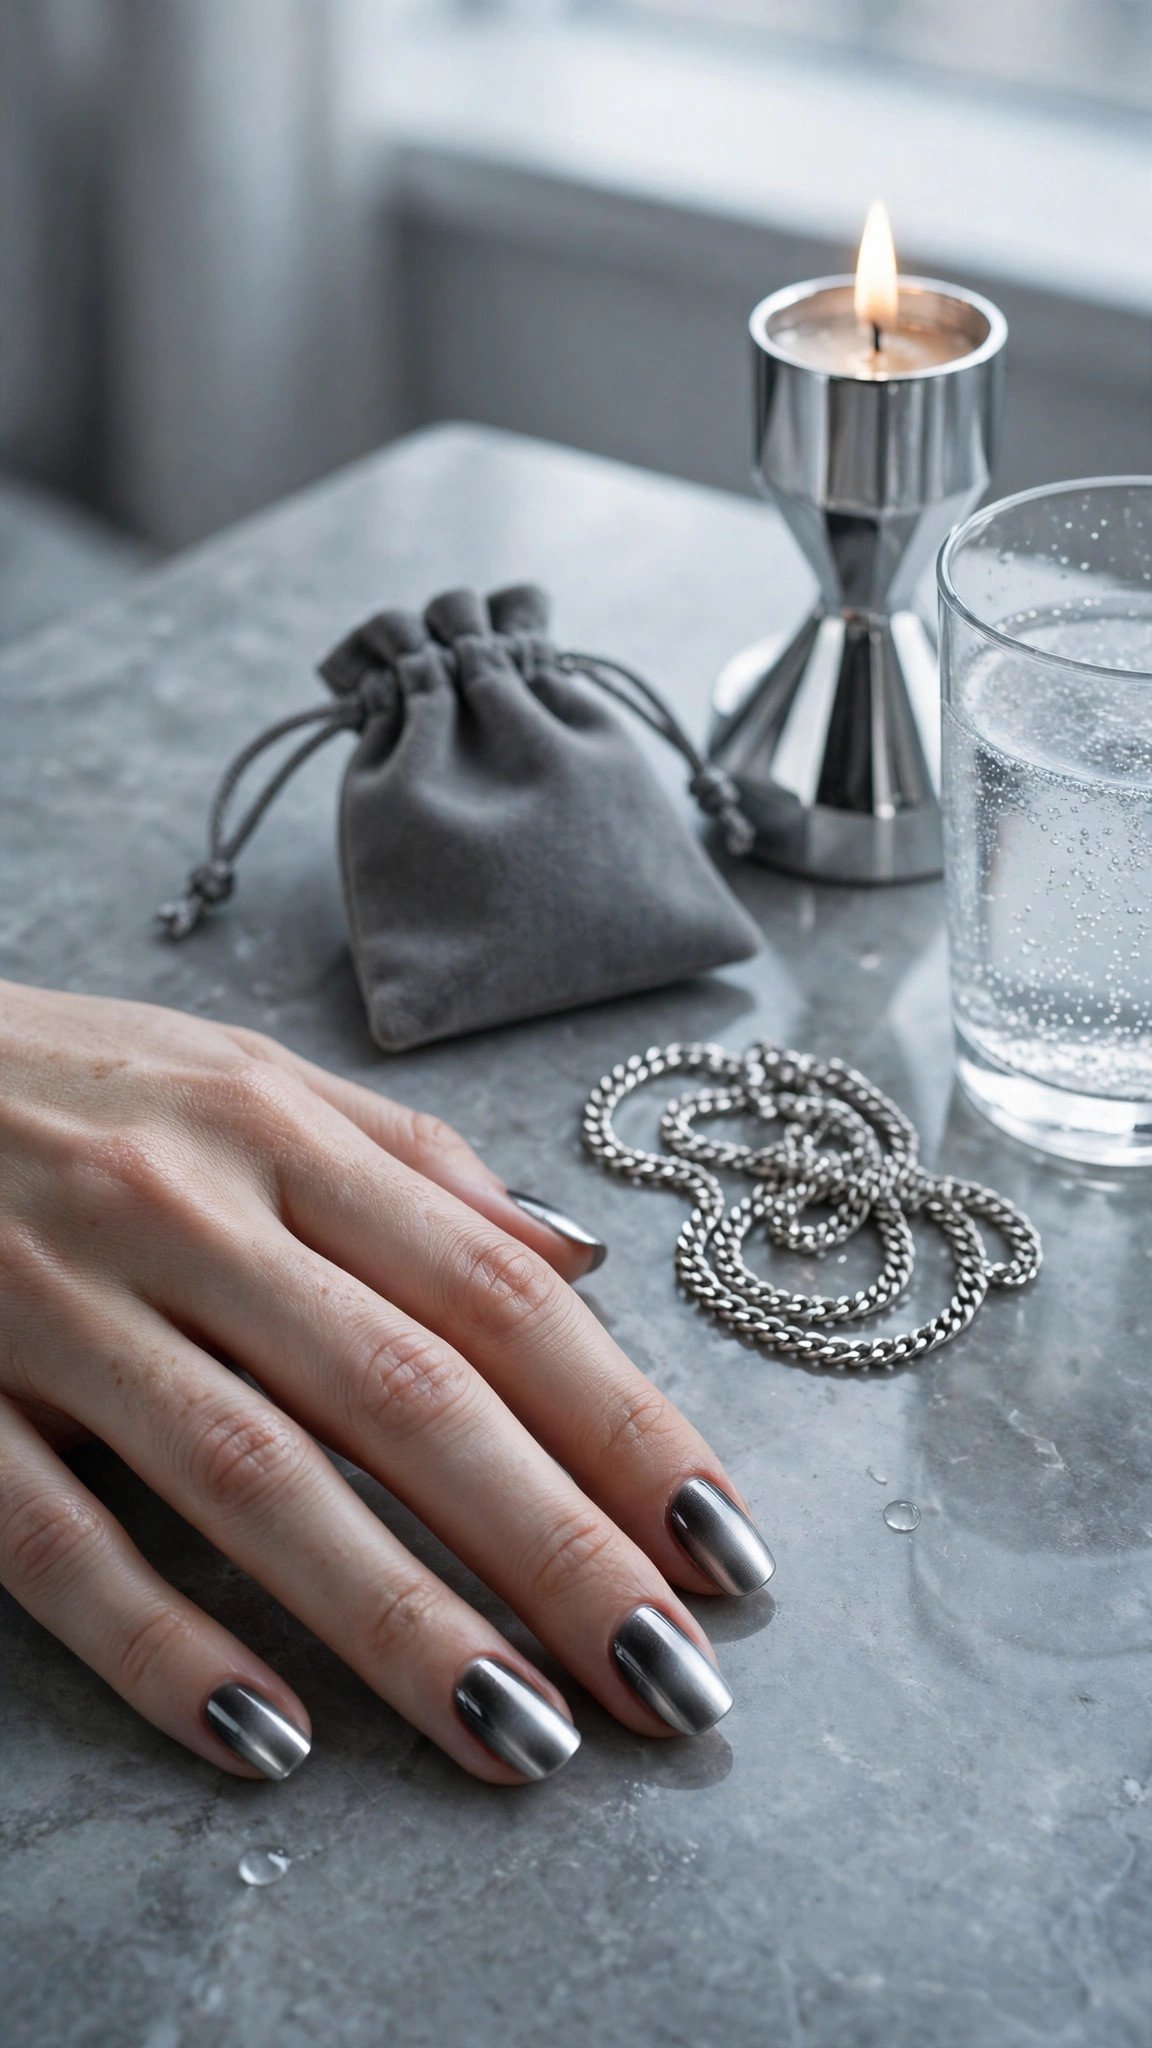
Silver fading into charcoal is the ombre for a formal evening, a work party, or any night when the outfit is already silver, grey, or black. The charcoal base is deep and elegant, the silver tip is bright and metallic, and the blend between them looks like brushed metal. Medium squoval nails suit the design because the softly squared tip gives the silver a clean edge without the sharpness of a stiletto.
This is a salon-level design, because metallic silver shows every sponge mark. Ask your tech for a charcoal gel base, then an airbrushed or carefully sponged silver fade from the tip, sealed with a glossy top coat. If you try it at home, use a very soft sponge, thin layers, and at least three passes.
Gel lasts 2-3 weeks, and the metallic tip hides small chips well.
Pro Tip: Use a dark grey base under the silver, not a black one. Black makes silver look harsh; charcoal lets it glow.
Browse silver nail ideas or metallic ombre nail guide.
Salon price runs about $60-90, and the set lasts 2-3 weeks.
17. Candy Cane Red-to-White Ombre on Medium Almond Nails
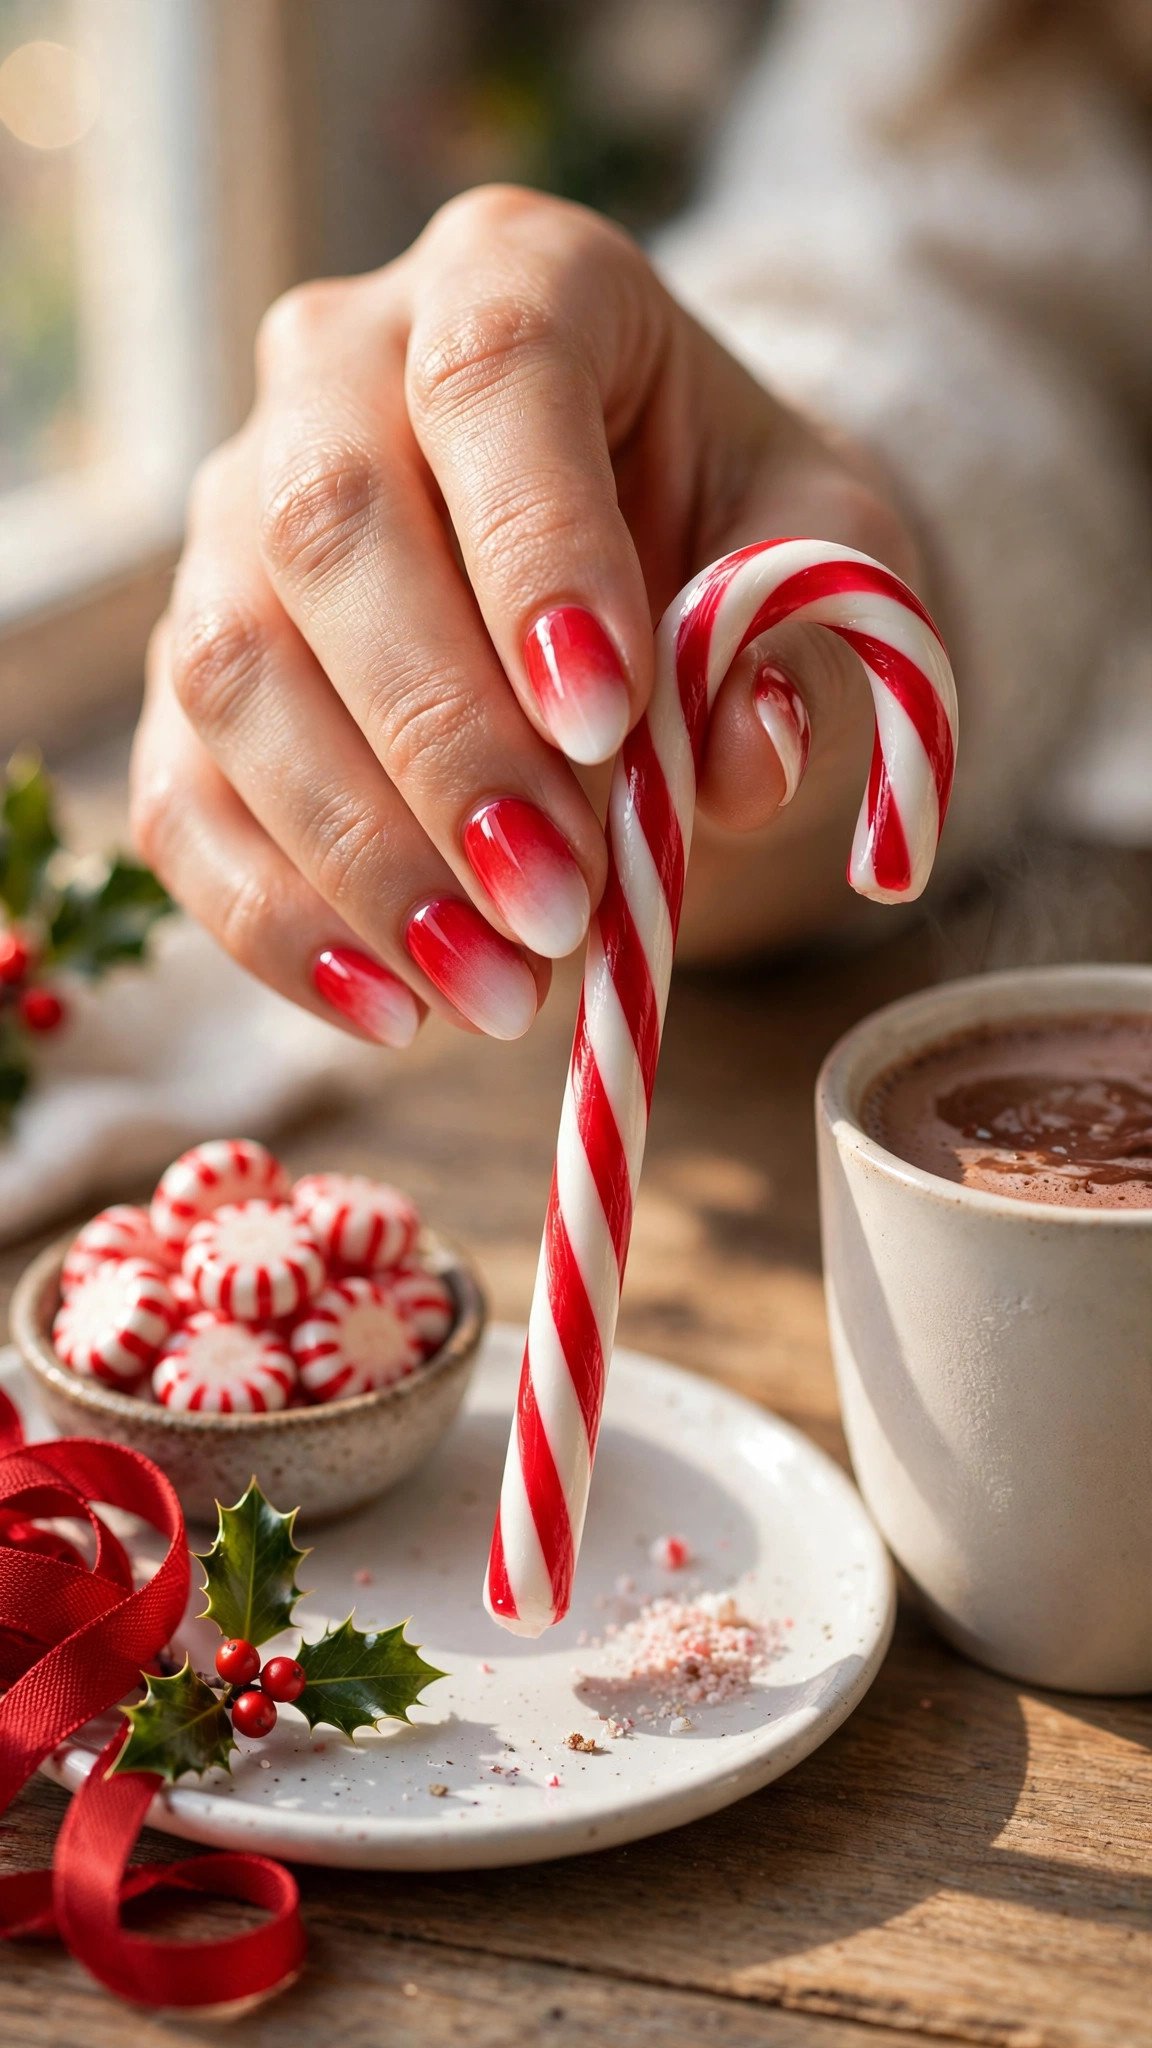
Candy cane red melting into white is the most joyful ombre in this list, and it belongs on Christmas Day itself. The bright red at the cuticle is pure festive cheer, the white tip is clean and crisp, and the blend between them is softer than the stripes on a real candy cane, which is exactly the point. Medium almond nails suit it because the tapered tip keeps the white end looking elegant rather than stark.
Paint a white base, then sponge bright red from the cuticle upward and leave the tip white, blending in the middle with a clean sponge. Red is a strong pigment, so use two thin passes and let each one dry before the next, or the red will bleed into the white and turn it pink.
Gel lasts 2-3 weeks, and the bright red base hides tip wear well.
Pro Tip: Keep a clean, dry sponge handy for the middle of the nail. One light dab with a clean sponge softens the join without adding more colour.
See candy cane nail ideas or red and white Christmas nails.
It costs about $50-75 in a salon.
18. Hot Cocoa Brown-to-Cream Ombre on Short Round Nails
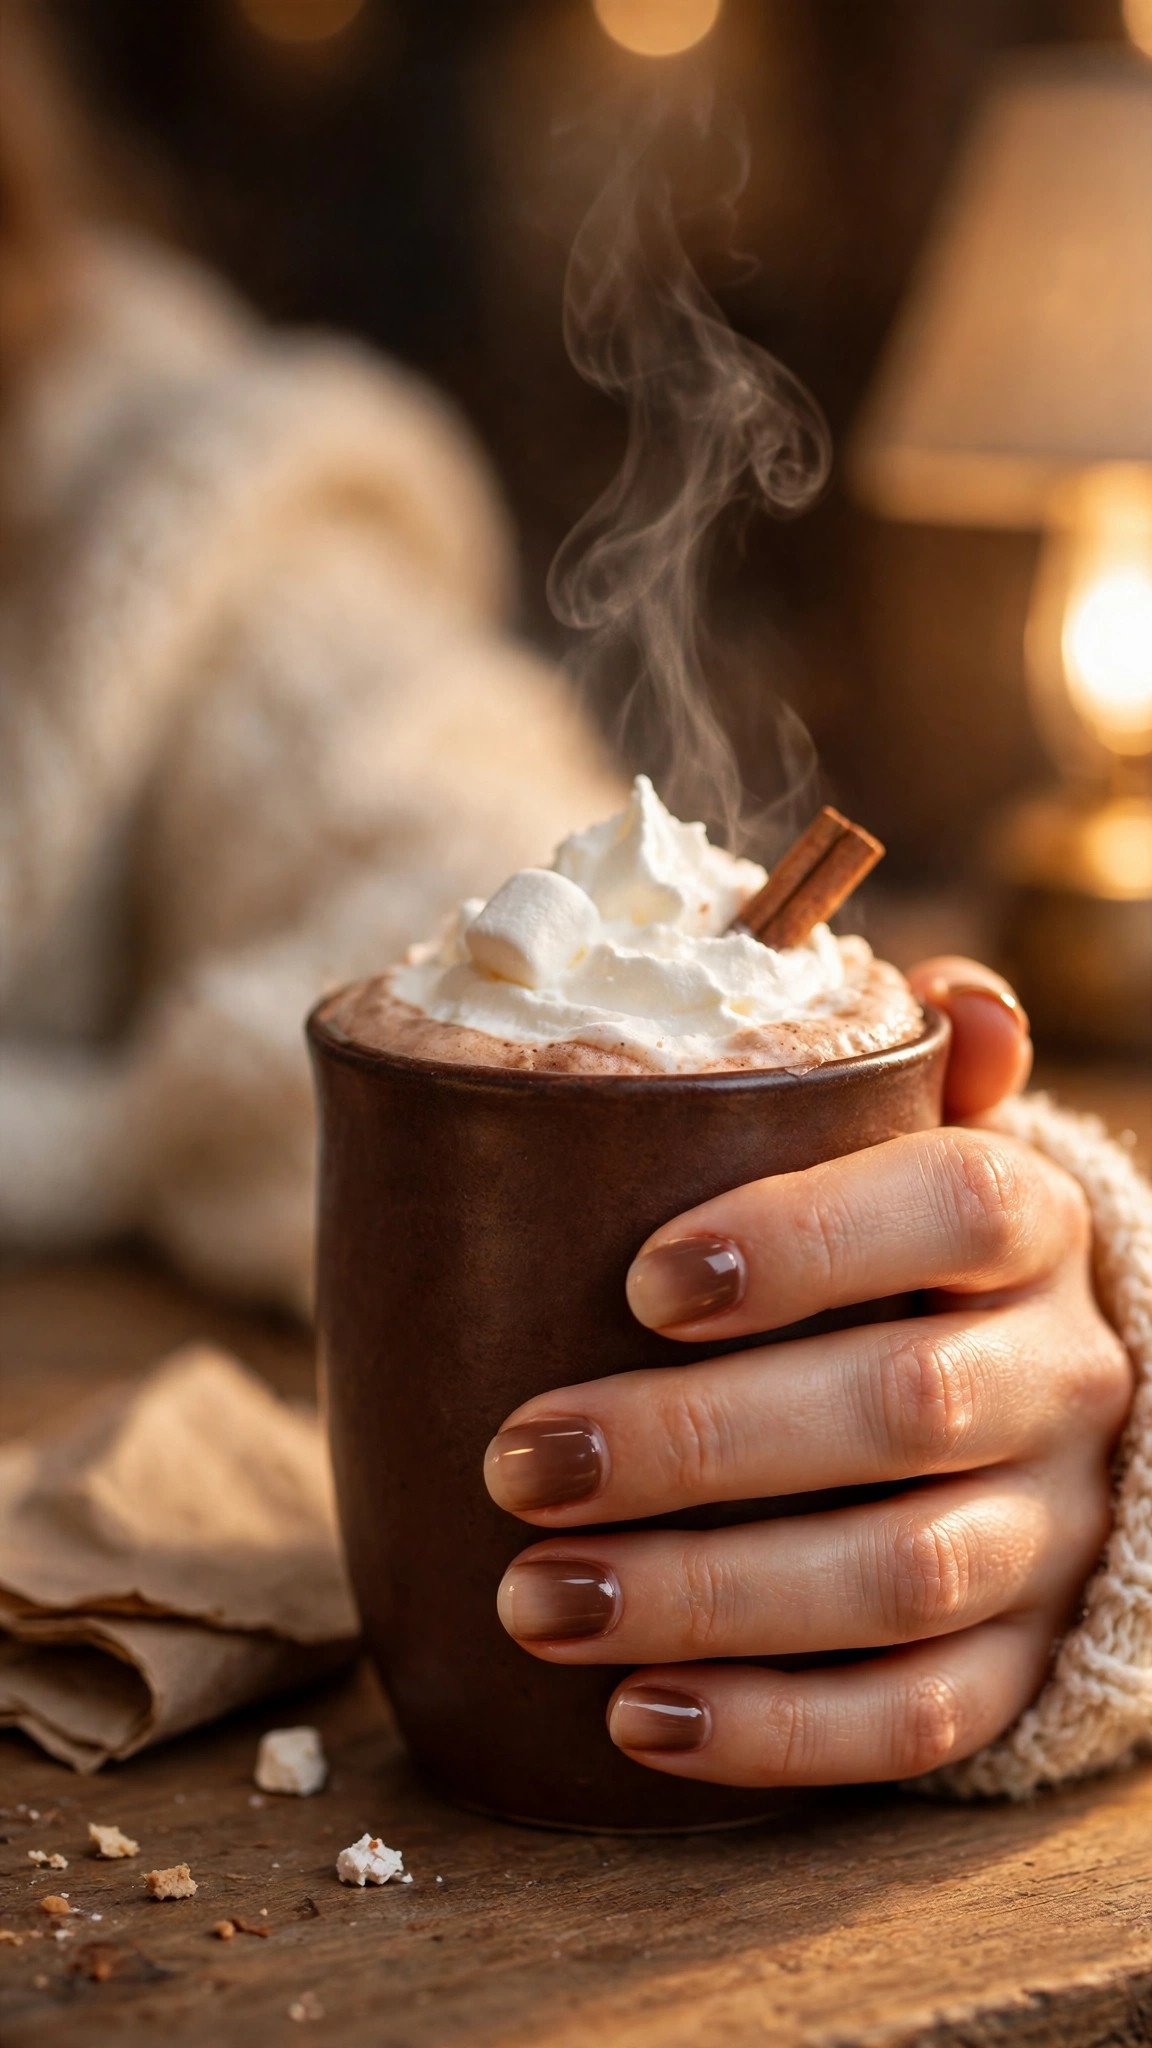
Hot cocoa brown melting into cream looks like the top of a mug of hot chocolate, and it is the cosiest ombre in this guide. The rich brown at the cuticle is warm and comforting, the cream tip lightens the whole hand, and the blend between them is naturally soft because both shades are warm. Short round nails suit it perfectly, because the shape is practical, comfortable, and made for a quiet day at home.
Paint a white base, then sponge cocoa brown from the cuticle and cream from the tip, overlapping in the middle. Brown and cream sit in the same warm family, so the join blends almost by itself, which makes this a genuine beginner design. Two thin sponge passes are enough. Finish with a glossy top coat, or a matte top coat for a softer, cocoa-like finish.
Gel lasts about two weeks, and the warm tones flatter most skin undertones.
Pro Tip: Use a warm cream, not a stark white, for the tip. Stark white against cocoa brown looks like a French manicure; warm cream melts into the brown.
Browse brown Christmas nail ideas or cosy winter nail designs.
This one costs under $15 and takes about 20 minutes.
Getting Started With Ombre Christmas Nails
The easiest first step is to pick one colour pair, not one design. A red-to-nude or a blush-to-white ombre teaches you how the sponge behaves before you try a dark-to-light fade like navy-to-ice-blue. Buy two polishes in the same colour family, a white base coat, a makeup sponge, and a glossy top coat, and practise on one nail before you commit to all ten.
The most common beginner mistake is skipping prep. Push back the cuticles, buff the nail surface lightly, and wipe with alcohol before the base coat. Without that, even a perfect blend lifts within a few days. The second mistake is thick sponge layers, which bubble and smear; two or three thin passes beat one heavy press every time.
What to buy first: a base coat, a top coat, one white polish, two colours for your first ombre, and a pack of makeup sponges. That is about $15-35 in total and covers designs 1, 3, 4, 6, 12, 15, and 18.
For timeline, regular polish takes about 30 minutes and lasts 5-7 days. Gel takes 60-90 minutes and lasts 2-3 weeks, though it should not stay on longer than three weeks. If you notice ridges, discoloration, or pain around the nail, skip the polish and ask a nail professional or a doctor before continuing.
Frequently Asked Questions
What are the best ombre Christmas nails for beginners?
The best ombre Christmas nails for beginners are a classic red-to-nude, a blush pink-to-white, and a frosted white-to-silver fade. Each needs only two colours and a sponge, and the colours sit close enough in tone that the blend almost makes itself.
What colours go with ombre Christmas nails besides red and green?
Burgundy and rose, plum and lavender, navy and ice blue, champagne gold and nude, and cocoa brown and cream all make beautiful Christmas ombres. Silver and charcoal suit formal evenings, while blush and white suit daytime gatherings.
How long do ombre Christmas nails last?
Regular polish lasts about 5-7 days, gel lasts 2-3 weeks, and press-on ombre sets last 1-2 weeks. Gradient designs hide regrowth better than solid colours, because there is no hard line at the cuticle to give the growth away.
Can I do ombre Christmas nails on short nails?
Yes, and many ombres look better short: try the Frosted White-to-Silver, the Blush Pink-to-White, or the Hot Cocoa Brown-to-Cream. Keep the fade compact, use two thin sponge passes, and avoid dense glitter on very short nails.
How much do ombre Christmas nails cost at a salon?
A simple gel ombre set costs about $50-75, and an airbrushed or hand-painted full set costs $65-95. Glitter, chrome, and cat-eye finishes add about $5-15. Prices vary by city and technician, so confirm before booking.
A Few Final Thoughts
The best ombre Christmas nails do not shout, and they do not need to be complicated. Across these 18 ideas, the pattern is simple: two colours in the same family, a soft sponge, and a glossy top coat make the biggest difference. Pick one of the 18, gather your tools this week, and enjoy the season.