
I have left a salon chair glowing with excitement and I have left one quietly panicking in the car park, sunglasses on, wondering how I was going to live with hair three shades brighter than the picture in my head. The difference between those two days was never the stylist’s talent, and it was never my hair. It was the conversation we had before a single strand of colour touched my head. I had either explained what I wanted in a way she could actually use, or I had smiled, said something vague like “just a bit lighter, but natural,” and hoped for the best. Natural-looking colour is not an accident, and it is not a single shade you can order like a coffee. It is the result of a clear, honest consultation, and this guide walks you through exactly how to have that conversation, step by step, so you walk out looking like yourself on your very best hair day, not like a stranger who borrowed your face.
Quick Answer: Bring three photos of hair like yours in natural light, name your maintenance level honestly, and say the words “stay on the brown side” or “no more than two levels lighter” out loud. Ask for a test strand, agree on warm or cool tone before colour starts, and check the result in the mirror halfway through. A natural colour appointment usually costs $150-$350, takes two to three hours, and should grow out softly for three to six months with no hard line.
Why Asking Well Matters
Your stylist is not a mind reader, and the word natural means something different to almost every woman who says it. To one of us it means a shade lighter than our own colour, to another it means sun-kissed ends with dark roots, and to a third it means blonde that somehow still looks untouched. When you sit down and say “natural” without adding anything else, your stylist has to guess which version you mean, and she will guess based on the last ten clients she saw, not on you. A good consultation closes that gap before the colour ever starts, so the two of you are picturing the same head of hair.
There is a practical reason this matters so much with colour, and it is that colour cannot be undone in an afternoon. A haircut that is too short grows back, but colour that is too bright has to be toned down, deepened, or grown out over months, and every fix costs money and puts more chemicals on your hair. Spending ten honest minutes talking first is the cheapest insurance you will ever buy for your hair, and it is the step most of us skip because we feel awkward, rushed, or afraid of sounding fussy. You are not being fussy. You are being clear, and a good stylist loves a clear client.
Here is the part most women miss: asking well also protects your relationship with your stylist. When you show her photos, tell her your history, and name your budget and your maintenance level, you give her the information she needs to do her best work, and you give her permission to tell you the truth when something will not work on your hair. That honesty is what turns a one-off appointment into a stylist you trust for years, because she knows you will listen, and you know she will not push you brighter than you asked to go.
At a Glance
- Three photos in natural light say more than any colour name ever will.
- Two levels lighter is the safe first step; four levels in one visit usually turns brassy.
- A test strand takes ten minutes and can save you months of regret.
- Natural colour costs $150-$350, with a gloss refresh of $40-$80 every 8-12 weeks.
| # | Step | What to Do | What to Say/Show | Difficulty |
|---|---|---|---|---|
| 1 | Bring the right photos | Show 3 photos on similar hair | “Like this, but softer around my face” | Easy |
| 2 | Learn the key terms | Use babylights, gloss, root shadow | “I want a gloss, not a full bleach” | Easy |
| 3 | Name your starting colour | State your natural shade and goal | “I am a level 5 brown, I want a level 7” | Easy |
| 4 | State your maintenance level | Say how often you will return | “I can only come back every four months” | Easy |
| 5 | Share your hair history | Tell her about dye, henna, keratin | “I used box dye six months ago” | Easy |
| 6 | Point to the lightest pieces | Show where brightness should sit | “Lightest at the ends, not at my roots” | Easy |
| 7 | Agree on warm or cool | Pick golden, neutral, or cool | “Warm gold, please, not ash” | Medium |
| 8 | Ask for a test strand | Test one hidden piece first | “Can we test one strand behind my ear?” | Easy |
| 9 | Agree on grow-out and price | Confirm cost, time, and upkeep | “What will this cost, and how will it grow out?” | Medium |
| 10 | Do a halfway mirror check | Look before the toner goes on | “Can I see it before you tone it?” | Easy |
| 11 | Ask about home care | Learn washing and toning rules | “What shampoo should I use at home?” | Easy |
| 12 | Know the fix if too bright | Agree the rescue plan in advance | “If it is too bright, can we tone it down today?” | Medium |
1. Bring Photos That Show Your Real Hair, Not Just the Dream

Photos are the single most useful thing you can bring to a colour appointment, because they remove the guesswork from words like natural, soft, and sun-kissed. I bring three: one of the exact result I want, one of a result that is slightly too light so I can say “not this bright,” and one of my own hair in daylight so my stylist can see my real starting point. The best photos show hair that is similar to mine in length, thickness, and texture, taken outdoors or by a window, because salon lighting and phone filters make every colour look warmer and brighter than it really is.
When you show the photos, do not just hand over your phone and hope. Point to the exact parts you love and say them out loud: the softness around the face, the darker roots, the way the ends catch the light. Then point to the parts you do not want, because that is just as important. Say something like, “I love how blended this is, but I do not want the blonde pieces this wide or this close to my parting.” Ask your stylist which photo is realistic on your hair, and listen carefully if she says one of them would need three sessions to reach safely.
I once brought a photo of a celebrity with thick, wavy, waist-length hair, and mine was fine, straight, and shoulder-length, and I could not understand why the result looked nothing like the picture. The mistake was choosing a dream photo instead of a realistic one. Hair colour behaves completely differently on fine straight hair than on thick wavy hair, so now I only save photos of women whose hair could pass for mine in a lineup, and the results finally started matching the pictures.
Pro Tip: Save your photos in a folder on your phone the night before, and screenshot them so they load without Wi-Fi. Bring one photo of the colour you want in direct sunlight and one in shade, because the same shade can look two tones different between the two, and your stylist needs to see both versions before she mixes anything.
See how to find your best hair colour photos or choosing a shade for your skin tone.
2. Learn the Words: Babylights, Balayage, Gloss, and Root Shadow
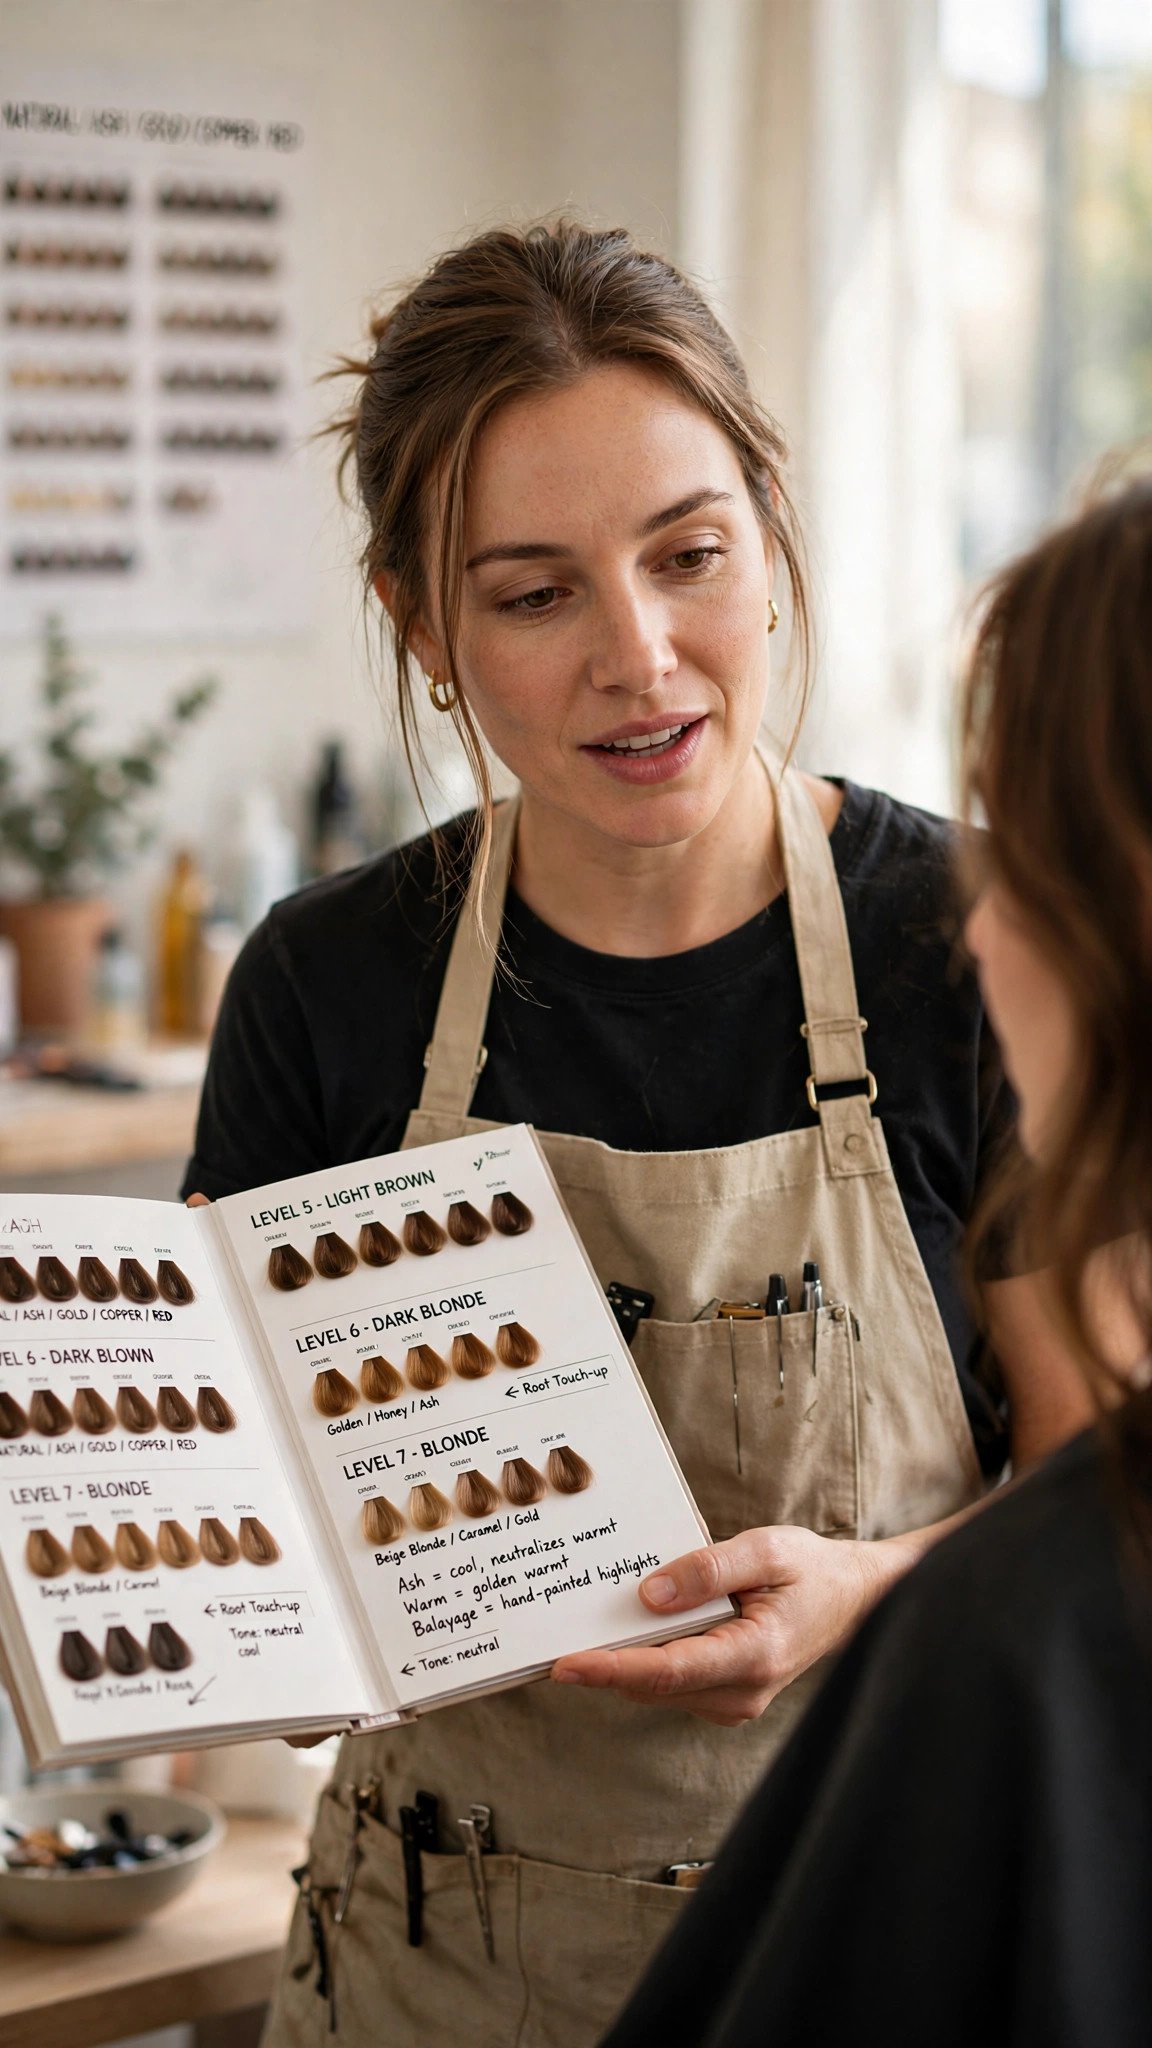
You do not need to speak like a colourist, but knowing five or six key words changes everything about your consultation, because it lets you describe the technique, not just the feeling. Babylights are fine, delicate highlights that mimic the way a child’s hair lightens in the sun. Balayage is colour painted freehand onto the surface of the hair for a soft, blended grow-out. A gloss, sometimes called a toner, is a sheer colour that adjusts tone and adds shine without lifting your hair lighter. A root shadow, or root melt, is a darker gloss at the roots that softens the line between your natural colour and the lighter pieces. Knowing those four terms alone means you can ask for almost any natural look.
Use the words in a full sentence so your stylist knows you mean them. Try, “I would like soft babylights through the top, with a root shadow so there is no hard line, and a warm gloss to finish.” That one sentence tells her the placement, the grow-out, and the tone in about ten seconds, and it invites her to correct you if a different technique would suit your hair better. If she suggests a word you do not know, ask her to explain it before you agree, because nodding at a term like teasylights or foilayage and hoping it means something gentle is how surprises happen.
The mistake I made for years was using the word highlights for everything, and then wondering why I kept getting stripey foils when I wanted a soft balayage. Highlights is a family of techniques, not one look, and my stylist was giving me the most common one while I was picturing something entirely different. The day I learned to say balayage instead of highlights, and gloss instead of dye, my appointments finally started producing the soft, blended colour I had been describing all along.
Pro Tip: Write your three key phrases on your phone before you go in, and read them out at the start of the consultation. It feels formal for about five seconds, and then it feels wonderful, because you have said exactly what you want before nerves or small talk can water it down, and your stylist can build the whole appointment around those words.
See babylights versus balayage explained or what a hair gloss actually does.
3. Name Your Natural Colour and Where You Want to Land

Every colourist thinks in levels, a scale from one, which is black, to ten, which is the lightest blonde, and knowing roughly where you sit on that scale is the fastest way to keep your colour natural. Most natural brunettes are a level four, five, or six, and most natural-looking colour sits just one or two levels lighter than that. If you are a level five brown and you ask for a level seven bronde, you will look sun-kissed and still unmistakably brunette. If you ask for a level nine in the same appointment, you are asking your hair to lift four levels at once, which is when brassiness, damage, and that too-bright shock usually appear.
Say it out loud in the chair, even if you are only guessing. Try, “I think I am about a level five brown, and I would like to land around a level seven, staying on the brown side.” Your stylist will confirm or correct your number in seconds, and from there the two of you have a shared target instead of a shared hope. Ask her how many levels she plans to lift, and how many sessions it would take to go lighter later if you love the result and want more. That question alone tells her you want a gradual change, not a transformation.
I once told a stylist I wanted to be “a bit lighter” and said nothing about levels, and she lifted me three levels in one session because, to her, a bit lighter meant a visible change worth photographing. I left looking blonde in every photo, and it took two toning appointments to bring me back to brown. The mistake was mine as much as hers: I had given her a direction but no destination, and she had driven further than I wanted to go.
Pro Tip: If you are not sure of your level, ask your stylist to hold a swatch next to your roots in daylight before she mixes anything. That thirty-second check grounds the whole appointment in your real hair instead of your memory of it, and it gives you both a number you can refer back to at your next visit.
See how to find your natural hair colour level or bronde shades for brunettes.
4. Describe Your Maintenance Level Honestly

Your maintenance level is the truth about how often you will really come back, how much money you will really spend, and how much effort you will really put in at home, and it should shape every colour decision you make. A woman who visits the salon every six weeks can wear bright face-framing pieces and cool ash tones, because she is there often enough to keep them fresh. A woman who visits twice a year needs dark roots, soft blending, and warm tones that fade gracefully, because nobody will be refreshing her toner in between. Neither choice is better, but pretending to be the first woman when you are the second is how you end up with roots that scream for attention by week six.
Be specific and a little bit blunt. Say, “I can come back every four months at most, and I wash my hair three times a week and I will not use purple shampoo every wash.” That sentence tells your stylist to choose a lived-in placement, a root shadow, and a tone that will still look good when it fades. Ask her what the colour will look like at eight weeks and at sixteen weeks, not just on day one, because a natural colour is judged by its grow-out, not by its first photograph.
The mistake I made was telling a stylist I would happily come back every six weeks for a toner, because I wanted to sound committed, and then life happened and I did not return for five months. By then my cool ash had faded to a warm, uneven brass, and my bright money piece had grown into a stripe. I had asked for a high-maintenance colour with a low-maintenance life, and the colour punished me for it. Now I say my real schedule first, and I let the colour fit my life instead of the other way around.
Pro Tip: Ask for the laziest version of the colour you love, and see if you still love it. If a soft bronde with a root shadow still makes you happy when you imagine it three months grown out, that is your colour. If it only excites you when it is freshly toned, choose something softer and save yourself the upkeep.
See low-maintenance hair colours that grow out well or how often to get a gloss refresh.
5. Talk About Your Hair History, Even the Box Dye

Your hair remembers everything, even the things you would rather forget, and your stylist needs to know all of it before she mixes colour. Box dye, henna, keratin treatments, bleach from two summers ago, and that gloss you bought at the chemist all change how your hair lifts, and they change it unevenly, so the same formula can turn one section golden and another section orange. Colourists call this history, and it is the first thing a good one will ask about, because it decides what is safe to do in one session and what needs to be done slowly.
Tell her everything, in order, with rough dates, and do not soften the embarrassing parts. Say, “I used a dark brown box dye six months ago, I had a keratin treatment in January, and I lightened my ends myself last summer.” Then let her feel your hair and look at it in the light, because she can often see old colour you have forgotten about. If you are not sure what was in a product, bring the box or a photo of it. A stylist would far rather hear an awkward truth in the consultation than discover it halfway through processing, when the colour is already developing.
I once forgot to mention a black box dye from a year earlier, because my hair had grown and I assumed it was gone, and the stylist lifted my lengths expecting virgin brown hair. The ends turned a stubborn orange while the roots lifted cleanly, and we spent an extra hour correcting it with a deeper toner. The mistake was not the dye, it was my silence, and it cost me time, money, and an afternoon of worry that could have been avoided with one honest sentence.
Pro Tip: Make a short hair-history note on your phone before your appointment, listing every colour, treatment, and bleach session you can remember, with the month and year. Handing that note to your stylist takes thirty seconds and makes you look like her favourite kind of client: honest, organised, and easy to keep safe.
See how box dye affects salon colour or what to tell your stylist before colouring.
6. Point to Where You Want the Lightest Pieces

Where the lightest pieces sit matters just as much as how light they are, and it is the detail most women forget to mention. Brightness at the roots reads as a full colour change, brightness at the ends reads as sun-kissed, and brightness around the face reads as a glow that lifts your whole complexion. For a natural result, most of us want the lightest pieces low and soft, starting around the cheekbones or lower, with the roots left dark and the brightest ribbons saved for the mid-lengths and ends where the sun would naturally touch our hair.
Use your hands and your mirror to show her, not just words. Touch the spot on your hair where you want the lightness to begin, and say, “Please start the light pieces here, at my cheekbones, and keep my roots and my parting dark.” Ask her to keep the pieces around your face fine and soft rather than wide and bold, because a wide bright section at the hairline is the fastest way to look dyed. If you part your hair in the middle, say so, because the pieces on either side of a centre parting are the most visible pieces on your whole head.
The mistake I made was asking for face-framing highlights without saying how high they should start, and my stylist painted them right up to my parting. For the first month every photo showed two bright stripes framing my face, and I felt like I was wearing a headband made of blonde. A few centimetres lower, with the roots left dark, would have given me the same glow without the stripe, and I have pointed to the starting point with my own finger ever since.
Pro Tip: Ask your stylist to show you the placement on dry hair before she starts painting, using clips or her fingers to mark where the lightest pieces will fall. Seeing the map before the colour goes on takes one minute, and it is the last easy moment to move a piece lower or make it finer.
See face-framing highlights done softly or where balayage should start on your hair.
7. Agree on Warmth: Golden, Neutral, or Cool

Warmth is the tone of your colour, and it decides whether your hair looks golden and sunlit, neutral and expensive, or cool and ashy, and it is the part of the conversation where most too-bright surprises are born. Warm tones like honey, caramel, and golden brown flatter warm skin and fade gracefully, because brown hair naturally lifts warm. Cool tones like ash, mushroom, and taupe look modern and editorial, but they fight your hair’s natural warmth every single day, so they fade faster and need more upkeep. Neutral sits in the middle and suits almost everyone, which is why it is the safest first choice if you are unsure.
Name your warmth out loud, and ask your stylist to hold a swatch next to your face in natural light before she commits. Say, “I want a warm gold, not ash, and I want to stay golden even as it fades.” Or, if you love cool tones, say, “I want a cool neutral, and I understand it will need a toner every six to eight weeks.” Ask her what toner she plans to use and what it is called, because a stylist who can name her toner is a stylist who has thought about your tone, and a stylist who cannot is guessing.
The mistake I made was asking for a colour I had seen on a friend with cool skin, and I did not realise the ash tone that looked so chic on her would wash me out completely. My warm skin needed gold to look alive, and the ash made me look tired in every photo for a month. The colour was technically perfect and completely wrong for me, because I had copied a tone instead of choosing one for my own undertones, and I have held swatches to my own face ever since.
Pro Tip: Stand by the salon window, not under the overhead lights, when you compare tones, because salon lighting is warm and flattering and it makes every cool tone look warmer than it is. If a swatch still looks cool by the window, it will look cool at home too, and if it looks warm there, trust what you see.
See warm versus cool hair colour for your skin tone or how to stop hair turning brassy.
8. Ask for a Test Strand Before the Full Colour

A test strand is a tiny preview of your colour on your actual hair, and it is the most underused tool in the whole salon. Your stylist takes one small, hidden section, usually behind your ear or underneath at the back, applies the exact formula she plans to use, and processes it for the same time, so you can see precisely how your hair lifts and what tone it turns. It takes about ten extra minutes, it costs little or nothing, and it answers the one question no photo or swatch can answer: what will this formula do on my hair, with my history, today.
Ask for it at the start of the consultation, before any foils go in, and frame it as a favour to you both. Say, “Could we test one strand behind my ear first, so we both know how my hair lifts before we do the whole head?” A good stylist will be delighted, because a test strand protects her work as much as it protects your hair. While it processes, talk through the rest of the plan, and when she shows you the result, look at it in natural light and be honest. If it is brighter than you wanted, that is wonderful news, because you found out on one strand instead of your whole head.
The mistake I made was skipping the test strand because I was in a hurry and the appointment already felt long, and my hair lifted two levels brighter than the formula promised. We only discovered it when the foils came out, and by then the only fix was a deeper toner over the whole head, which muted the dimension I had wanted. Ten minutes of patience would have saved an hour of correction and a week of feeling like my hair belonged to someone else.
Pro Tip: Ask your stylist to test the strand at the lightest placement you are considering, not the darkest, because the lightest piece is the one that will surprise you. If that strand looks right, every softer piece will look right too, and you can relax through the rest of the appointment.
See what a strand test is and why it matters or how to avoid colour surprises at the salon.
9. Agree on the Grow-Out Plan and the Price

A natural colour is not just a colour, it is a plan, and the plan includes what it costs today, what it will cost to maintain, and what it will look like in two months when nobody has touched it. Before the colour starts, ask your stylist for the full price, including the gloss, the toner, the treatment, and the blow-dry, because the number you are quoted for the colour alone is rarely the number on the bill. Then ask what the grow-out will look like, how long before you need to return, and what a maintenance visit costs compared with a full appointment, because that is the number that decides whether a colour is affordable for your real life.
Ask the questions in plain language and write the answers down. Try, “What is the total today, what will a gloss cost in eight weeks, and what will my roots look like at three months?” If the answers surprise you, say so before the colour starts, not after, because it is far easier to choose a softer, cheaper placement now than to regret an expensive one later. A stylist who explains her pricing clearly is a stylist who respects you, and if she cannot explain it, that is useful information too.
The mistake I made was agreeing to a colour without asking about the upkeep, and discovering that my beautiful ash blonde needed a $70 toner every six weeks to stay ash at all. I loved the colour on day one and resented it by week eight, because I had budgeted for one appointment and bought myself a subscription instead. Now I ask for the yearly cost, not just the day-one cost, and I choose colours whose maintenance I can actually afford and actually enjoy.
Pro Tip: Ask which part of the appointment you could skip next time to save money, because the answer tells you what really matters. If she says the gloss is essential and the treatment is optional, you have learned how to keep the colour looking good on a tighter budget, and you have a plan for the months when money is tight.
See how much hair colour really costs or low-maintenance colours that save money.
10. Use the Mirror Check Halfway Through

The halfway mirror check is your last easy chance to change direction, and most women never ask for it because they do not want to seem difficult. By the time the foils come out and the toner goes on, the colour is largely decided, but before the toner, your stylist can still adjust the tone, deepen a piece that lifted too bright, or soften a section that looks too strong. Asking to see your hair at that moment is not rude, it is sensible, and it is the moment your stylist most wants your honest reaction, because she can still do something about it.
Ask for it before the appointment starts, so it feels planned rather than panicked. Say, “When the foils come out, could I see it in the mirror before you tone it, just so we can check the brightness together?” When you look, check the pieces around your face first, because those are the ones you will see every day, and look in natural light if you can. If something feels too bright, say so immediately and specifically, like “the pieces by my parting feel too light, could we deepen those slightly,” instead of a vague “I am not sure,” which leaves your stylist guessing.
The mistake I made was sitting silently through the whole appointment, smiling at every check-in, and then bursting into tears in the car because the colour was far brighter than I had imagined. My stylist had asked me twice how I felt, and I had said “lovely” both times, because I did not want to hurt her feelings. She could not fix what I would not name, and I learned that honesty in the chair is kindness, not criticism, because it lets her finish the job well.
Pro Tip: Take a quick photo of your hair in the mirror at the halfway check, in natural light if possible, because a photo shows brightness more honestly than a mirror does. If the photo shocks you, trust the photo, because that is how the rest of the world will see your hair too.
See what to do if your hair colour is too bright or how to talk to your stylist honestly.
11. Ask What to Do at Home in the First Two Weeks

The first two weeks after colouring decide how long your natural colour stays natural, because fresh colour is at its most fragile and its most likely to fade, turn brassy, or wash out unevenly. Hot water, clarifying shampoo, heat styling without protection, and swimming can all strip toner and lighten your colour faster than you expect, and most of us learn that by accident. Asking your stylist for a simple home-care plan before you leave means you protect the colour you just paid for, instead of accidentally washing it away in the first week.
Ask for specifics, not general advice, and write them down. Say, “What shampoo should I use, how often should I wash, and when can I use heat tools again?” A good answer sounds like this: a sulphate-free colour-safe shampoo, washing two or three times a week in lukewarm water, a weekly mask, heat protectant every time you style, and no swimming or clarifying shampoo for at least two weeks. Ask whether you need a toning shampoo, and if so, how often, because using one too often can turn warm colour ashy, and not using one at all can let cool colour turn brassy.
The mistake I made was washing my fresh bronde with my usual clarifying shampoo the very next morning, because I had run out of my colour-safe bottle and thought one wash would not matter. It mattered. The gloss faded visibly in a single wash, the ends turned brassy within a week, and I paid for a toner refresh far sooner than I needed to. Now I buy the right shampoo before the appointment, not after, and I treat the first two weeks like the colour is still settling, because it is.
Pro Tip: Ask your stylist to write the aftercare on the back of your receipt or in a text message, because you will forget the details by the time you get home. A written plan you can stick on your bathroom mirror is worth more than a perfect memory of a conversation you had while your hair was still damp.
See how to care for coloured hair at home or the best shampoo for colour-treated hair.
12. Know How to Fix It If It Comes Out Too Bright

Even with the best consultation in the world, colour can still come out brighter than you wanted, because hair lifts unpredictably and light changes everything, and knowing the fix in advance takes the panic out of that moment. The most common fix is a deeper gloss or toner, applied over the too-bright pieces to pull them back toward brown without removing the dimension underneath. It takes about twenty minutes, it costs far less than a full recolour, and it can be done on the same day, in the same chair, before you ever leave the salon. Knowing that is the difference between a bad afternoon and a bad three months.
Agree the rescue plan before the colour starts, so you never have to negotiate it while you are upset. Say, “If it comes out brighter than we agreed, can we tone it down today, and what would that cost?” Most stylists will say yes without hesitation, and many will do it free if the result is clearly brighter than the consultation agreed. Ask her to show you the toner she would use, and ask how long it will last, because a toner that washes out in two weeks is a temporary patch, while a deeper gloss can hold for six to eight weeks and give you time to decide if you want to go darker permanently.
The mistake I made was leaving the salon in tears with hair I hated, because I was too embarrassed to say it was too bright, and then I tried to fix it myself with a dark box dye at home. The box dye grabbed unevenly over the fresh salon colour, turned my ends muddy, and cost me two corrective appointments to repair. If I had simply said, “This is brighter than we agreed, could we tone it down,” my stylist would have fixed it in twenty minutes, and I would have saved myself months of regret and hundreds of dollars.
Pro Tip: Never try to fix fresh salon colour at home on the same day, no matter how tempted you are. Fresh colour is still settling, box dye reacts unpredictably over it, and a professional toner is gentler, more precise, and far cheaper than correcting a home fix. Call the salon within forty-eight hours if you are unhappy, because most good salons would rather fix it free than lose you as a client.
See how to fix hair colour that is too bright or what to do if you hate your hair colour.
Getting Started
Start with the photos tonight, not on the morning of your appointment. Save three pictures of hair like yours in natural light, one that is your dream result, one that is slightly too bright, and one of your own hair in daylight. Write your three key phrases on your phone: your maintenance level, your warmth, and your limit of two levels lighter. That ten minutes of preparation does more for your result than any product you could buy.
The most common mistake is booking the colour before you have had the consultation, and then feeling too rushed to speak up once you are in the chair. Book a consultation first, even a fifteen-minute one, and treat it as a separate appointment where your only job is to talk. If the stylist rushes you, dismisses your photos, or will not do a test strand, that is useful information, and you are free to walk away before any colour touches your hair.
Buy your colour-safe shampoo, a weekly mask, and a heat protectant before the appointment, for about $30-$50, so you are ready for the first two weeks. A natural colour appointment takes two to three hours and costs $150-$350, with a gloss refresh of $40-$80 every eight to twelve weeks. Bring your photos, your hair history, and your honest schedule, and you will leave looking like yourself, only softer and sunnier.
Frequently Asked Questions
How do I ask my stylist for natural-looking colour without sounding fussy?
Bring three photos, name your maintenance level, and say your limit out loud, such as “no more than two levels lighter, staying on the brown side.” Stylists love clear clients, because clear instructions let them do their best work, and a short, honest consultation is never fussy, it is professional.
What should I say if I am afraid the colour will come out too bright?
Say it directly at the start: “My biggest worry is leaving too bright, so please stay subtle and check with me before you go lighter.” Ask for a test strand and a halfway mirror check, and agree in advance that a deeper toner can be applied the same day if needed.
How many levels lighter should I go for a natural result?
One to two levels lighter than your natural colour is the safe first step for most women, and it still reads as brunette in photos. Four levels in one session usually turns brassy and looks dyed, so go gradually and add more lightness at your next visit if you love the result.
What is the difference between babylights, balayage, and a gloss?
Babylights are fine, delicate highlights that mimic sun-lightened hair, balayage is colour painted freehand for a soft grow-out, and a gloss is a sheer toner that adjusts tone and adds shine without lifting your hair lighter. Most natural colours use all three together.
What do I do if I hate my colour when I get home?
Call the salon within forty-eight hours and explain calmly what is wrong, because most good salons will tone it down or adjust it free of charge. Do not try to fix it yourself with box dye, which reacts unpredictably over fresh salon colour and makes a professional correction much harder and more expensive.
A Few Final Thoughts
Natural-looking colour is not about playing it safe, and it is not about settling for boring hair. It is about colour that looks like it grew that way, and that only happens when you and your stylist are picturing the same result. Bring the photos, learn the words, name your level and your maintenance, and ask for the test strand and the mirror check, because those small, brave conversations are what stand between you and the too-bright surprise. Pick your three photos tonight, book the consultation, and walk in knowing exactly what to say. Your hair, and your future self in every photo for the next three months, will thank you.