
A French twist bun is the most elegant hairstyle you can do with your own two hands. It is a vertical roll of hair pinned up the back of the head, and it looks like it came from a Paris salon even when it took you five minutes in front of a bathroom mirror. The secret is the twist itself: one smooth roll, tucked and pinned, creates a shape that no other bun can match.
This guide covers 15 French twist bun styles, from the classic twist to low, voluminous, messy, and pearl-pinned versions, plus styles with braids, curls, scarves, and barrettes. Every style lists the hair length it needs, the skill level, how long it holds, and the occasion it suits best. Most of them take under fifteen minutes and need nothing more than bobby pins, a comb, and hairspray.
You do not need a salon or expensive tools. A French twist is one of the oldest hairstyles in the world, and it was designed to be done by hand, with pins and patience. If you can twist your hair and push in a bobby pin, you can make every French twist bun in this guide.
Quick Answer: For the most expensive-looking result, start with the Classic French Twist Bun (#1) or the Sleek French Twist Bun (#15). For a softer look that still feels elegant, try the French Twist Bun With Face-Framing Strands (#6) or the Messy French Twist Bun (#5). A pack of bobby pins and a good hairspray cost about $8-10.
Why French Twist Buns Are Worth Your Time
French twist buns look expensive because they are built on technique, not products. The smooth vertical roll, the hidden pins, and the clean silhouette read as luxury, and the style works with a cocktail dress, a wedding gown, a blazer, or a simple black dress. It is the bun for evenings, weddings, and any occasion where you want to look like you spent an hour at the salon.
There is also a practical reason this style has survived for decades. A French twist holds its shape through long events, dancing, and warm rooms, because the hair is rolled and pinned in one continuous direction, which locks it in place. The vertical shape also keeps the hair off your neck, which is a blessing in summer and at crowded events.
The third win is versatility. A French twist can be sleek and severe for a formal event, soft and messy for a romantic dinner, or voluminous and dramatic for a photoshoot. The base technique is the same every time, and the variations are just small changes: a different parting, a barrette instead of pins, or a few curls left out at the front.
Finally, the French twist is kind to your hair. Unlike a tight ponytail bun that pulls at the hairline, the twist distributes the weight along the back of the head, which means less tension and less breakage. Many women with long hair wear a French twist as their everyday updo specifically because it is comfortable for hours at a time.
At a Glance
- All 15 styles hold for 8-12 hours with the right pins and hairspray, and most survive a full evening of dancing or events.
- Hair length needs range from shoulder-length to long; the twist works best on hair that reaches at least the shoulders.
- Eleven of the 15 styles are beginner-friendly and take under fifteen minutes once you know the steps.
- A pack of bobby pins, a fine-tooth comb, and hairspray cost about $8-10 in total.
- The style suits women wanting classic elegance, brides, bridesmaids, professionals, and anyone dressing up for an evening.
- Every twist can be dressed up with pearl pins, a barrette, a comb, or a silk scarf, or kept plain for a clean, minimal look.
| # | Style | Hair Length | Skill Level | Hold Time | Occasion |
|---|---|---|---|---|---|
| 1 | Classic French Twist Bun | Medium to long | Beginner | 10-12 hours | Weddings, formal events |
| 2 | Low French Twist Bun | Medium to long | Beginner | 8-12 hours | Dinners, weddings |
| 3 | French Twist Bun With Volume | Medium to long | Intermediate | 10-12 hours | Photoshoots, parties |
| 4 | French Twist Bun With a Barrette | Medium to long | Beginner | 10-12 hours | Work, events |
| 5 | Messy French Twist Bun | Medium to long | Beginner | 8-10 hours | Date night, casual events |
| 6 | French Twist Bun With Face-Framing Strands | Medium to long | Beginner | 8-10 hours | Everyday, date night |
| 7 | French Twist Bun With a Side Part | Medium to long | Beginner | 10-12 hours | Work, photos |
| 8 | French Twist Bun With a Braid | Long | Intermediate | 10-12 hours | Weddings, performances |
| 9 | Half-Up French Twist Bun | Medium to long | Beginner | 8-10 hours | Casual days, school |
| 10 | French Twist Bun With Pearl Pins | Medium to long | Beginner | 10-12 hours | Weddings, parties |
| 11 | French Twist Bun With Curls | Long | Beginner | 8-10 hours | Date night, events |
| 12 | French Twist Bun With a Silk Scarf | Medium to long | Beginner | 8-10 hours | Brunch, holidays |
| 13 | French Twist Bun With a Deep Side Part | Medium to long | Beginner | 10-12 hours | Evenings, photoshoots |
| 14 | French Twist Bun With a Comb | Medium to long | Beginner | 10-12 hours | Weddings, formal events |
| 15 | Sleek French Twist Bun | Medium to long | Beginner | 10-12 hours | Work, formal events |
1. Classic French Twist Bun

The classic French twist bun is the original, and it is still the standard for elegant updos. The hair is swept up and rolled into a vertical twist that runs up the back of the head, pinned in place with bobby pins that disappear into the roll. It is the bun for weddings, galas, and any event where you want to look timeless.
This twist suits every hair type, but it works best on medium to long hair with a little natural texture. If your hair is very fine, a light dusting of texturizing spray at the roots gives the pins something to grip. If your hair is thick, use longer bobby pins, because short pins cannot grip a thick roll.
Brush all of your hair to one side and hold it in a low ponytail shape without an elastic. Twist the hair upward along the back of your head, rolling it into a vertical coil, and tuck the ends inside the top of the roll. Pin the twist in place with bobby pins pushed upward into the roll, then smooth the surface with a comb and spray firmly.
Pro Tip: Push the bobby pins upward into the twist, not downward. Pins pushed upward grip the roll and hold it in place, while pins pushed downward slide out.
See French twist hairstyles or how to do a classic French twist.
Hold time: 10-12 hours. Difficulty: beginner. Cost: under $5 in pins and spray.
2. Low French Twist Bun

The low French twist bun keeps the same smooth, vertical roll as the classic version, but it sits lower, at the nape instead of the crown. It is softer, more romantic, and it works beautifully with high collars, necklaces, and wedding veils that a high twist would fight with.
A low twist is kinder to fine hair than a high one, because the weight hangs down instead of pulling up on the roots. It also pairs beautifully with statement earrings and necklaces, since nothing competes at the neckline. For a wedding, add a small sprig of fresh flowers or a pearl comb just above the twist.
Gather your hair at the nape and twist it upward in a short, compact roll, tucking the ends inside the top. Pin the roll in place with bobby pins pushed upward, then smooth the surface with a comb and spray. If you want a softer look, gently pull out two thin strands at the temples before you spray.
A mistake I made once was twisting too loosely at the nape, and the roll sagged by evening. Twist firmly and pin the base first, before you pin the top, so the roll cannot slide down.
See low French twist hairstyles or elegant updos for weddings.
Hold time: 8-12 hours. Difficulty: beginner. Cost: under $5 in pins and spray.
3. French Twist Bun With Volume
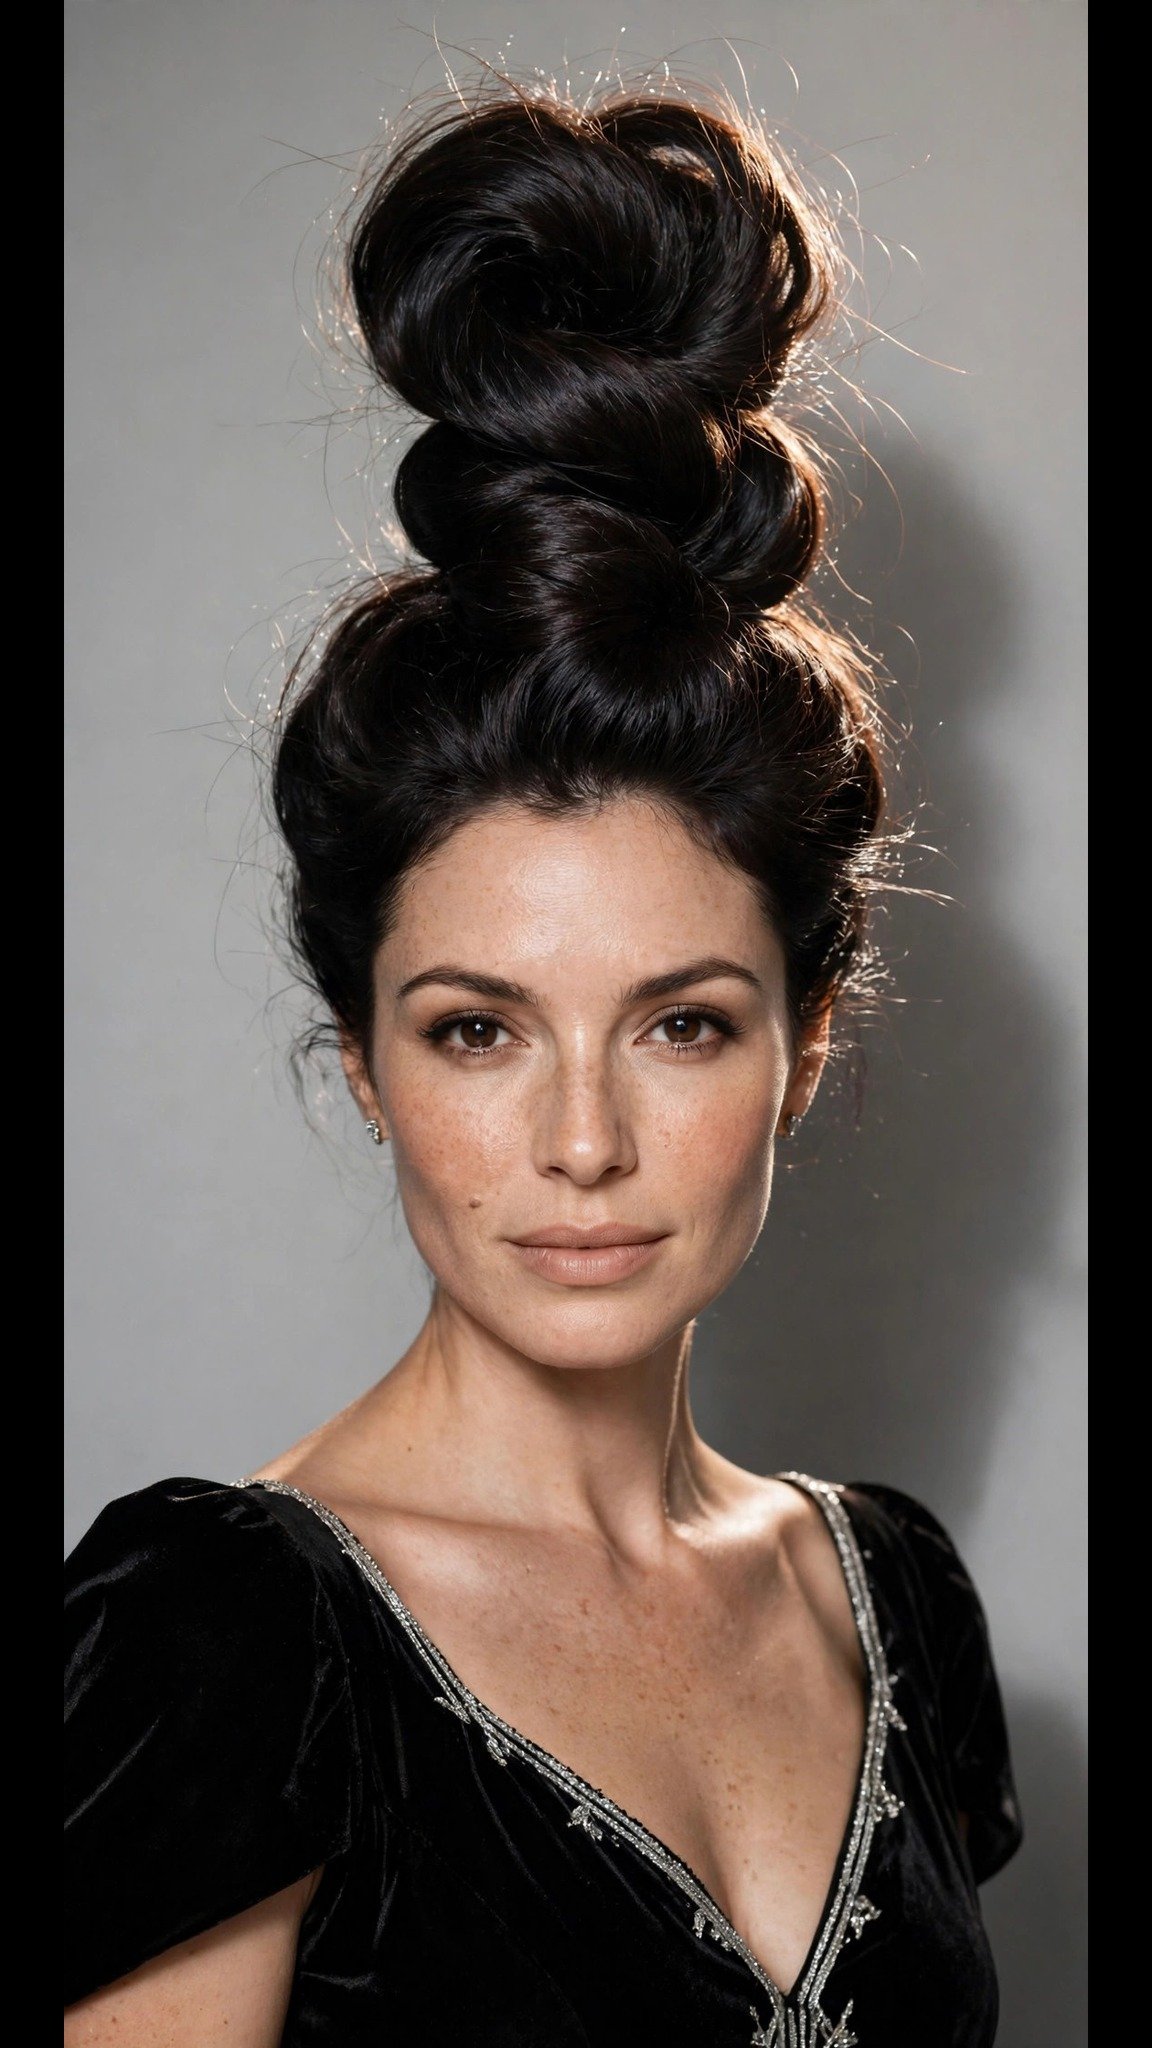
A French twist with volume is the most dramatic version in this guide. The crown is teased and lifted before the twist is rolled, which gives the style height, fullness, and a glamorous silhouette that photographs beautifully from every angle. This is the twist for photoshoots, parties, and evenings when you want maximum impact.
Volume at the crown suits oval and round faces especially well, since the height adds length to the face. It also works beautifully for photoshoots, because the extra height shows up on camera. If your hair is very thick, you may not need to tease at all, because the natural volume does the work for you.
Tease the crown lightly with a fine-tooth comb, backcombing small sections at the roots to build height. Smooth the top layer over the teasing, then gather the hair to one side and roll it into a vertical twist, pinning it in place. Spray the crown lightly to set the volume without flattening it.
Pro Tip: Tease in small sections, about an inch wide, and use a light hand. Heavy teasing creates a tangled mess that is hard to brush out, while light teasing builds soft, even volume.
See voluminous French twist hairstyles or how to add volume to an updo.
Hold time: 10-12 hours. Difficulty: intermediate. Cost: under $5 in pins and spray.
4. French Twist Bun With a Barrette
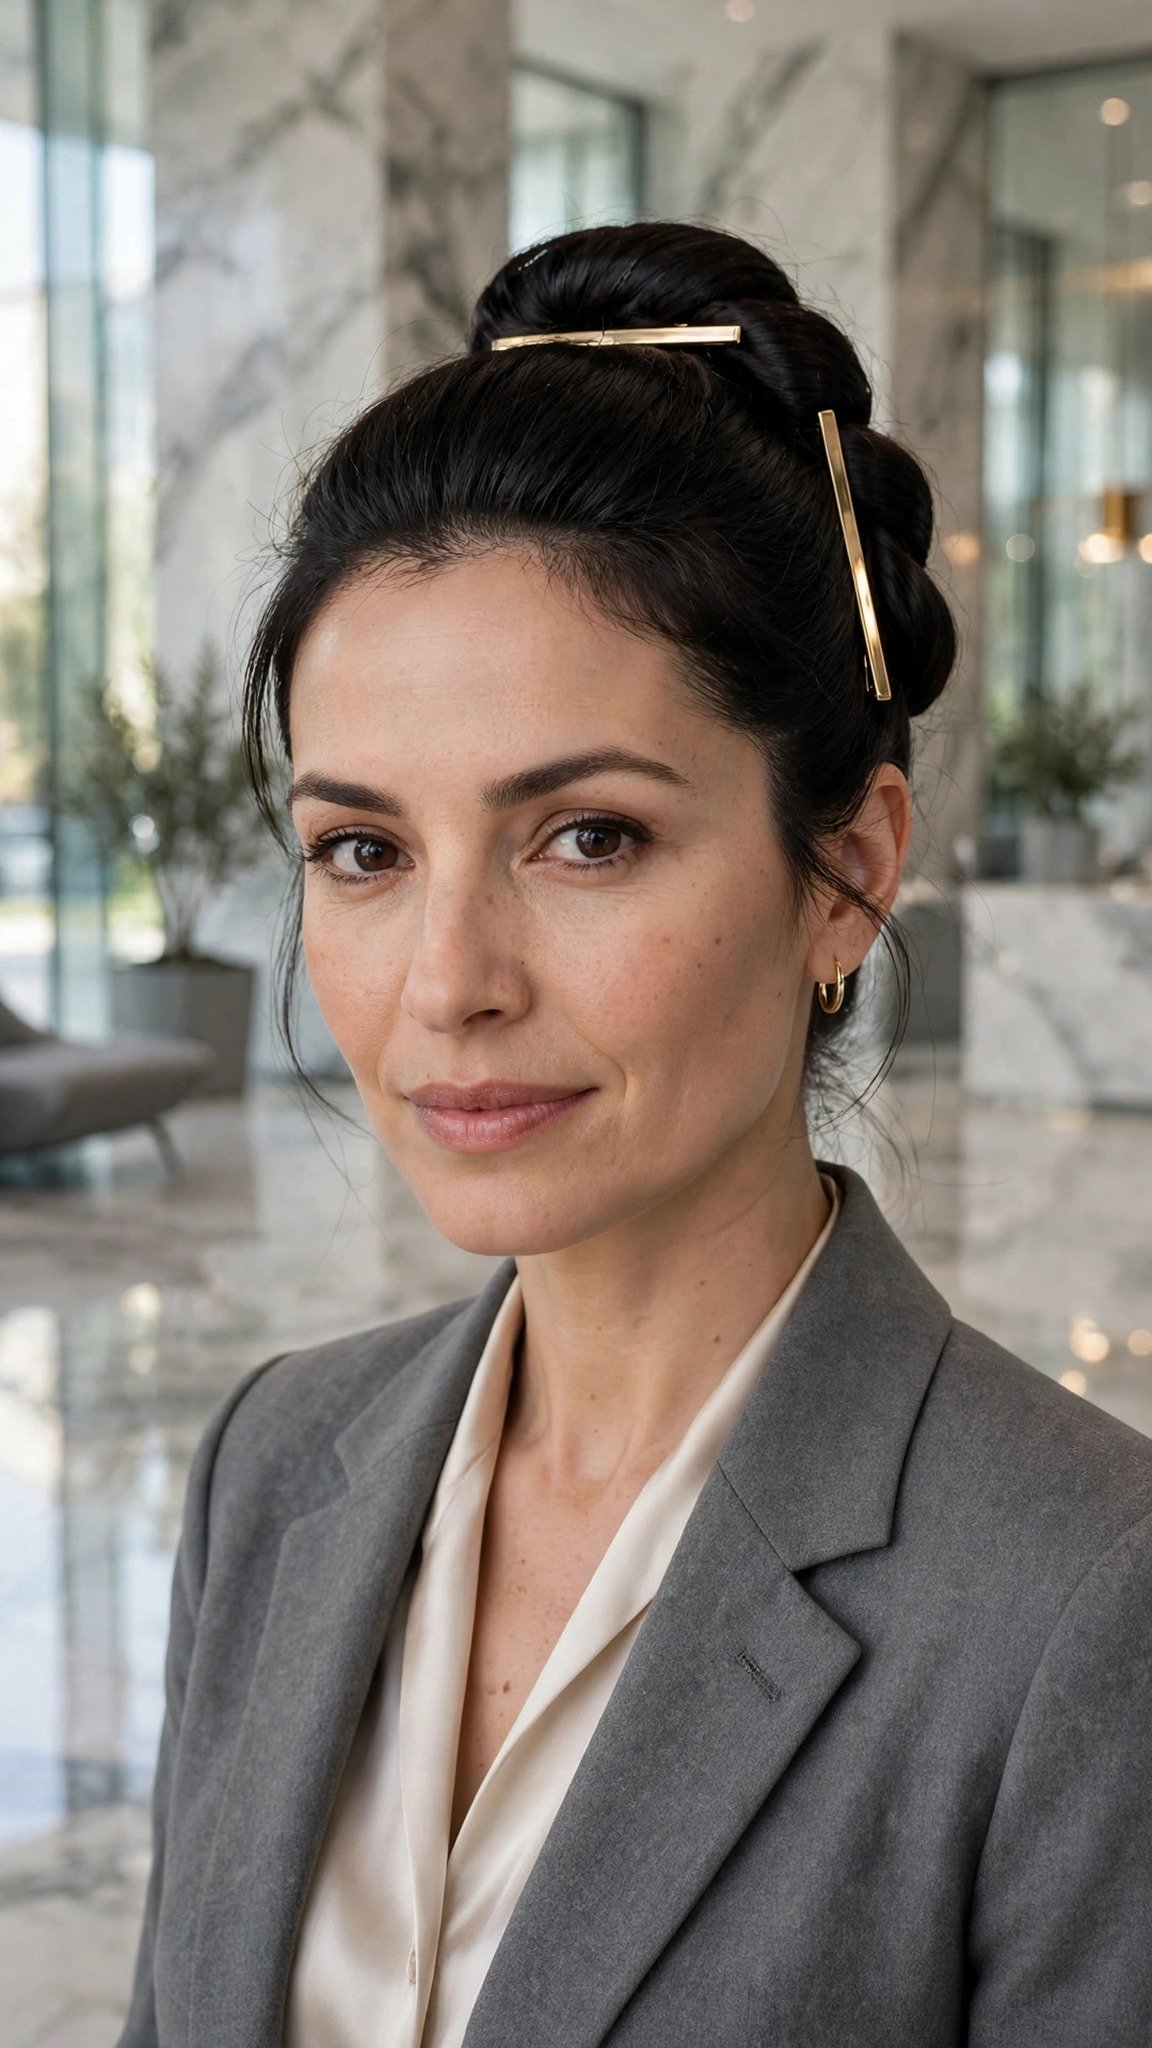
A barrette turns a French twist into a finished look in seconds. Instead of hiding every pin, you clip a slim gold or pearl barrette along the seam of the twist, which holds the roll in place and adds a piece of jewelry at the same time. This is the version for work, events, and anyone who loves accessories.
Choose a barrette that picks up something in your outfit, such as the color of your earrings or your bag, and the whole look comes together. A slim gold barrette looks classic and expensive, while a pearl barrette feels bridal. Keep the barrette slim, because a wide one overwhelms the twist.
Roll a classic French twist and pin it lightly with two or three bobby pins. Then clip a barrette along the seam of the twist, positioning it vertically so it follows the line of the roll. Push it in firmly so it grips the hair, and add one or two extra pins behind it for security.
A mistake I made once was clipping the barrette across the twist instead of along it, and it stuck out sideways. Always clip along the seam, following the vertical line of the roll.
See barrette hairstyles or French twist ideas with hair accessories.
Hold time: 10-12 hours. Difficulty: beginner. Cost: about $6-12 for a barrette, plus pins.
5. Messy French Twist Bun
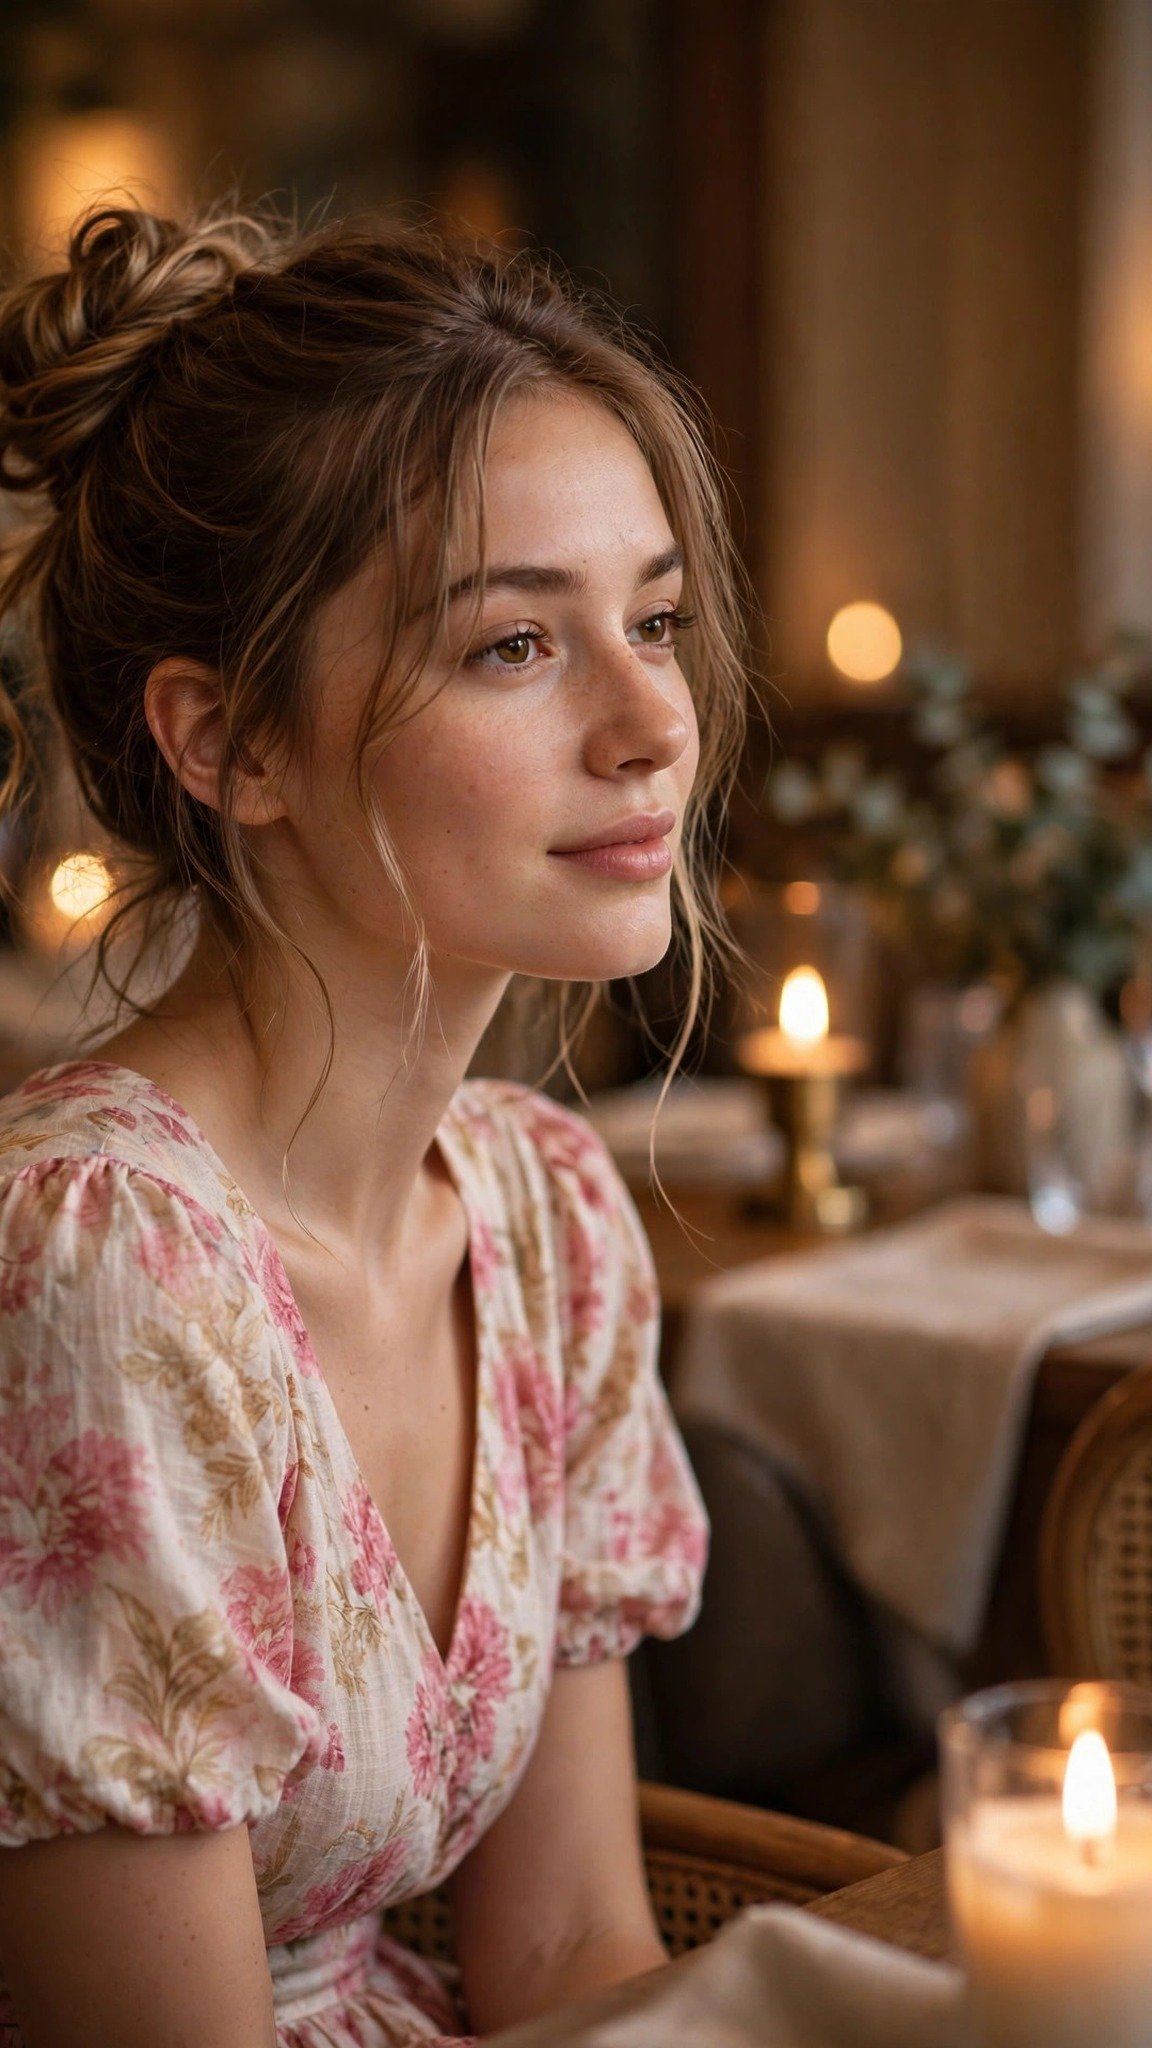
The messy French twist bun is the relaxed version of the classic. It keeps the vertical roll and the elegant shape, but it skips the severe smoothness, leaving a few soft wisps and a slightly undone texture. It is the twist for date nights, casual events, and anyone who wants elegance without formality.
The messy twist is the most forgiving style in this guide, because it is supposed to look undone. That makes it the best first French twist to learn if you are new to styling your own hair. The trick is to keep the mess intentional: a few soft wisps and a slightly loose roll look chic, but a twist that is falling apart looks unfinished.
Gather your hair to one side without brushing it perfectly smooth, and leave the natural texture in. Roll it into a vertical twist, pinning it loosely with fewer pins than usual so it stays soft. Gently pull a few pieces loose around the hairline and at the nape, then spray lightly so the wisps move instead of freezing in place.
Pro Tip: Pull the wisps out before you spray, not after. Once the hairspray sets, pulling pieces loose creates frizz instead of soft strands.
See messy French twist hairstyles or relaxed updos for date night.
Hold time: 8-10 hours. Difficulty: beginner. Cost: under $5 in pins and spray.
6. French Twist Bun With Face-Framing Strands

Face-framing strands soften a French twist and make it look less severe, which is why this is one of the most popular versions for everyday wear and date nights. The vertical roll gives the style elegance and height, while the soft strands at the front keep the face looking gentle and relaxed.
Face-framing strands are the difference between a severe twist and a soft one, and they suit almost every face shape. If you have a square jaw, leave the strands slightly longer so they fall past the jawline. If you have a round face, keep them shorter and curl them outward, which adds width at the cheekbones.
Leave out a thin strand on each side of your face before you gather the rest into a twist. Roll the twist as usual and pin it in place, then curl the two front strands lightly with a curling iron or flat iron, wrapping them away from your face. Spray the strands lightly so they hold their shape without going stiff.
Pro Tip: Keep the face-framing strands thin, about the width of a pencil. Thick strands pull the whole look toward messy instead of soft.
See face-framing hairstyles or soft French twist ideas for everyday.
Hold time: 8-10 hours. Difficulty: beginner. Cost: under $5 in pins and spray.
7. French Twist Bun With a Side Part

A side part gives the French twist a softer, more approachable feel, which makes it a great choice for work and photos. The sweep of hair across the forehead balances the vertical line of the twist, and the whole look reads as polished without feeling severe.
A side part adds softness to a French twist, and it works especially well on thick hair, because the sweep across the forehead shows off the volume. It also suits heart-shaped faces beautifully, since the sweep balances a wider forehead. If you want the sweep to stay put all day, set it with a small amount of gel.
Part your hair on one side, then brush the hair back and to the opposite side, gathering it into a low ponytail shape. Roll it into a vertical twist, pinning it in place, and check the sweep in a mirror to make sure it falls evenly and does not cover one eye. Smooth the surface with a comb and spray.
A mistake I made early on was parting too shallow, which looked like a mistake instead of a style. Commit to a clear side part, about an inch from the center, or skip the part entirely.
See side-part hairstyles or French twist ideas for work.
Hold time: 10-12 hours. Difficulty: beginner. Cost: under $5 in pins and spray.
8. French Twist Bun With a Braid

A braid feeding into a French twist adds texture and detail to the classic shape, and it makes the whole style look far more intricate than it is. The braid runs along the crown and disappears into the twist, which gives the front of the style a beautiful detail and helps the twist stay anchored all day.
The braid feeding into the twist is the detail that makes people ask who did your hair. It looks intricate, but it is really just a French braid that ends in a twist, and it takes about five extra minutes. For a wedding or a formal event, add a few tiny pearl pins along the braid for extra sparkle.
Start a French braid at the front hairline and braid it back along the crown, adding hair as you go. When you reach the back of the head, gather all of your hair to one side and roll it into a vertical twist, pinning it in place. Spray the braid lightly to keep it neat.
Pro Tip: Braid loosely at the front and tighter as you go back, so the braid sits flat against the head and does not pull at your hairline.
See braided French twist hairstyles or French braid updo ideas.
Hold time: 10-12 hours. Difficulty: intermediate. Cost: under $5 in pins and spray.
9. Half-Up French Twist Bun
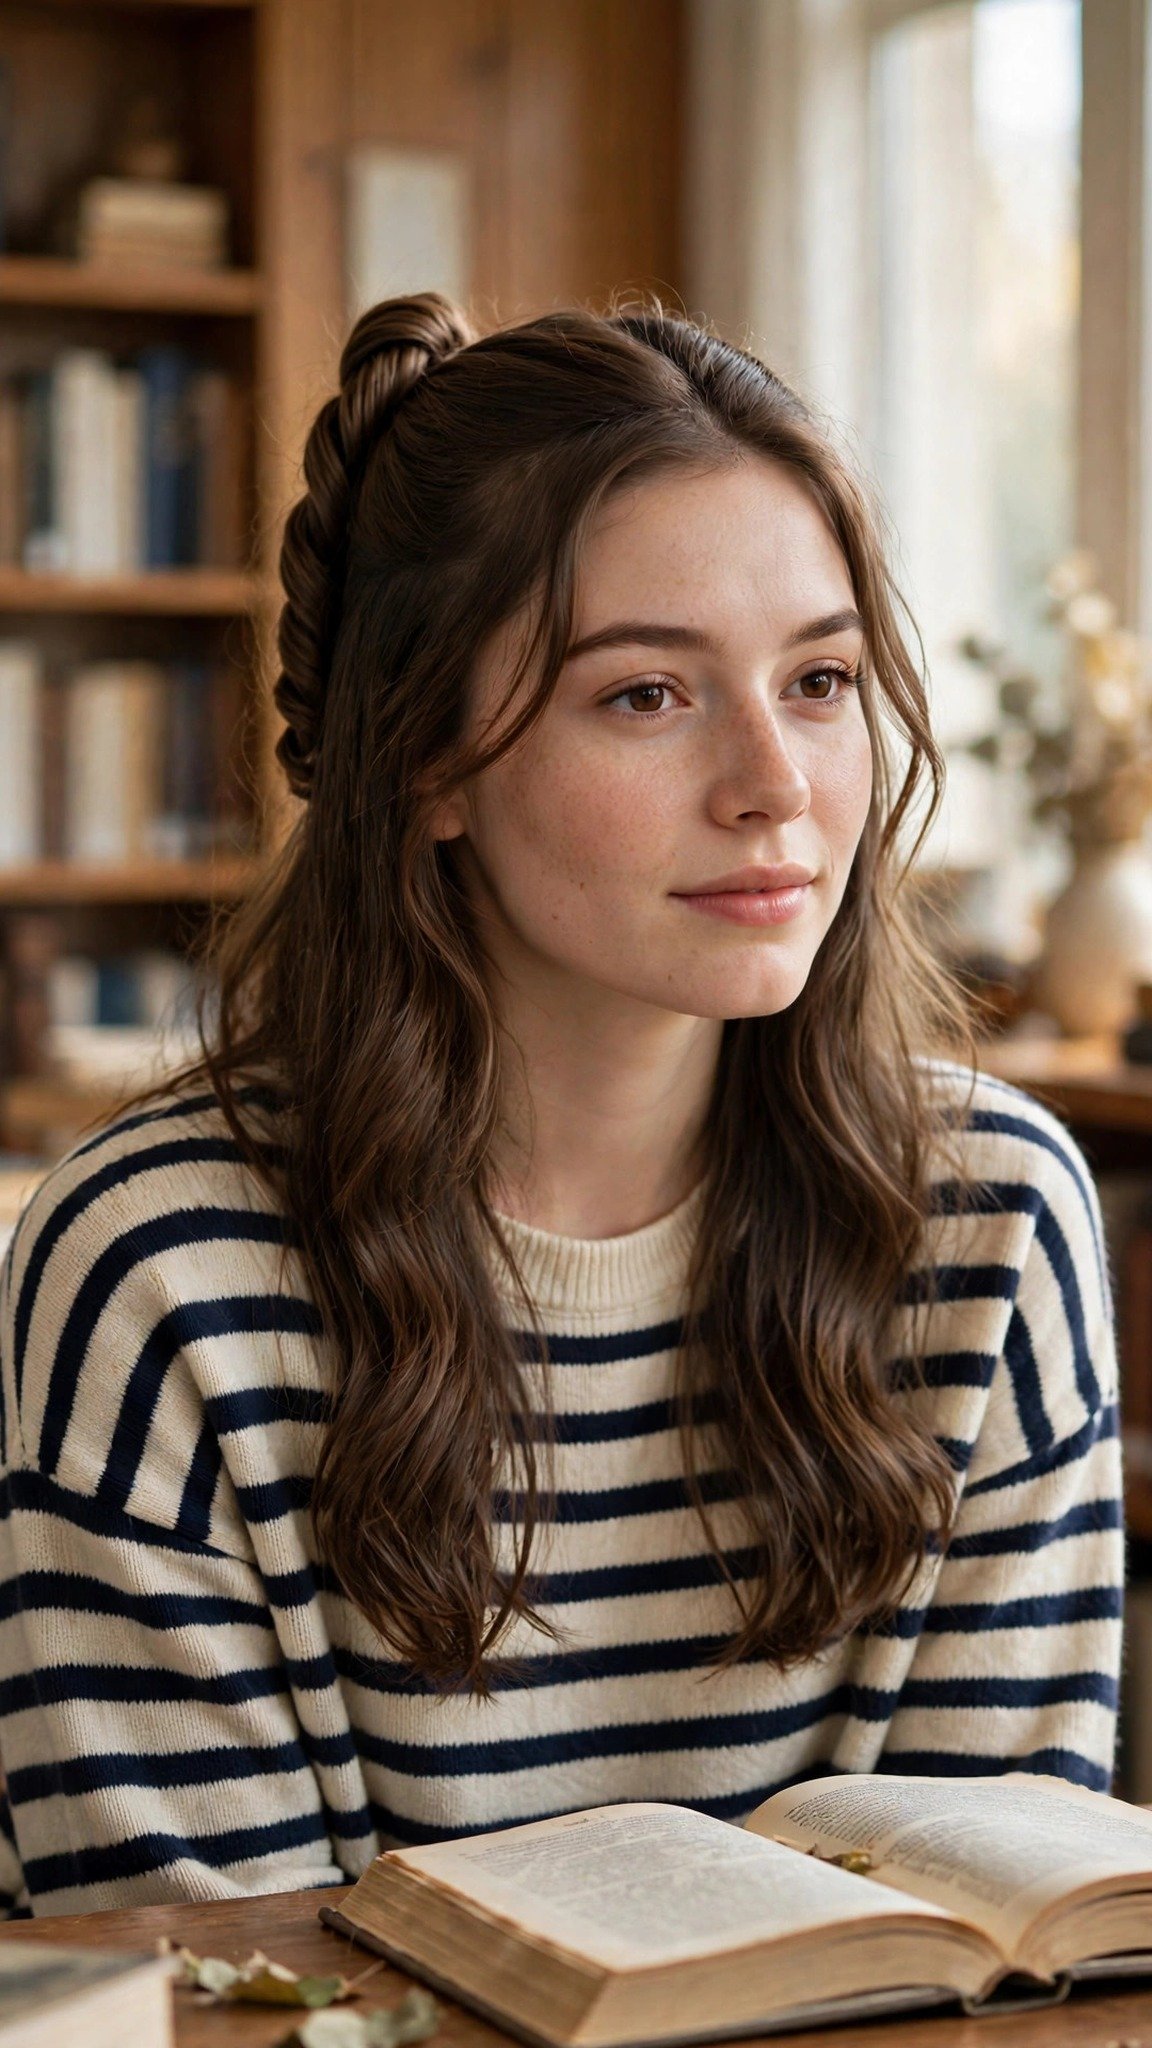
The half-up French twist bun gives you the elegance of a twist and the softness of loose hair at the same time. The top half is rolled into a small vertical twist that keeps hair out of your face, while the rest falls freely over your shoulders. It is perfect for school, casual days, and anyone who does not want all of their hair up.
The half-up twist is the best option for anyone with layers, because the top section is usually the longest and easiest to gather. It also works on hair that is too short for a full twist, since you only need the top half. For a fuller look, tease the crown lightly before you gather the top section.
Section off the top half of your hair, from ear to ear, and gather it to one side. Roll it into a small vertical twist and pin it in place, then smooth the loose hair underneath with a brush. Add a little wave to the loose section with a curling iron if you want a softer finish.
A mistake I made once was taking too much hair into the top section, and the twist looked heavy. Take only the top third to half, and keep the twist small.
See half-up French twist hairstyles or easy half-up updos.
Hold time: 8-10 hours. Difficulty: beginner. Cost: under $5 in pins and spray.
10. French Twist Bun With Pearl Pins

Pearl pins are the fastest way to make a French twist look bridal. A few small pearls arranged in a line along the seam of the twist add sparkle and elegance without any extra styling, and they photograph beautifully in soft light.
Pearl pins come in many sizes, and mixing two sizes looks more expensive than using one size alone. Place a larger pearl at the top of the seam and smaller ones trailing down, which creates a graduated effect. If you are wearing pearls for a wedding, match the pins to your earrings so the whole look feels coordinated.
Roll a classic French twist and pin it securely with bobby pins. Then slide pearl pins into the twist one at a time, arranging them in a vertical line along the seam or in a small cluster near the top. Push each pin in at an angle so it grips the twist and cannot slide out.
Pro Tip: Place an odd number of pins, three or five, because odd numbers look more natural and intentional than even ones.
See pearl hair accessories or bridal French twist ideas.
Hold time: 10-12 hours. Difficulty: beginner. Cost: about $6-12 for a set of pearl pins.
11. French Twist Bun With Curls
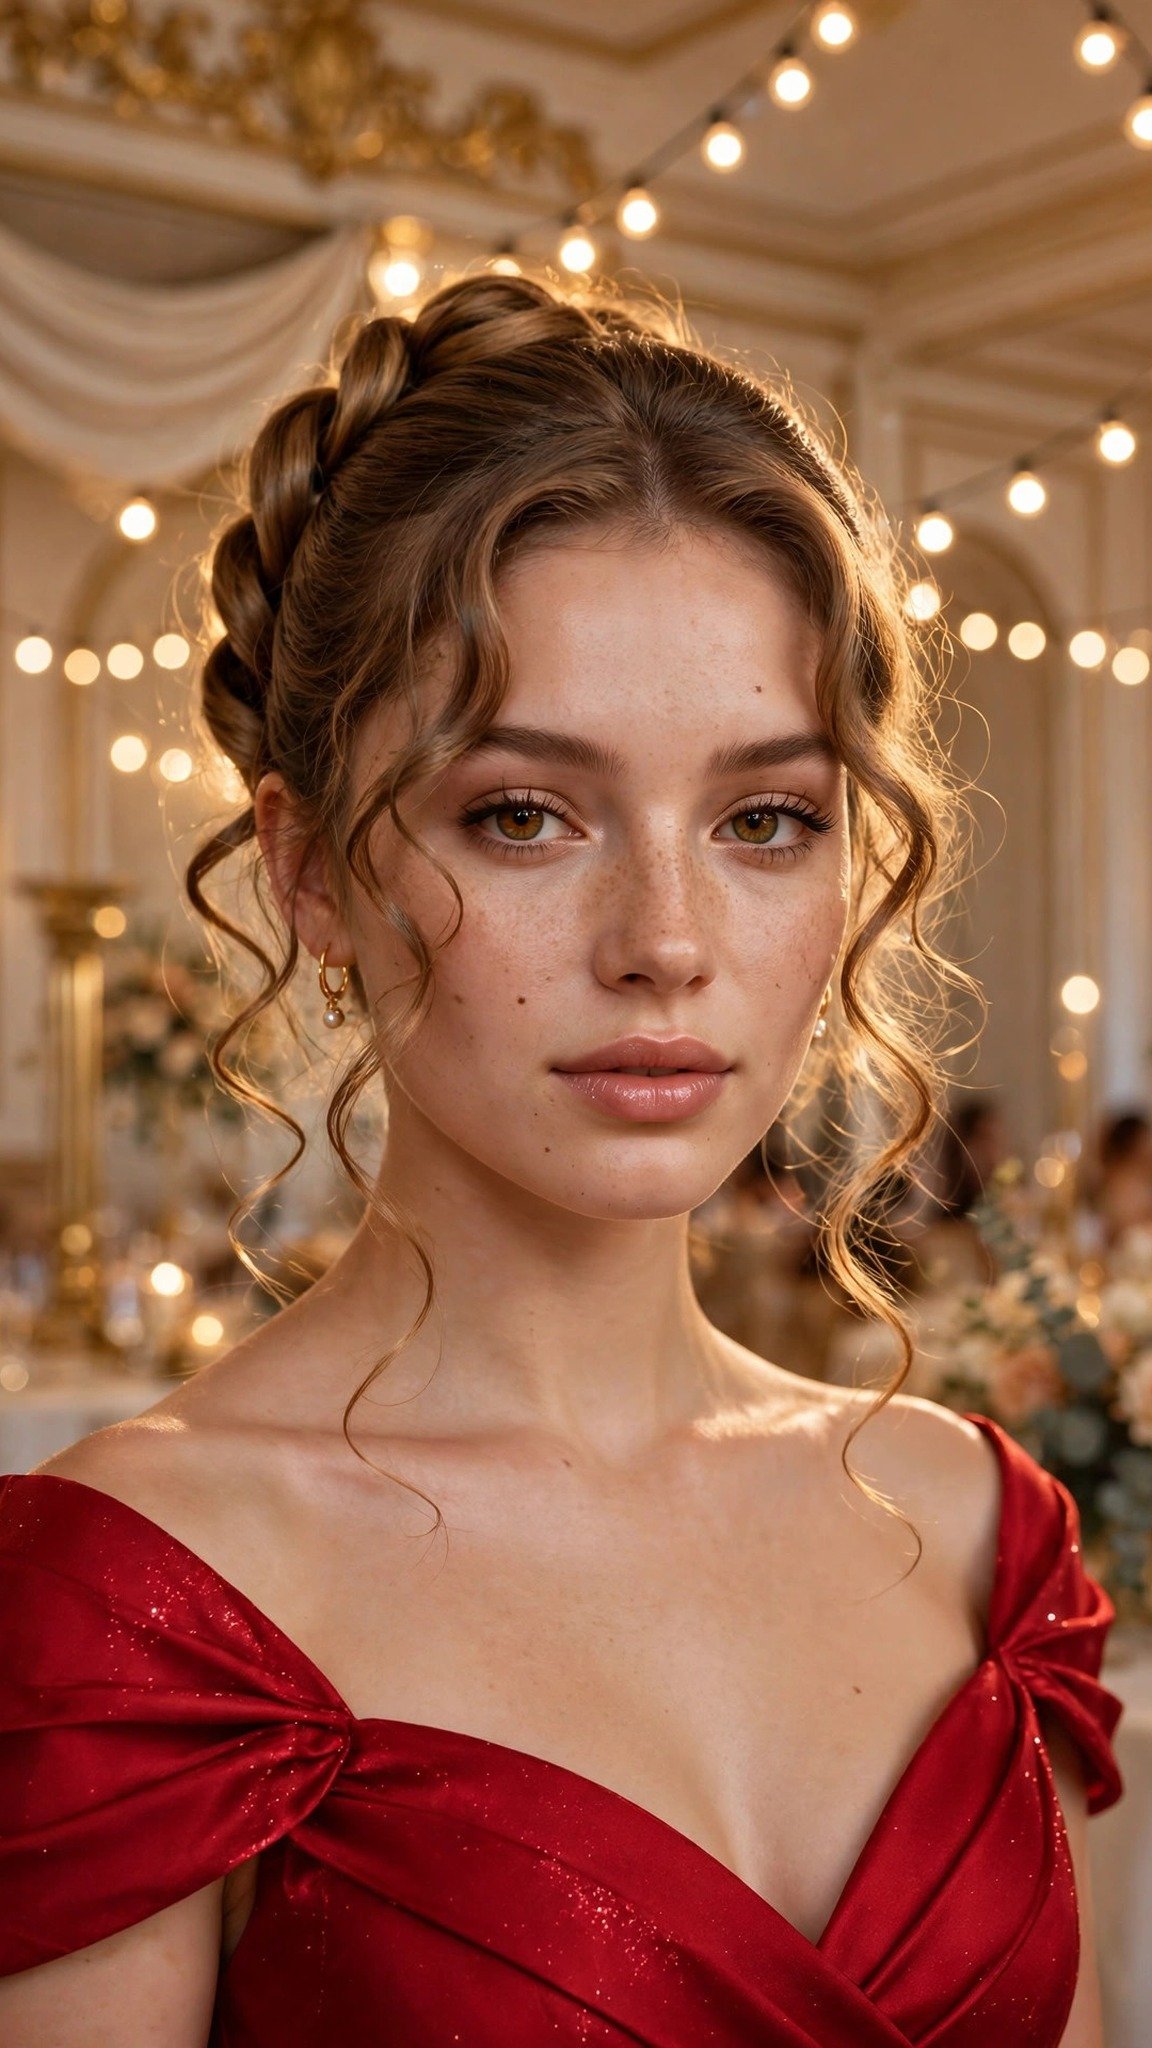
Curls soften a French twist and make it look more romantic, which is why this version is a favorite for evening events and weddings. The vertical roll gives structure and elegance, while the curls at the top and the front add movement and softness. It works best on long hair, where the curls have room to fall.
Curls need long hair to work well, because the curls need room to fall around the twist. If your hair is medium length, curl only the top section so the style does not look weighed down. A large-barrel curling iron gives soft waves, while a smaller barrel gives tighter curls that hold longer.
Curl your hair first with a large-barrel curling iron, then gather it to one side and roll it into a vertical twist, leaving a few curls free at the top. Pin the twist in place, then arrange the free curls so they fall softly over the top of the twist and frame your face. Spray lightly so the curls hold without going stiff.
A mistake I made once was rolling the twist too tightly, which pulled all the curl out of the hair. Roll gently, using only your fingertips, and let the curls stay intact.
See curly French twist hairstyles or romantic updos with curls.
Hold time: 8-10 hours. Difficulty: beginner. Cost: under $5 in pins and spray, plus a curling iron.
12. French Twist Bun With a Silk Scarf
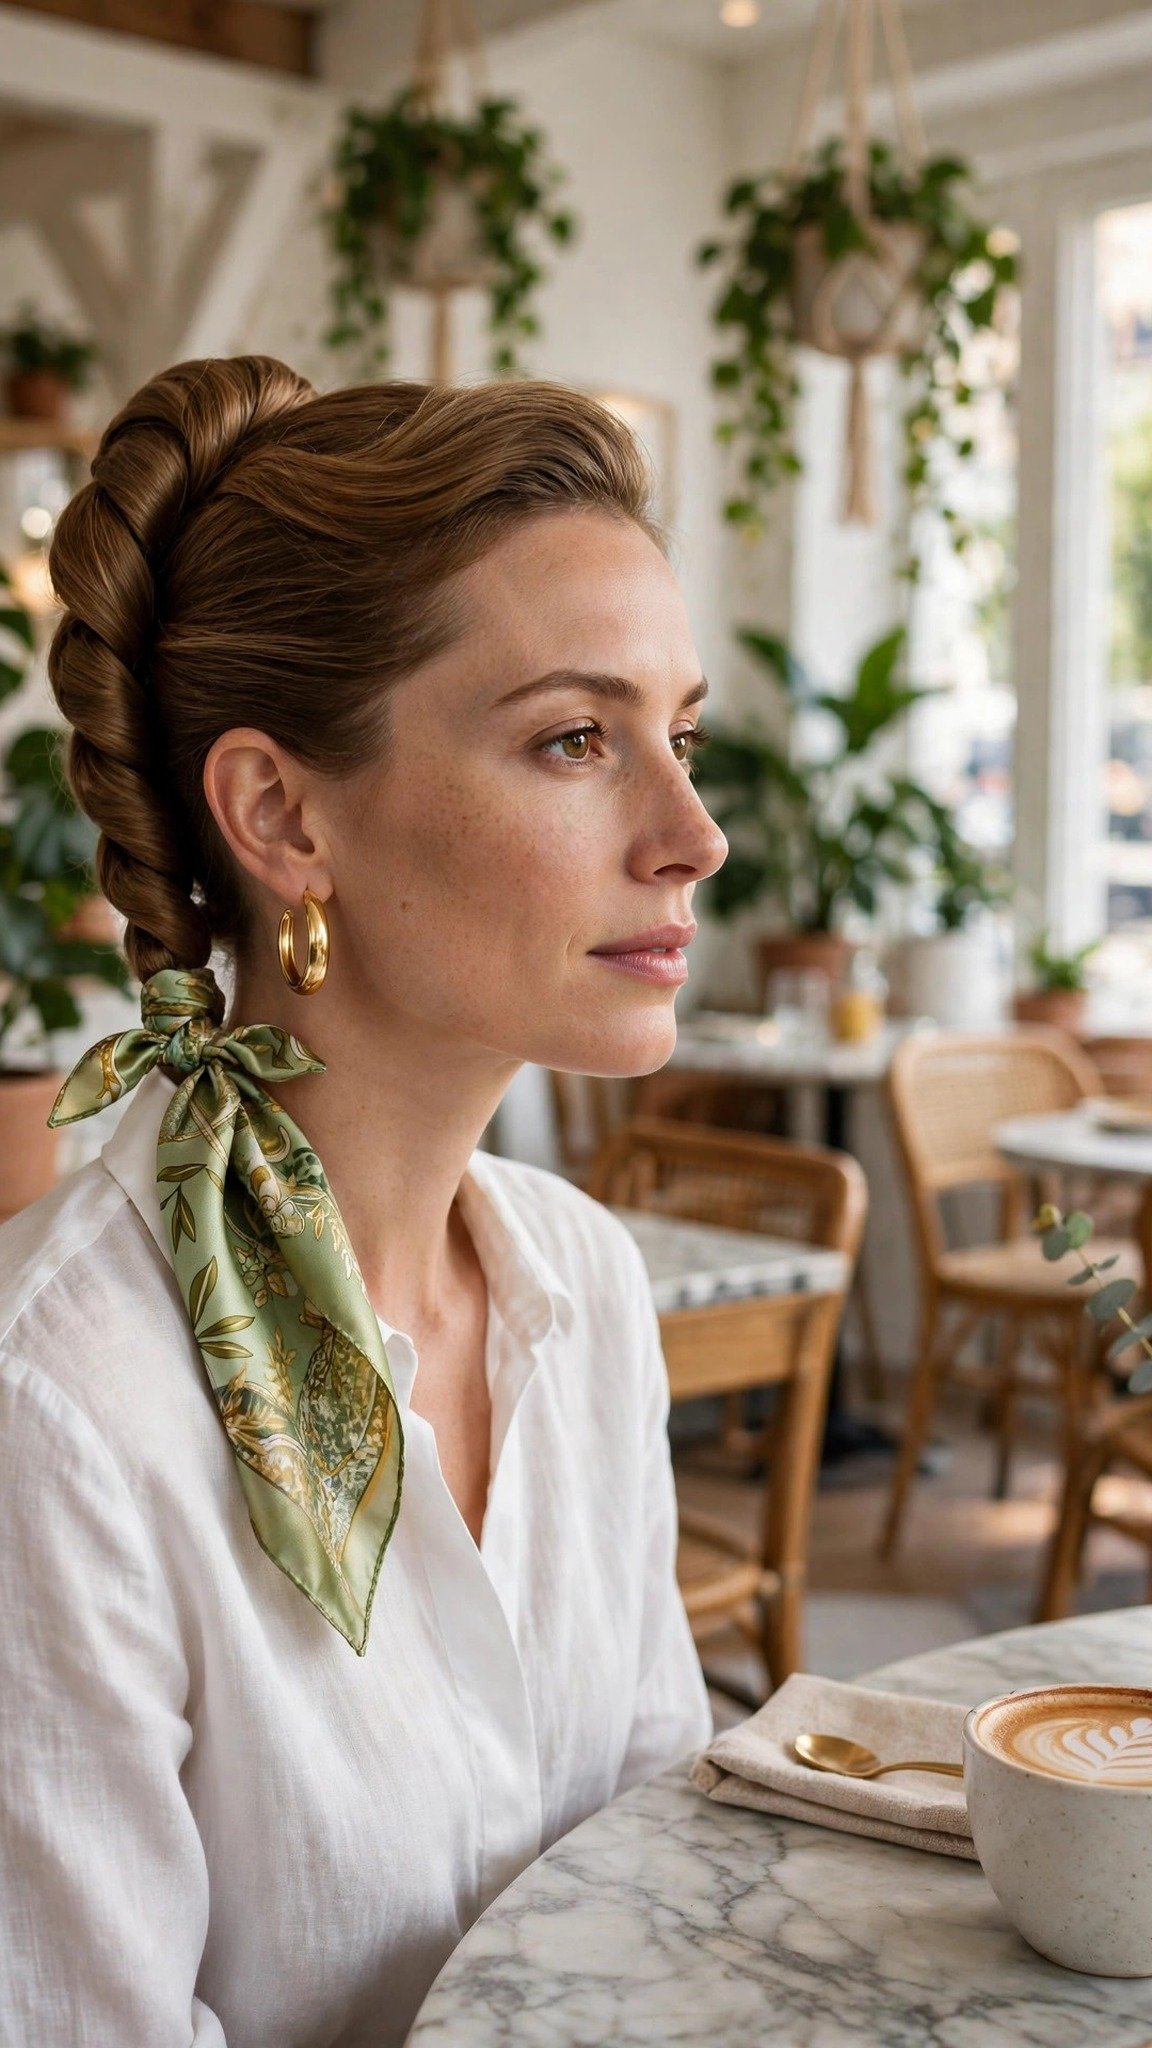
A silk scarf turns a French twist into a statement. It adds color, pattern, and a soft texture that contrasts beautifully with smooth hair, and it hides the pins at the base of the twist at the same time. This is the version for brunch, holidays, and days when you want your hair to look dressed up.
A silk scarf adds color and polish, and it hides the pins at the base of the twist at the same time. Choose a scarf with a small print rather than a large one, because a large print gets lost when the scarf is folded into a narrow band. Silk stays in place better than cotton.
Roll a classic French twist and pin it securely. Fold a square silk scarf into a long band, wrap it around the base of the twist, and tie it in a small bow or knot at the side. Tuck the ends neatly, or let two short tails hang for a playful look.
A mistake I made once was tying the scarf before the twist was pinned, and the whole thing slid around. Twist first, scarf second, always.
See scarf hairstyles or how to tie a silk scarf in your hair.
Hold time: 8-10 hours. Difficulty: beginner. Cost: about $8-15 for a silk scarf, plus pins.
13. French Twist Bun With a Deep Side Part

A deep side part gives the French twist a glamorous, old-Hollywood feel. The sweep of hair across the forehead softens the face and adds drama, which makes this version a favorite for photoshoots, evening events, and anyone who wants a red-carpet look.
A deep side part adds instant glamour, and it works especially well on thick hair, because the sweep across the forehead shows off the volume. It also suits heart-shaped faces beautifully, since the deep sweep balances a wider forehead. Commit to a deep part, about two inches from the center, or skip it entirely.
Part your hair deeply on one side, about two inches above your eyebrow, then brush the hair back and to the opposite side, gathering it into a low ponytail shape. Roll it into a vertical twist, pinning it in place, and check the sweep in a mirror to make sure it falls evenly and does not cover one eye.
A mistake I made early on was parting too shallow, which looked like a mistake instead of a style. Commit to a deep part, about two inches from the center, or skip the part entirely.
See deep side-part hairstyles or glamorous French twist ideas.
Hold time: 10-12 hours. Difficulty: beginner. Cost: under $5 in pins and spray.
14. French Twist Bun With a Comb
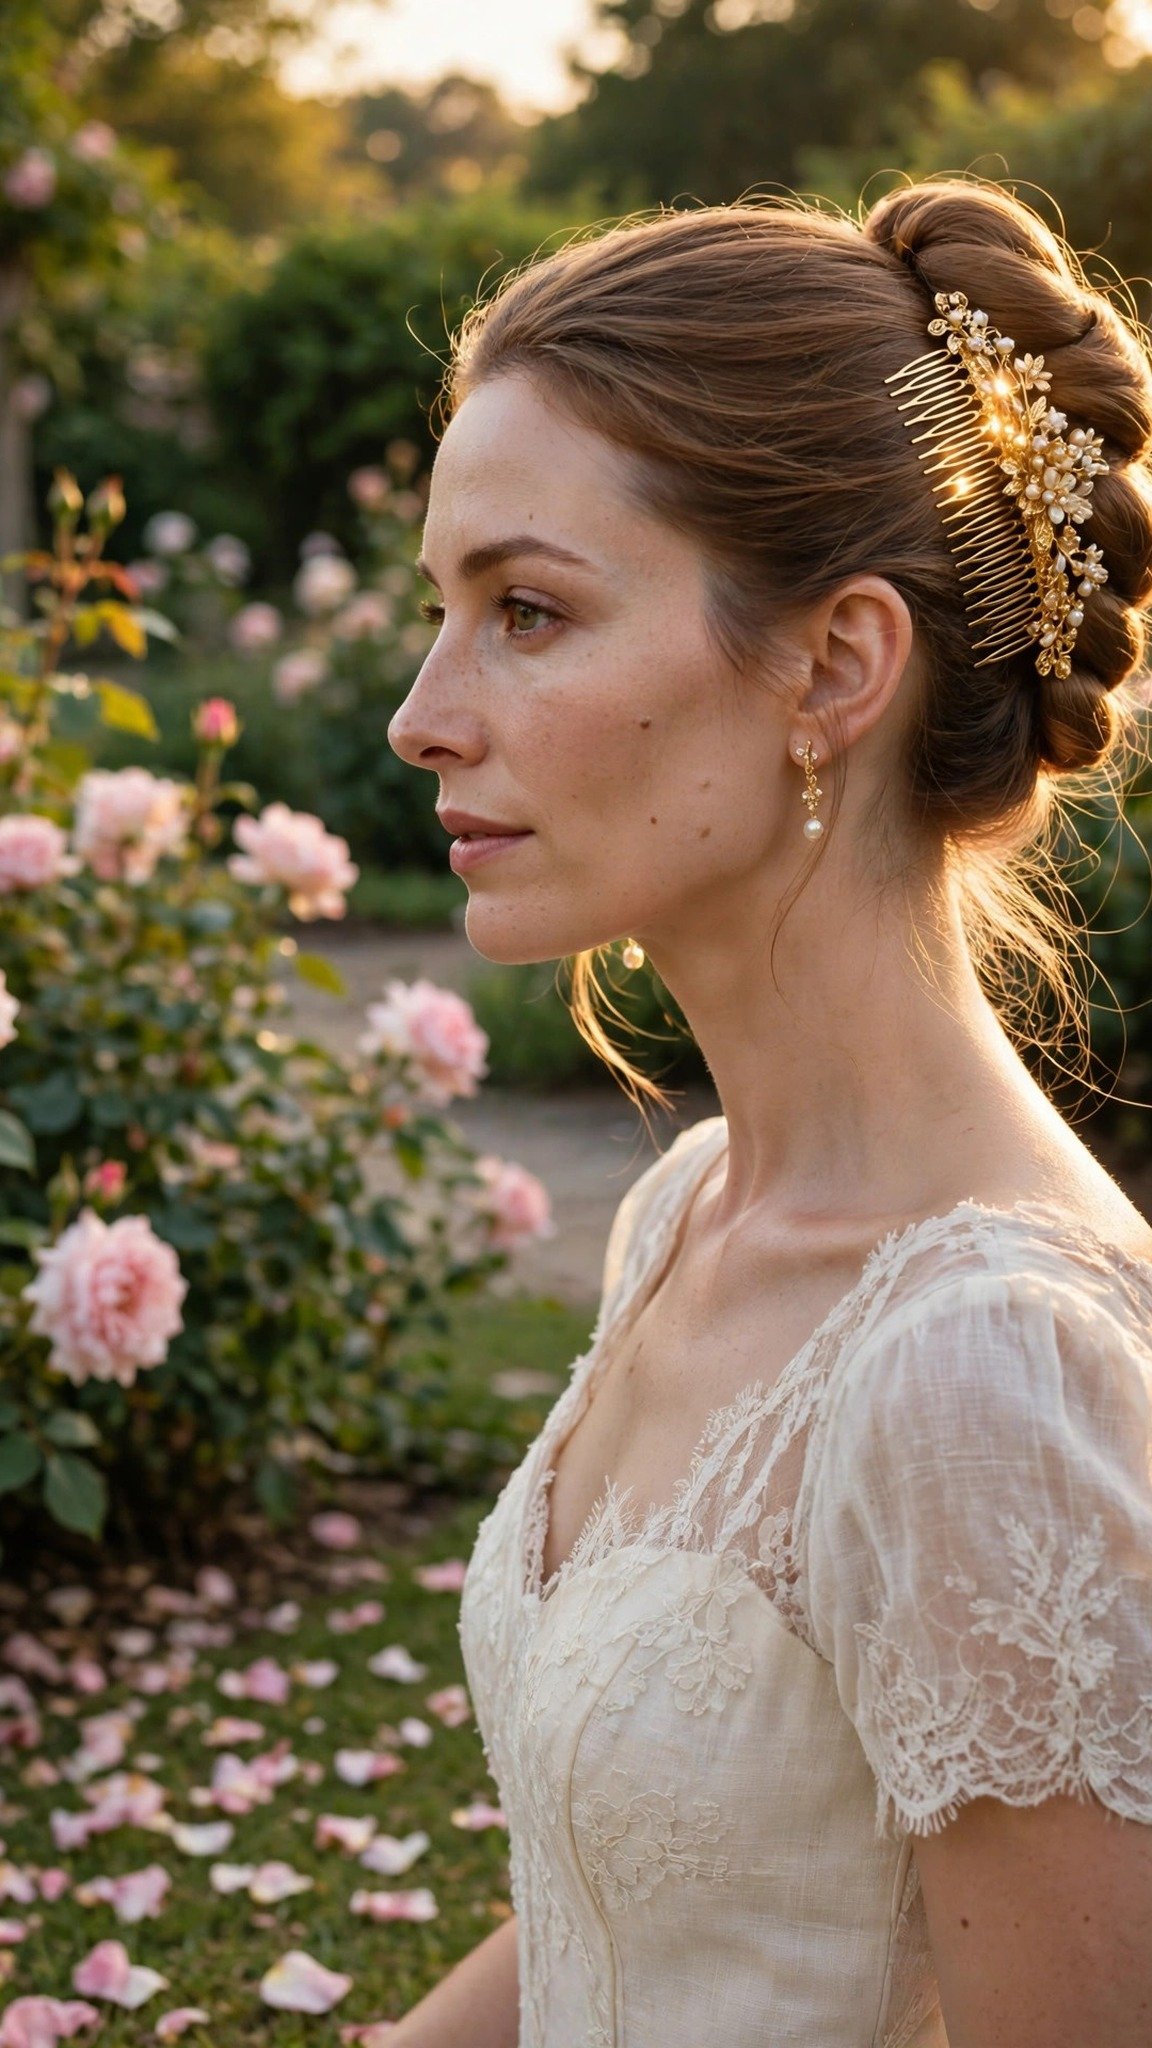
A decorative comb is the most secure way to hold a French twist, and it adds a piece of jewelry at the same time. The teeth of the comb grip the roll from the inside, which holds the twist firmly, and the decorative top shows above the seam like a piece of jewelry. This is the version for weddings and formal events.
A decorative comb is the most secure accessory in this guide, because the teeth grip the roll from the inside. Choose a comb with teeth at least two inches long, and push them upward into the twist so they grip firmly. A gold comb looks classic, while a pearl comb feels bridal.
Roll a classic French twist and pin it lightly with two or three bobby pins. Then slide a decorative comb into the seam of the twist, pushing the teeth upward into the roll so they grip the hair. Position the comb so the decorative part shows above the seam, and add one or two extra pins behind it for security.
Pro Tip: Choose a comb with teeth that are at least two inches long, because short teeth cannot grip a thick twist and will slide out.
See decorative hair comb hairstyles or French twist ideas with a comb.
Hold time: 10-12 hours. Difficulty: beginner. Cost: about $8-15 for a decorative comb, plus pins.
15. Sleek French Twist Bun

The sleek French twist bun is the most polished version in this guide. Every strand is combed flat, the surface of the twist is perfectly smooth, and the finish has a subtle shine. It is the twist for job interviews, boardrooms, and formal events where you want to look sharp and in control.
The sleek twist needs the right products to work. A smoothing serum and a shine spray are essential, and a fine-tooth comb keeps the surface perfectly flat. This style looks best on dark hair, where the shine shows up most, but it works on any color if you use enough product. Keep the rest of your makeup simple, because the hair is the statement.
Apply a small amount of smoothing serum or gel to damp hair, then blow-dry it smooth with a paddle brush. Gather the hair to one side and roll it into a tight vertical twist, smoothing the surface with a fine-tooth comb as you go. Pin it firmly, then finish with a shine spray and a firm-hold hairspray.
A mistake I made once was using regular hairspray over a sleek twist, and it dulled the shine completely. Use a shine spray on top, or nothing at all, so the glossy finish stays intact.
See sleek updo hairstyles or polished French twist ideas for work.
Hold time: 10-12 hours. Difficulty: beginner. Cost: about $8-12 for smoothing serum and shine spray.
Getting Started
The easiest first step is to practice the classic French twist on second-day hair. Hair that was washed yesterday has more grip than freshly washed hair, which is slippery and lets the pins slide out. If your hair is freshly washed, work a little texturizing spray or dry shampoo through it before you start, and the twist will hold much better.
The most common beginner mistake is pushing the bobby pins in the wrong direction. Pins grip best when they are pushed upward into the twist, with the wavy side facing the scalp, and a twist needs at least four or five pins to hold securely. The second mistake is rolling the twist too loosely. A French twist should feel snug against the back of your head; if it wobbles when you shake your head, add another pin before you leave the house.
What to buy first: a pack of bobby pins in your hair color, a fine-tooth comb, a bristle brush, and a firm-hold hairspray. That kit costs about $8-10 and covers every style in this guide. If you want pearl pins, a barrette, or a decorative comb, buy those after you have the basics, because the twist technique is the same no matter what you decorate it with.
For timeline, a classic French twist takes about ten minutes once you know the steps, and fifteen minutes when you are learning. A braided or voluminous version takes fifteen to twenty minutes. The twist holds for 8-12 hours depending on the style, and it should be taken down gently at night by removing the pins one at a time, starting from the top, never pulling them out in a hurry.
Frequently Asked Questions
How do I make a French twist stay put all day?
Start with second-day hair or add texturizing spray for grip. Push the bobby pins upward into the twist, not downward, and use at least four or five pins. Finish with firm-hold hairspray, and for extra security, add a decorative comb or barrette along the seam, which acts as an anchor.
Can I do a French twist with short hair?
Yes, if your hair reaches at least shoulder length. A low French twist works best on shorter hair, because the roll is shorter and easier to pin. If your hair is too short for a full twist, try the half-up French twist, which only needs the top section, or use a small hairpiece to fill the roll.
What is the difference between a French twist and a regular bun?
A French twist is a vertical roll of hair pinned up the back of the head, while a regular bun is a horizontal coil, usually at the crown or the nape. The twist has a sleek, elongated silhouette that looks more formal and elegant, while a bun is rounder and more casual. The twist also distributes weight along the back of the head, which many women find more comfortable.
How do I stop flyaways around a French twist?
Smooth a small amount of gel or pomade along the hairline with a clean toothbrush or a small brush before you spray. For fine flyaways, a light mist of hairspray on the brush works better than spraying directly, which can make the hair stiff. A silk scarf wrapped around the hairline for five minutes also flattens flyaways.
Can I wear a French twist every day?
Yes, but vary the placement. Wearing a tight twist in the exact same spot every day can cause tension and breakage along the hairline. Alternate between a classic twist, a low twist, and a half-up twist, and use a soft touch on rest days. Take the twist down gently at night and let your hair rest.
A Few Final Thoughts
The French twist bun has survived every trend because it works. It is elegant, it holds, it flatters almost every face, and it takes ten minutes once you know the steps. Whether you choose the classic twist for a wedding, the sleek version for work, or the pearl-pinned version for a party, the technique is the same: gather, roll, tuck, and pin upward. Pick one of the 15, practice it twice this week, and you will have a style that looks expensive every time you wear it.