
Hand-painted Christmas nails are beautiful, and they take forever. A single tiny reindeer can eat up forty minutes, a steady hand, and three attempts before it looks right. Nail stamping gives you the same hand-painted look in a fraction of the time: you pick up a crisp design from an etched stamping plate, press it onto your nail with a stamper, and suddenly you have snowflakes, reindeer, candy canes, and plaid that look like a nail artist spent an hour on each finger. This guide collects 15 holiday nail stamping ideas that genuinely look hand-painted, from classic red snowflakes to Nordic sweater patterns, gold Christmas trees, and gingerbread scenes.
Every design in this list is chosen for intermediate hobbyists who already own a stamping plate or two and want to get more out of them. You do not need to be able to paint a freehand snowflake. You do need a decent stamper, a stamping polish that is opaque enough to pick up cleanly, and a little patience with your first few transfers. Once the technique clicks, a full set takes under an hour, and the results fool almost everyone.
Quick Answer: For your first holiday stamping set, start with the Classic Red Snowflake Stamping (#1) or the Candy Cane Stripe Stamping (#3). For the most hand-painted look, try the Reindeer Silhouette Stamping (#4) or the Winter Wonderland Scene Stamping (#10). For a party, choose the Gold Foil Christmas Tree Stamping (#2) or the Elegant Gold on Emerald Stamping (#15). Stamping sets cost $15-30 in supplies if you already own plates, take 45-60 minutes, and last 1-2 weeks in regular polish or 2-3 weeks in gel.
Why Holiday Nail Stamping Is Worth Your Time
Nail stamping is the closest thing to a shortcut that still looks like real nail art, because the design comes from an etched plate rather than a sticker. The lines are crisp, the details are fine, and the image sits flat on the nail the way painted art does. Stickers lift at the edges and catch on hair and clothing; a stamped image sealed under top coat is smooth, glossy, and indistinguishable from hand-painting at arm’s length. That is the whole appeal: salon-level detail without salon-level drawing skill.
There is a money win too. One Christmas stamping plate costs $8-15 and holds dozens of designs, and a single plate can carry you through every December for years. A salon set with hand-painted Christmas art runs $60-90, and you pay it again when the set grows out. A stamper, a scraper, a few opaque stamping polishes, and two or three holiday plates cost about $30-40 in total, and they pay for themselves after a single set. You can also stamp over press-ons, gel, or regular polish, so the same plates work no matter what base you prefer.
Here is the lesser-known part: stamping polish matters more than the plate. Regular polish is often too sheer to transfer cleanly, which is why so many beginners get faint, patchy images and blame their stamper. A dedicated stamping polish is thicker and far more opaque, so it fills the etched lines and picks up in one clean roll. Once you switch to a proper stamping polish, your success rate jumps overnight, and designs that looked impossible suddenly work on the first try.
This guide suits anyone looking for stamping plate Christmas nails, easy holiday nail art, or a salon look without freehand painting. It also covers how to pick up a clean image, how to layer two colours for a hand-painted effect, and how to fix the smudges and partial transfers that every stamper meets sooner or later.
At a Glance
- All 15 designs use a stamping plate and stamper, so no freehand painting skill is needed.
- Designs range from single-image accents to full-nail scenes, on short, medium, and long nails.
- Wear times run 1-2 weeks in regular polish and 2-3 weeks in gel, sealed under top coat.
- A starter stamping kit costs $30-40, while the same look at a salon runs $60-90.
- Finishes include glossy, matte, metallic gold, and glitter, so you can match your outfit and mood.
| # | Design | Nail Shape | Skill Level | Wear Time | Occasion |
|---|---|---|---|---|---|
| 1 | Classic Red Snowflake Stamping | Short almond | Intermediate | 1-2 weeks | Christmas party |
| 2 | Gold Foil Christmas Tree Stamping | Medium almond | Intermediate | 2-3 weeks | Formal dinner |
| 3 | Candy Cane Stripe Stamping | Medium square | Intermediate | 1-2 weeks | Family gathering |
| 4 | Reindeer Silhouette Stamping | Medium coffin | Intermediate | 2-3 weeks | Christmas morning |
| 5 | Holly Berry Stamping | Short oval | Intermediate | 1-2 weeks | Everyday |
| 6 | Snowman Stamping | Short square | Intermediate | 1-2 weeks | Kids’ party |
| 7 | Plaid Tartan Stamping | Medium squoval | Intermediate | 1-2 weeks | Cozy day |
| 8 | Christmas Lights Stamping | Long almond | Intermediate | 2-3 weeks | Evening party |
| 9 | Gingerbread Stamping | Medium almond | Intermediate | 1-2 weeks | Baking day |
| 10 | Winter Wonderland Scene Stamping | Long coffin | Intermediate | 2-3 weeks | Winter wedding |
| 11 | Mistletoe Stamping | Short almond | Intermediate | 1-2 weeks | Date night |
| 12 | Ornament Bauble Stamping | Medium oval | Intermediate | 2-3 weeks | Tree decorating |
| 13 | Nordic Sweater Stamping | Short square | Intermediate | 1-2 weeks | Cozy day |
| 14 | Santa Hat Stamping | Short round | Intermediate | 1-2 weeks | Christmas morning |
| 15 | Elegant Gold on Emerald Stamping | Medium almond | Intermediate | 2-3 weeks | New Year’s Eve |
1. Classic Red Snowflake Stamping

Red polish with white snowflakes is the Christmas stamping design everyone recognises, and it is the best place to start because snowflake plates are forgiving. The fine lines of a snowflake pick up cleanly even when your pressure is not perfect, and a slightly imperfect flake still reads as a snowflake. On a deep classic red base, the white stamping polish pops the way fresh snow pops against a red coat, and the whole set looks like a nail artist spent an hour on each finger.
Start with two thin coats of classic red and let them dry completely, because stamping over tacky polish smears the base. Paint white stamping polish over the snowflake image on your plate, scrape at a 45-degree angle, and roll the stamper across the plate in one smooth motion. Press the stamper straight down onto the nail and lift it straight up again. Do not wiggle it, because wiggling doubles the image and turns a crisp flake into a blurry ghost.
Pro Tip: Choose a snowflake plate with several flake sizes and mix them across the set. A large flake on the ring finger, medium flakes on the middle fingers, and small flakes near the tips looks hand-placed and deliberate, while ten identical flakes look stamped. The mix is what sells the hand-painted illusion.
See stamping plate Christmas nails or easy snowflake nail ideas.
This set costs $15-25 in supplies and takes about 45 minutes.
2. Gold Foil Christmas Tree Stamping

A gold Christmas tree stamped over deep green is the most elegant design in this list, and it is the one that gets mistaken for hand-painted gold leaf most often. The tree shape is simple enough to stamp cleanly, and the metallic gold stamping polish catches candlelight in a way that flat polish never does. On a deep emerald base, the gold reads rich and expensive, like the wrapping paper on a very good present.
The trick with metallic stamping polish is speed. Gold polish dries faster than white or black, so you have only a few seconds between scraping the plate and pressing the stamper. Paint the polish onto the plate, scrape once, and roll the stamper immediately. If you hesitate, the polish dries in the etched lines and the image comes up patchy.
Pro Tip: Stamp the tree first, let it dry for a minute, then stamp a tiny gold star or dot above it with a second, smaller image from the same plate. The two-layer look reads as a hand-painted composition rather than a single stamp, and the star hides any small gap at the top of the tree.
See gold Christmas nail ideas or elegant holiday nail art.
This set costs $20-30 in supplies and takes about 50 minutes.
3. Candy Cane Stripe Stamping

Candy cane stripes are the most cheerful design here, and stripes are exactly the kind of art that looks better stamped than painted by hand. The diagonal red and white lines are crisp on every nail, which is almost impossible to achieve with a striping brush at home. A white base with red stamped stripes reads as a peppermint sweet, and it pairs with everything from a cream sweater to a red party dress.
Stripe plates come in two styles: a full-nail stripe image and a single wide stripe. The full-nail image is easier, because you stamp the whole pattern in one press. Paint red stamping polish over the stripe image, scrape firmly, and roll the stamper across it. Press onto the nail and clean up the edges with a small brush dipped in acetone before you seal it.
Pro Tip: Keep the stripes running the same direction on both hands. When one hand angles one way and the other angles the opposite way, the set looks mismatched in photos. Pick a diagonal direction before you start and stick to it on all ten nails.
See striped nail ideas or Christmas party nail ideas.
This set costs $15-25 in supplies and takes about 45 minutes.
4. Reindeer Silhouette Stamping

A reindeer silhouette is the design that makes people ask who painted your nails, because the shape is detailed and instantly recognisable. Freehand, a reindeer takes a steady hand and a very fine brush. Stamped, it takes ten seconds: a dark brown or black image over a warm nude base, and the antlers, legs, and tail are all perfectly formed. The contrast is what makes it work, so keep the base pale and the stamping polish dark.
Silhouette images are solid rather than line art, which means they need more polish on the plate than a snowflake does. Paint a generous layer of dark brown stamping polish over the reindeer, scrape once with firm pressure, and roll the stamper slowly so the solid image has time to transfer. If the reindeer comes up with a hole in the middle, you scraped too hard and removed too much polish. Use a lighter scrape and a second coat of polish on the plate if needed.
Pro Tip: Add a tiny red dot with a dotting tool on the reindeer’s nose after the stamp dries, and you have Rudolph. One dot turns a generic reindeer into a Christmas character, and it is the detail everyone notices first. Seal it under top coat so the dot does not smudge.
See reindeer nail art ideas or Christmas accent nail ideas.
This set costs $15-25 in supplies and takes about 50 minutes.
5. Holly Berry Stamping
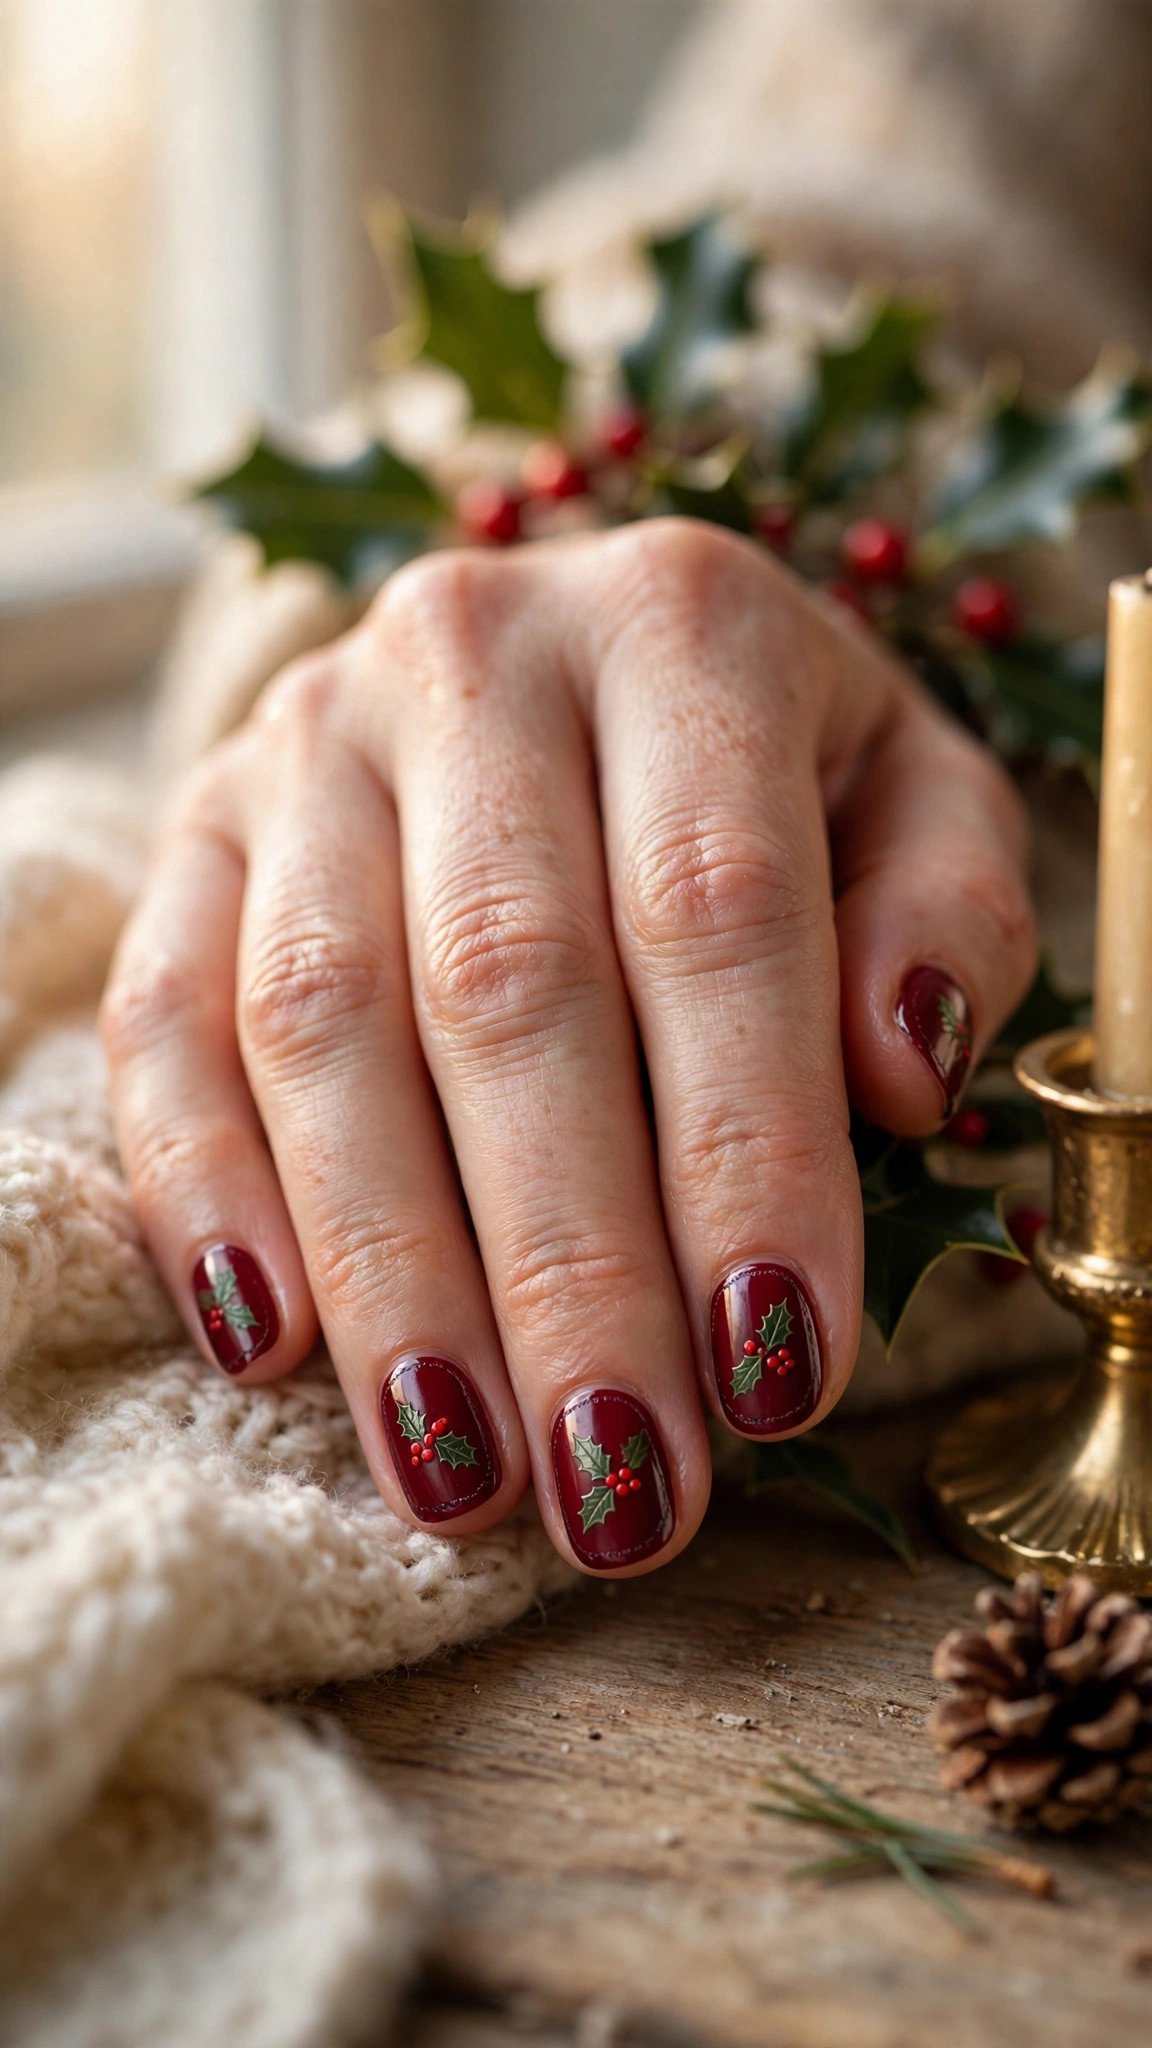
Holly is the classic Christmas foliage, and stamping it in two colours is what makes it look hand-painted. A single-colour holly stamp looks flat, but a green leaf layer with a red berry layer on top reads as a real sprig. This is the technique called double stamping, and holly is the perfect design to learn it on, because the leaf and berry images are separate on most holiday plates and line up easily.
Stamp the green leaves first and let them dry for a full minute. Then stamp the red berries over the top, aiming the image so the berries sit where the leaves meet. You do not need perfect alignment; a berry cluster that sits slightly off-centre still looks natural, because real holly is not symmetrical.
Pro Tip: Keep the holly to one or two accent nails and leave the rest a solid deep red or burgundy. A full set of holly on every nail looks busy and hides the detail, while a single sprig on the ring finger looks like a deliberate piece of nail art. Less is more with foliage.
See holly nail ideas or double stamping nail art.
This set costs $15-25 in supplies and takes about 50 minutes.
6. Snowman Stamping

A snowman is the most playful design in this list, and it is the one kids ask for by name. Stamping a snowman is far easier than painting one, because the round body, the carrot nose, and the little scarf are all etched into the plate in perfect proportion. On an icy blue base, a white snowman pops beautifully, and a red scarf detail turns him into a proper Christmas character.
The trick is layering. Stamp the white snowman body first and let it dry completely. Then, with a second image from the same plate, stamp the scarf and hat in red or black over the top. If your plate has a single-colour snowman only, you can still add the details by hand: a thin brush for the scarf, a dotting tool for the coal eyes and buttons, and a tiny orange triangle for the nose. The stamped body does the hard work, and three hand-painted details finish the character.
Pro Tip: Stamp the snowman on the ring finger only and put tiny white snowflakes on the other nails. A full set of snowmen looks crowded and childish, while one snowman surrounded by falling snow looks like a scene from a Christmas card. The snowflakes also hide any small smudge around the snowman’s edges.
See snowman nail art ideas or winter nail art for kids.
This set costs $15-25 in supplies and takes about 50 minutes.
7. Plaid Tartan Stamping

Plaid is the pattern of cosy December, and it is almost impossible to paint neatly by hand. Stamping it is a different story: the criss-cross lines are etched in perfect straight lines, and one press gives you a full tartan. The secret to plaid that looks hand-painted rather than printed is layering two colours, because real tartan is woven from overlapping threads, not drawn in a single pass.
Start with a cream or nude base. Stamp the first plaid layer in red and let it dry for a minute. Then stamp the second layer in green, using the same image or a slightly offset one, so the green lines cross the red ones. Where the two colours overlap, you get a darker woven effect that reads as real fabric. Use a clear jelly stamper so you can see the first layer through it and line up the second.
Pro Tip: Keep the plaid to a few accent nails and pair it with solid red or green on the rest. A full plaid set is a lot of pattern at once, while two plaid accent nails with solid neighbours look like a thoughtful outfit choice. The solid nails also give your eyes a rest and make the plaid stand out more.
See plaid nail ideas or Christmas sweater nail art.
This set costs $15-25 in supplies and takes about 55 minutes.
8. Christmas Lights Stamping

Christmas lights stamped over a dark navy base are the most festive design in this list, and they are the one that photographs best at a party. The dark background makes the coloured bulbs glow, and the thin wire that connects them reads as a string of lights draped across the nail. It looks like a lot of work, but the whole string is a single stamped image, so one press does the entire design.
The challenge with Christmas lights is colour. A single-colour stamp gives you a wire with identical bulbs, which looks fine but flat. The hand-painted trick is to stamp the wire and bulb outlines in gold or silver first, then fill in each bulb with a different colour using a dotting tool or a thin brush. It takes five extra minutes per hand, and it transforms the design completely. Red, green, gold, and blue bulbs on a navy base look like real fairy lights, and a glitter top coat over the top adds a sparkle that reads as light itself.
Pro Tip: Stamp the lights so the wire drapes across the nail in a gentle curve, not a straight line. A curved wire looks like a real string of lights hanging loosely, while a straight wire looks like a diagram. Angle the stamper slightly when you press it down, and the curve will follow naturally.
See Christmas lights nail ideas or festive party nail art.
This set costs $20-30 in supplies and takes about 55 minutes.
9. Gingerbread Stamping

Gingerbread men are the sweetest design in this list, and stamping them in white over a warm brown base is the closest you will get to a real cookie on your nails. The white icing details, the little buttons, the smile, and the bow tie are all etched into the plate, so the gingerbread man comes out perfectly formed every time. On a gingerbread brown base, the white stamp reads as royal icing piped onto a cookie, which is exactly the effect you want.
White stamping polish over a brown base is one of the highest-contrast combinations in stamping, so it picks up beautifully even for beginners. The mistake to avoid is stamping the gingerbread man too large: a man that fills the whole nail looks cramped and loses his arms, while a smaller man centred on the nail looks like a proper cookie. Choose the medium-sized gingerbread image on your plate and stamp him on the ring finger, then use small candy canes or icing swirls on the other nails.
Pro Tip: Use a matte top coat over this set. Glossy top coat makes the brown base look like chocolate, but matte makes it look like a baked cookie, and the white icing stands out more against a matte surface. The matte finish is what sells the gingerbread illusion.
See gingerbread nail art ideas or Christmas baking nail ideas.
This set costs $15-25 in supplies and takes about 50 minutes.
10. Winter Wonderland Scene Stamping

A full winter scene stamped across a long coffin nail is the most ambitious design in this list, and it is the one that looks most like a miniature painting. Pine trees, falling snow, a tiny cabin, and a moon can all live on one nail when the scene is etched into a single plate image. On a pale icy blue base, the white scene reads as a snowy landscape at dusk, and it is the design to choose for a winter wedding or a formal December event.
Scene stamping needs a large stamper and a steady hand, because the image is bigger than a snowflake and any wobble shows. Use a wide, soft stamper and roll it across the plate slowly, from one edge to the other, so the whole scene picks up evenly. Press the stamper onto the nail with even pressure and hold it for two seconds before lifting. If part of the scene is missing, the problem is usually uneven pressure, not the plate. Try again with a slightly firmer press in the middle and a lighter press at the edges.
Pro Tip: Add a tiny silver glitter gradient at the tip of the scene nail before you seal it. The glitter reads as falling snow catching the light, and it softens the edge where the stamped scene meets the bare base. It is a small step that makes the whole nail look finished rather than stamped.
See winter scene nail art or snowflake nail ideas.
This set costs $20-30 in supplies and takes about 60 minutes.
11. Mistletoe Stamping

Mistletoe is the most romantic design in this list, and it is the perfect choice for a December date night. The green leaves and tiny white berries are delicate and understated, which makes them ideal for short nails and for anyone who wants a festive look without a loud pattern. On a soft nude base, the mistletoe reads as a sprig of greenery, and it pairs beautifully with a red dress or a gold bracelet.
Like holly, mistletoe works best as a double stamp: green leaves first, then white berries on top. The difference is scale. Mistletoe leaves are smaller and more delicate than holly, so you need a lighter hand with the scraper and a stamper that is not too firm. A soft, squishy stamper picks up fine lines better than a hard one, and it conforms to the curve of a short almond nail without smudging the edges. Stamp the mistletoe near the tip of the nail rather than the centre, so it looks like a sprig hanging down from the top.
Pro Tip: Keep the mistletoe to the ring finger and the thumb, and leave the other nails a solid nude or a soft gold shimmer. Two sprigs are enough to carry the theme, and the empty nails make the design feel expensive rather than busy. This is the design to choose when you want Christmas nails that do not shout.
See mistletoe nail ideas or romantic holiday nail art.
This set costs $15-25 in supplies and takes about 45 minutes.
12. Ornament Bauble Stamping

Christmas baubles stamped over a deep red base are the most joyful design in this list, because they look like the tree itself landed on your nails. The round ornament shape is easy to stamp cleanly, and the little cap and string at the top make it instantly recognisable. On a deep red or dark green base, gold and silver baubles shine like real ornaments, and the whole set feels like a celebration.
The trick with baubles is mixing the metals. Stamp some baubles in gold and some in silver, alternating them across the set, so the nails look like a real tree with a mix of ornaments. If your plate has a bauble with a pattern inside it, choose the patterned one for the accent nails and the plain one for the rest, so the detail does not overwhelm the set. Stamp the bauble near the tip of the nail with the string running up toward the cuticle, so it looks like the ornament is hanging down.
Pro Tip: Add a thin gold glitter line along the tip of each nail before you seal the set. The glitter reads as tinsel, and it ties the baubles together across all ten nails. It also hides any small smudge at the tip where the stamp may have run off the edge of the nail.
See ornament nail ideas or Christmas tree nail art.
This set costs $20-30 in supplies and takes about 55 minutes.
13. Nordic Sweater Stamping

A Nordic sweater pattern is the cosiest design in this list, and it is the one that makes your nails match your favourite December jumper. The Fair Isle pattern of tiny snowflakes, reindeer, and geometric diamonds is etched into stamping plates in perfect rows, so one press gives you a whole knitted panel. On a cream base, red and green Fair Isle reads as a real sweater, and it is the design to choose for a cosy day by the fire or a Christmas market visit.
Fair Isle is a double stamping design, like plaid and holly. Stamp the first layer in red and let it dry, then stamp the second layer in green over the top, using a clear jelly stamper so you can see where the first layer sits. The two colours interlock like real knitting, and the pattern looks woven rather than printed. Use a matte top coat over this set, because matte makes the pattern look like wool and softens the sharp stamped lines.
Pro Tip: Keep the Fair Isle to two or three accent nails and pair it with solid cream or red on the rest. A full set of Fair Isle is a lot of pattern, and the tiny details get lost when every nail is busy. Two patterned nails with solid neighbours look like a deliberate outfit choice, and the pattern stands out far more.
See sweater nail ideas or Nordic nail art.
This set costs $15-25 in supplies and takes about 55 minutes.
14. Santa Hat Stamping

A Santa hat is the most cheerful design in this list, and it is the one that makes everyone smile on Christmas morning. The red triangle, the white fluffy brim, and the little pom-pom are all instantly recognisable, and stamping them is far easier than painting them. On a classic red base, a white Santa hat pops beautifully, and the whole set feels like a Christmas card come to life.
The trick is the base colour. A Santa hat stamped in red over a red base disappears, so use a contrasting base: white, nude, or deep green. White is the easiest, because the red hat stands out sharply and the white brim reads as fur against the white base only if you add a thin outline. Choose a plate with a Santa hat that has a clear outline, and stamp it in red over a white or nude base.
Pro Tip: Stamp the Santa hat on the ring finger only and put tiny white snowflakes on the other nails. A full set of Santa hats looks like a costume, while one hat surrounded by snow looks like a proper piece of nail art. The snowflakes also fill the empty space on the other nails without competing with the hat.
See Santa nail art ideas or Christmas morning nail ideas.
This set costs $15-25 in supplies and takes about 45 minutes.
15. Elegant Gold on Emerald Stamping

Gold filigree stamped over deep emerald is the most luxurious design in this list, and it is the one to choose for New Year’s Eve. The fine gold swirls, snowflakes, and stars read as jewellery on the nail, and the deep green base makes the gold shine like a precious stone. It looks like a hand-painted gold leaf design from a salon, but it is a single stamp, and it takes less than a minute per nail.
Metallic gold stamping polish is the key to this design, and it needs the same speed as the gold Christmas tree in section two. Paint the polish onto the plate, scrape once, and roll the stamper immediately, because gold polish dries fast and a slow transfer comes up patchy. Use a clear jelly stamper so you can see the filigree through it and place it exactly where you want it on the nail. Seal with a glossy top coat, because gloss makes the gold shine and the emerald look deep and rich.
Pro Tip: Add a single tiny gold rhinestone at the centre of the filigree on the ring finger, sealed under top coat. One rhinestone turns a stamped design into a jewelled one, and it is the detail that makes the set look like it cost far more than it did. Keep it to one nail, because a rhinestone on every finger looks like a craft project.
See gold nail ideas or New Year’s Eve nail art.
This set costs $20-30 in supplies and takes about 50 minutes.
Getting Started
You do not need a drawer full of plates to start stamping. A starter kit is a stamper, a scraper, one or two holiday plates, a white stamping polish, a black stamping polish, and a gold metallic stamping polish. That is enough for every design in this list, because the base colour does the heavy lifting and the stamping polish provides the detail. Buy a clear jelly stamper if you can, because seeing through it makes placement far easier, especially for double stamping and scenes.
Prep matters more than most beginners expect. Push back the cuticles, buff the nail surface lightly, and wipe with acetone or alcohol before you apply the base colour. A clean, dry nail holds polish longer and gives the stamp a smooth surface to land on. Apply two thin coats of base colour and let them dry completely before you stamp. Stamping over tacky polish is the most common beginner mistake, and it smears the base and ruins the transfer in one press. Wait a full five minutes after the second coat, or use a quick-dry top coat and wait for it to set.
Practice on a piece of paper or a nail wheel before you stamp your real nails. The first few transfers are always the messiest, and practising on paper costs nothing. Once you can pick up a clean image three times in a row, move to your nails. Work one nail at a time, clean the plate between nails, and seal the whole set with a top coat only after every stamp is completely dry.
Frequently Asked Questions
**Why does my stamped image come out patchy or faint?**
The most common cause is regular polish instead of stamping polish. Regular polish is too sheer to fill the etched lines on the plate, so the image picks up thin and patchy. Switch to a dedicated stamping polish, which is thicker and far more opaque, and your images will come up solid. The second most common cause is a dirty stamper. Clean it with a lint roller or tape before each use, and avoid acetone on a jelly stamper, because acetone clouds the surface and makes it pick up poorly.
**How do I stop my top coat from smearing the stamped design?**
Wait for the stamp to dry completely before you seal it, at least two minutes for a single layer and longer for double stamping. Then apply the top coat in one smooth stroke without going back over the same spot. Going back over a wet stamp with the brush drags the polish and smears the image. A water-based top coat smears less than a regular one, so many stampers use a water-based top coat as a first seal, then a regular glossy top coat on top for shine.
**Can I stamp over gel polish?**
Yes, and gel is one of the best bases for stamping, because it is smooth and hard. Apply your gel base colour, cure it, and wipe off the sticky inhibition layer with alcohol before you stamp. Stamp with regular stamping polish, let it dry, seal with a gel top coat, and cure. The stamped design will last as long as the gel underneath it, usually two to three weeks. Do not stamp over an uncured gel layer, because the stamp will sink into it.
**What is double stamping, and do I need it?**
Double stamping means stamping a second image over the first one, usually in a different colour, to create a layered design. Holly leaves in green with red berries on top is a classic double stamp, and so is plaid in red with green over it. You do not need it for every design, but it is what makes stamped nails look hand-painted rather than printed. A clear jelly stamper makes double stamping much easier, because you can see the first layer through it and place the second one exactly.
**How long do stamped nails last?**
A stamped design sealed under top coat lasts as long as the polish underneath it: one to two weeks in regular polish and two to three weeks in gel.
A Few Final Thoughts
Nail stamping looks like a shortcut, and in the best sense it is. It gives you the detail of hand-painted nail art without the years of practice, and it lets you change your design every week without starting from scratch. The fifteen ideas in this guide are a starting point, not a limit. Once you can pick up a clean snowflake and place a second colour over the first, you can combine any images on your plates into designs of your own.
Start with the classic red snowflake, because it is the most forgiving design here and the one that teaches you the most. Learn how much pressure your stamper needs, how fast your gold polish dries, and how long to wait before you seal the set. Then move on to the double-stamped holly and the plaid, and by the time you reach the winter wonderland scene, you will be stamping like someone who has done it for years. Your December nails will look hand-painted, and only you will know how little time they took.